

Sometimes it is nice to keep things simple, and that is my feeling on laptop bags. I don’t like bags with all the bells and whistles and pockets that make the bag bulky and heavy when filled. I like the simple laptop bags. The Reginald Transfer by Crumpler is one of these bags.
Month: June 2008
Reginald Transfer Crumpler Bag
Introducing Rapid Repair for iPod and iPhone
Tales from the PodCrypt! Return of the Living DeadPods! The iPhone Ranger Rides Again!
MyMac Podcast 190
Marriage of Mediocrity
![]()
Download the show here or subscribe and download via iTunes
Do you have any fond memories of old computer games? Tim and David do, and chat about 3D Monster Maze for the ZX81 and Dungeons of Daggorath for the TRS-80. This is the last week for Bill Gates at Microsoft, and we chat about the possible Yahoo – Microsoft merger in the segment we call the Marriage of Mediocrity. Sam Levin kicks off the show with two Cool Mac Picks, the Myvu and Partners In Rhyme.
Other World Computing pick of the week:
NLU Products BodyGuardz for Apple iPhone
We would love your feedback! Email us at MyMacPodcast@gmail.com or leave a voice message at 1-801-938-5559
Links from the show
Myvu
Partners In Rhyme
3D Monster Maze
Dungeons of Daggorath
GrooveAtomic: High performance earphones (pink)
Review

Before I start this review I should say that I’ve been quite satisfied with the stock headphones that were shipped with my iPod nano. Perhaps my expectations for a unit costing $14.99 to $29.99 were not so high, but for such a small device I wasn’t expecting $100-plus Bose power, only a set that would give me clear, crisp highs, non-muddled mid-ranges, and reasonable bass sounds.
iRecord
Review
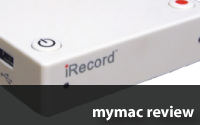
The iRecord is billed as your "Personal Media Recorder." I was hoping I’d be able to use this unit to pull some video from a few DVDs I wanted to use in another project. Read on and we’ll find out how successful I was and what the iRecord is all about.
Fenestration 42
Data Exchange in the Clouds

For users straddling the Windows PC and Mac worlds, the question of seamless data interchange between the systems can be a challenging one. Of course, with the capabilities of OS X, the rise of USB and the availability of flash drives and external disks it is probably easier than it has ever been to pass data, but nevertheless there are still considerations of disk formats, file formats and application versions to consider.
Two Glenn Fleishman Take Control ebooks
Reviewed
With these two ebooks, TidBITS author, blogger, columnist, and all-around networking pundit Glenn Fleishman is bound and determined to help Mac users better understand and use screen sharing and Back To My Mac.
Laplogic G800 Aerogel Extreme
Review

My Macbook Pro gets hot. Too hot to sit in my lap with extended usage. One of the ways to combat this is to use smcFanControl to adjust the speed of the internal fans to help cool the laptop. But even then, I only trust setting the fans so high before I start worrying about damaging the computer. And that’s where the LapLogic G800 with Aerogel comes in.
MyMac Podcast 189
Night Ranger – MacAppStore
![]()
Download the show here, or subscribe via iTunes
Night Ranger’s Kelly Keagy stops in for an interview this week, while the rest of the gang chats about the AppleTV, a Macintosh software store, and so much more. If you are either a software developer or simply someone who buys software, this weeks podcast is a must to listen to.
Other World Computing pick of the week:
MiniStack V3
We would love your feedback! Email us at MyMacPodcast@gmail.com or leave a voice message at 1-801-938-5559
Links from the show
Night Ranger

MacFamily Tree 5
Review

Most of you probably have at least one person in your extended families trying to find out more about their ancestors so they can share that information with the rest of their family, and if they are doing their work on the Macintosh, MacFamilyTree could be just the product for them.
Macspiration 112
Time for Some Downloads

Last time I did a download article I mentioned that good free downloads (for my use) had been few and far between. However, I’ve been downloading a bunch of new free apps and utilities lately. Here’s some of them (ALL FREE!).
Read MoreRemembering Mac writer Rodney O. Lain
Six Years Later

It was six years ago this week that the Mac world lost a prolific Macintosh advocate, and I lost a friend. Rodney Lain, popular writer for Mac sites AppleLinks, The Mac Observer, MacAddict, and our own MyMac.com, died on June 16th, 2002.
MyMac Podcast 188
WWDC – iPhone 3G
![]()
Download the show here, or subscribe via iTunes
As WWDC wraps up, we chat with some of the developers who were at the show. Lee Givens talks about the Apple Design Award winning iPhone application AOL Radio with Tim and David, Sam Levin gives us some Cool Mac Picks and WWDC commentary, and John Nemo sends in a live recording session from the conference. A great show, topped by a cool GTA IV inspired intro thanks to Jason Zumwalt
Check out our Sponsor!
Drive Genius 2 only $79.99 at Other World Computing
Links from the show:
Bill Dudney
FlipSide5
Signal from Alloysoft
reQall
AOL Radio

Freeverse
MacFun
SpeckProducts Read More
I get to interview Tim Robertson
On this week’s episode of the iProng Radio podcast, we interview someone named “Tim Robertson” from a some site I’ve never heard of called
Read MoreAn Interview with MyMac’s Tim Robertson
Last week MyMac’s Tim Robertson agree to be interviewed by some of my students for our school podcast. They talked about podcasting and more
Read MoreThe Crazy Day of Tim Robertson
It started out innocently enough. I had taken the family, as I do every year, to the Battle Creek Hot-Air Balloon festival. Each year,
Read MoreFastMac 1.4Ghz Processor Upgrade for PowerMac G4
Review

What is the value of an older G4 Macintosh? Can it be upgraded to run Mac OS X 10.5? Is it worth upgrading a 450MHz G4 in the first place/ David Cohen looks at the 1.4GHz upgrade processor from FastMac.
How much did a $200 iPhone cost Apple

As we celebrate the introduction of 3G to the Apple iPhone we need to allow ourselves to take the good with the bad. Unfortunately the way Apple got the price down to $199 for the 8GB phone harms the end users as well as the company. So lets take a look at the true cost of a $200 iPhone 3G.
Macspiration 111
Uncle Joe

Last week my uncle made the switch from his Windows computer to a MacBook. Of course, I am his “guide” as he makes the switch and I made him a cheat sheet for some of the common questions he’ll have as he works. When I was done, I thought, “Why not make this a Macspiration article?” So here is the cheat sheet I made him in all of its simple glory.
Steve Jobs’ Health
Steve Job’s state of health has been questionable ever since he “recovered” from Pancreatic cancer. Watching him on stage yesterday made me think, “Is
Read More