
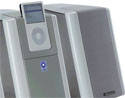
The i-deck is capable of delivering house-filling audio when cranked up all the way, and provided the source audio is clean and well-encoded, distortion does not appear even at the top of the range.
Month: January 2006
i-deck
Growl
Review

The main purpose of Growl is to allow an application to communicate with you, by displaying a small notification (see below) on top of any other window.
Read MoreMacspiration 20 – Some More Quick Tips

As I write the various Macspiration articles, I am constantly getting ideas for new articles. Some of these ideas are not enough for a complete article, so I add them to a tip list for use in an article like this one. So here are five tips from that list.
Window Seat: The Art of Digital Photography & Creative Thinking
Book Review
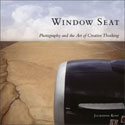
Julieanne Kost is Adobe’s traveling evangelist, and Window Seat is primarily a portfolio of her expansive color images taken while flying from place to place, bookended by an itemized itinerary of her approach to personal creativity at the front and a 25 page explanation of her working methods at the rear of the book, in an Appendix.
The Sound of Snow…
The Happiest people on The planet earth today have got to be the Boston Area TV weathermen. (“weatherpersons” in newspeak) Today, the area is
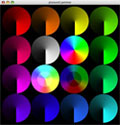
Read MorePixound – A first look
MyMac Podcast
#66
![]()
MyMac Podcast 66
Tim and Chad return for another week of Mac talk. Also, announce the winner of the i-Rock Slim light-up keyboard. Check out the show notes (here) for all the links.
Get the show
MP3 Direct Download (Will play in your web browser)
iTunes Music Store listing
Podcast RSS-Only feed
Podcast Sponsors: Smalldog.com and Inno-Tech.com
Send any feedback to mymacpodcast@gmail.com. Audio (MP3) feedback welcome.
Read MoreiTunes 6 and iPod
Book Review
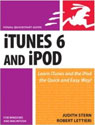
If you’re using iTunes for the first time, and you want to master all its useful features, Judith Stern and Robert Lettieri’s Visual QuickStart Guide: iTunes 6 and iPod is a very good how-to reference book for everything you need to know about using the software and any modern version of the iPod.
Read MoreMacspiration 19 – The Download Drawer 3 – Web Browsers Aplenty

If you are like many Mac users, you use Apple’s Safari for surfing the internet. You might even be one of those people who still use the now no longer supported or updated Internet Explorer (IE) for the Mac. Did you know there are many other web browser options out there? I’m going to discuss three free options in this article.
MyMac Podcast
#65
![]()
MyMac Podcast 65
This week, London Burea Chief David Cohen looks at the news from Macworld Expo. He talks about LightRoom and Monitor Audio’s iDeck. This episode was recorded using Garageband 3 Podcast Studio.
Get the show
Direct MP3 Link
iTunes Music Store
MyMac.com RSS podcast feed
via ODEO, Podcast Alley, Yahoo, or PodcastPickle
Links from the show
MacRumors
Intel Macs
Apple Aperture
Adobe Lightroom
Monitor Audio
Kevin Reeves
Send feedback to DavidCohen@mymac.com
Read MoreThumbn@ils 14
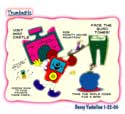
Thumbn@ils 13
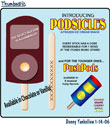
Podsicles, the frozen Ice Cream Snack!
Who Needs a Telephone When You Have a Computer

For those not familiar with Skype, it is similar to iChat. It also has the ability for users to converse over the computer.
Read MoreMyMac.com Hiring
Are you experienced in advertising? Are you looking for a position that will pay you a percentage of the money you generate by acquiring advertisers? If so, email Tim Robertson, publisher and owner of MyMac.com. Click to read more…
Read MoreKR-6810M X-Slim Lighted Keyboard
Book Review
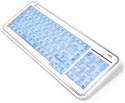
Is you are looking to add a lighted keyboard to your desktop Mac, check out this review by Tim Robertson.
Read MoreMyMac Podcast
#64
![]()
MyMac Podcast 64
Tim and Chad interview musician Kevin Reeves. If you don’t know who Kevin is, you will want to after listening to this interview and hearing his song. Kevin also was the creator of our theme music. Back by popular demand, we are giving away yet another of the i-Rock Slim light-up keyboards. Listen to the podcast for your chance to win.
Mac News from MacMinute.com
Get the show
Direct MP3 Link
iTunes Music Store
MyMac.com RSS podcast feed
via ODEO, Podcast Alley, Yahoo, or PodcastPickle
Sponsored by SmallDog.com and Inno-Tech.com.
Send feedback to MyMacPodcast@gmail.com
Read MoreThumbn@ils 12
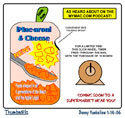
From the Podcast, to the art of Donny, iMac-aroni and Cheese.
15 Tips – Screen Capture

Fifteen tips for Apple’s screen capture? I bet you think I can’t come up with fifteen things you can do with a simple Mac feature.
Read MoreSpell Catcher X
Review

Macspiration 18
Troubleshooting your iPod
If you are having problems with your iPod, this is the article for you.