

Fifteen tips for Apple’s screen capture? I bet you think I can’t come up with fifteen things you can do with a simple Mac feature. Well, here it goes.
First off, here’s five tips/reasons for using screen capture:
1. Screen capture is a great way to illustrate what’s on your desktop. If you want to email someone the layout of an iDVD menu or Pages’s document you’re working on, you can simply take a screen shot of it and email the graphic file for feedback.
2. If you’re getting some weird error notice about an application, you might be able to take a screen shot and send it to a techie person for help.
3. If you want to show off the interface of a cool third party application you think your Mac buddies should have, take a screen shot of it.
4. If you’re putting together a how-to manual that involves computer related instructions, take a set of screen shots for your manual.
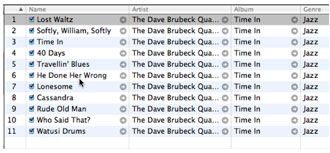
5. If you can’t download a photo or graphic from say iTunes Music Store or copy it from a PDF file, you can take a screen shot of it.
If you’ve never taken a screen shot here’s how to do so.
6. The easy way are two keyboard shortcuts: First, press down Apple/Command + the Shift key. Next, press down the number 3, and when you do so, click!, a PNG graphic file will appear on your desktop.
Above is the picture file for the full-screen capture I just took while writing this article. Below is how the file looks in Preview when I open it up. (I of course reduced the size of the shot for this article.)
7. Most of the time you’ll want to capture a particular item or area on your desktop. To do this, press down the Apple/Command+Shift+4 keys. Four cross hairs will appear. With your mouse, drag the cross hairs over the part of the desktop or item you want to capture. Again, a PNG file will appear. It’s simple and fast. I just did it again with the document I’m working on.

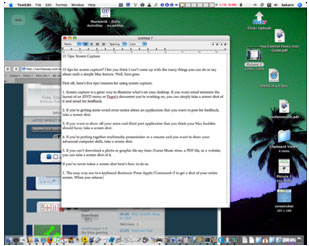
8. Okay, let’s take it to another level. Go into your Applications folder and scroll down until you find the Utilities folder. Inside it, scroll down to the Grab application and open it up. No application window will appear on your screen, but you should see menu items for the application at the top of your screen. Under Capture, you’ll see two of the controls I’ve just described except with different keyboard shortcuts. The fourth feature, Timed Screen, gives you ten seconds for your capture. That’s how I got the following shot. When I clicked Timed Screen, I got a Start Timer button that after I clicked, I got ten seconds to pull down the Capture menu before the shot was taken. (Again, I resized the shot for this article.)

9. Another feature of Screen Capture allows you take an exact capture of a window you select on your desktop. You can do this with the Screen feature you see above, or you can do it a faster way. Press down Apple/Command+Shift+4 and then hit the space bar. A little camera icon will appear. Move it over the window you want to capture. After you release the mouse, click, your shot appears on your desktop. Seriously cool.
10. You can also use the above technique to capture a picture of your dock. Just pull the camera icon over your dock and release the mouse. Done.
11. While you still have Grab open, you might as well take a look at another little feature. In the menu bar for Grab, select Preferences, and you will get the following window.
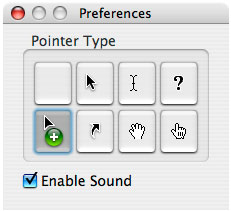
You can use this to select one of the Pointer Types to use in a Timed Screen shot. After hitting the Timer, just move your curser to where you want the Pointer to appear before the shot is taken. Click, like this one:
12. You can also change the format of the resulting Grab file. Say you want to convert the PNG file to a PDF file. Simply open the file, go to File>Save As. Change the drop down format button to PDG or any other available format. Click Save, and it’s done.
13. Another place you can get at Grab is through the Service menu. However, this feature doesn’t seem to work in many of Apple’s applications. It works in TextEdit where I’m typing now, but it doesn’t work for applications like Mail, iTunes, or Safari. I’m not sure why that is. But if you want to see it anyway, just open up TextEdit. In the application’s menu bar, click on TextEdit and scroll down to Services. In the connecting window, scroll down to Grab and you’ll get the same controls as explained above.
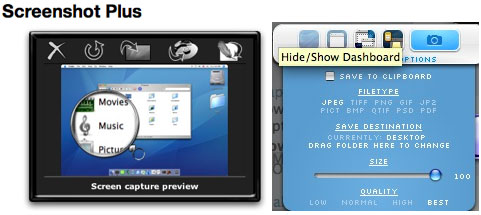
14. If you’re a Dashboard user, there are a couple of good widgets that will do Grab-like captures for you. Capture 0.7.9 and Screenshot Plusare two free widgets that contain a few more features that you might find useful. They both will even take shots of your Dashboard or a particular widget inside it.
15. If all this desktop shooting is filling your head with ideas, you might want to look into something more heavy duty. Check out SnapzPro. The Lite version ($29) has all the Grab features but also includes resize, format, color-depth, and dithering options. And then there’s the Full Movie Capture version ($69) in which you can make actual clean audio/video captures of movements you want to show on your desktop. Both programs are highly used by tech writers in the computer industry. A similar application to SnapzPro is MacCapture which also does audio/visual captures. I will have to do a separate review of it because my fifteen-day trial version ran out before I started writing this article. What I was able to do with the demo version seemed pretty useful, and thirty dollars cheaper than Snapz Pro.
Leave a Reply
You must be logged in to post a comment.