Camera RAW – What is it good for?

On February 27, 2007, in Uncategorized, by Martin Taylor


Absolutely nothing – unless you happen to be a photographer trying to scrape every last ounce of quality out of your digital pictures.

Perhaps you’ve heard photographers talking about RAW, so what is it?  Let’s begin with the familiar JPEG format most digital cameras produce.  JPEGs do not contain all the information that registered on the camera’s sensor when you pressed the shutter release.  When you pressed it the computer inside your camera took the data from the sensor, applied white balance, sharpening, saturation, and several other variables to that image.  Then it applied compression using the JPEC codec which basically throws away data it considers to be superfluous to the image, which is why JPEG is described as a "lossy codec."

RAW is sometimes described as a digital negative but that’s not an entirely accurate description.  RAW images are, as their name suggests, all the unprocessed data your camera’s sensor collected when you pressed the shutter without any processing carried out by the software inside your camera. Instead of allowing your camera to process that data without much interaction from the photographer, RAW files are processed back at your computer with lots of interaction with the photographer.  RAW files aren’t really images until they have been processed or interpreted in some way by some other software. When you see the thumbnail of a RAW image on your MAC you are actually seeing one possible interpretation of the image data but there are countless other interpretations.

So here is the attraction; your camera pretends to be smart but really it is smart at math and it cannot really evaluate your specific subject with a photographer’s eye.  When it captures image data from the sensor it processes the image to get the math right and it then throws away data it considers unimportant. Math is important to calculating exposure but it is not the sole concern.  The correct exposure for a black cat in a coal cellar is very different from the exposure for a white cat in a snow storm but your camera tries to expose them both similarly (usually as 18% gray if you’re interested). When you shoot in RAW you get a second bite at the cherry as you are able to apply different settings to the RAW data as it is converted to an image in your computer, to compensate for problems you experienced out in the field.

RAW is not a real picture format as such; it is all the raw data the sensor collected.  Before you can see the picture the RAW file first has to be processed.  Your computer may do this on the fly or it may extract the compressed image within the RAW file to show you a preview of what the image might look like, but it is only a preview.  When you want to work on a RAW file you must first process it.  This is power of RAW.  Instead of your camera guessing about how to process an exposure the photographer gets to decide how to interpret and process the image data and, as no data has been thrown away, the photographer gets something of a second chance to correct exposure mistakes.  

In real world terms this means that if you under-expose a shot by more than a stop it will be hard to rescue that shot as a JPEG, but as a RAW file you will be able to create an image almost as if you got the exposure correct in the first place.  This is especially useful in any less-than-ideal lighting situation such as using available light indoors, anything dark, anything with very high contrast but just about any shot can benefit from the flexibility RAW provides.  These days I use RAW for all my shots unless speed is an issue.  RAW files are much bigger than compressed JPEGs; they take up more space on your storage card and they take longer to write to it and when you’re taking action shots in burst/continuous mode, this bottle neck can be a limiting factor.

Perhaps you are getting the feeling that RAW image processing is not a simple subject. It can be tricky to get used to but it is worth pursuing if you want to make the best possible images from your camera.  If your camera is not capable of storing RAW data (most digicams are not) or if you’re already perfectly happy with every image that your camera produces then spending time learning about RAW images is probably not worth your effort. If, however, you have a DSLR (digital single lens reflex) or a prosumer digicam that is capable of storing RAW images, and you recognize that your camera, smart though it seems to be, does not always set the exposure or white balance to the optimum values for the subject and conditions, then learning to use RAW can help you produce better pictures.

As RAW processing  is a complex subject, you might need a book to supplement the information available on the web or that came with your image processing software of choice.  There are many books on RAW available to you and here are three of the many that deal with the subject of RAW, listed in their Amazon sales rank.


Real World Camera Raw with Adobe Photoshop CS2
By Bruce Fraser

Peachpit Press
ISBN-10: 0-321-33409-4, 336 pages
$39.99


Photoshop CS2 RAW
Using Adobe Camera Raw, Bridge, and Photoshop to Get the Most out of Your Digital Camera
By Mikkel Aaland

O’Reilly Media
ISBN 10: 0-596-00851-1, 232 pages
$34.99 US


The Art of RAW Conversion
How to Produce Art-Quality Photos with Adobe Photoshop CS2 and Leading RAW Converters
by Uwe Steinmueller and Jürgen Gulbins

No Starch Press
ISBN-10 1-59327-067-4, 240 pages

$39.95 US

* * * * *

Real World Camera Raw with Adobe Photoshop CS2, by Bruce Fraser (Rank: #2,362)

As you can see from the Amazon sales rank, this book has sold well for Bruce Fraser.  Flipping through it you can see why.  The book is aimed directly at the photographer already using Photohop but not yet using RAW.  If this is you, this book is a solid choice.  Fraser does a good job of walking you through various processes and workflows, explaining the compromises of automation against creative control along the way.  The processes he describes contain screenshots that let you know you are on the right path making it exceeding hard to get lost while following this book.

In the negative column, this book can get repetitive.  I know that repetition can be a useful learning device but the same solutions and concepts keep reappearing in a slightly distracting way.  This is not the only reason that this book is bigger and bulkier than it needs to be.  

We seem to have arrived at a place where we expect our technical books to be big and heavy; do we think that the bulk adds gravitas to the subject or that we are getting better value buying our books by weight?  The paper in this tome is thick, the fonts are large and the margins are wide.  At the same time, the photographic reproductions are too small and their quality isn’t good enough to precisely see the point being illustrated.  Some of the before and after pictures are so similar, studying them becomes like a spot-the-difference newspaper cartoon puzzle.
Still, this book is worth reading especially if you are a photographer new to RAW, but already comfortable with image processing concepts like histograms and color spaces.  This book does not stray off topic much and so it does not go into elements of Photoshop outside the scope of RAW.  If this audience description fits you, Fraser’s book may be an equally good fit.

Photoshop CS2 Raw: Using Adobe Camera Raw, Bridge, and Photoshop to Get the Most Out of Your Digital Camera, by Mikkel Aaland (Rank: #32,583)

Mikkel Aaland’s book aims at the same audience as Fraser’s book with much the same scope; the photographer already familiar with Photoshop but not yet utilizing the RAW format.  Again, tools outside of Adobe Camera Raw get little mention, although I did appreciate that Aaland did not try to sell ACR as the miraculous solution to all photographic problems and that he does tell his readers what are the equivalent tools within Photoshop itself, and when they are more useful..

Again, reproduction of the photographs themselves, are not that great — am I expecting too much of a technical manual?
Again, the point being illustrated, before and after, is often hard to appreciate. The artistic standard of the images is also uninspiring; many seem little better than standard snapshots.  They do illustrate the concepts adequately enough but they don’t make you want to rush to your computer to try them for yourself. The book also suffers from that modern technical book problem of a slightly distracting layout.  A subject is introduced but is then followed by many screenshots and illustrations, sidebars and foot notes which can make it hard to remain focussed on the topic in hand as a reader.

If Fraser’s book suffered from repetition and information spread a little thinly, Aaland’s book is slightly the other side of the scale with an attempt to cover everything RAW is capable of in slightly too few pages.  Again, if you are Aaland’s target audience (not a PS beginner and not already a RAW convert) you will learn a lot from this book.  Subjects are easy to find, the recipes and concepts are not hard to follow and it will certainly give your initial foray into the world of RAW a good kick off.

Art of RAW Conversion: How to Produce Art-Quality Photos with Adobe Photoshop CS2 and Leading RAW Converters by Uwe Steinmueller (Rank: #160,209)

Uwe Steinmueller’s book addresses the RAW process in a slightly different way and for a slightly different audience. This book is the only one of the three that acknowledges that there are converters worth using other than Adobe’s Raw Convertor; this is both its strength and its downfall.  It covers a lot of ground, showing you what tools are available and this could be useful if you haven’t already bought into a tool or workflow.  A large part of the book is condensed, mini-manuals for each of the tools described.  It is interesting to see this comparison but, at the same time, it is of limited day-to-day use and the information could date exceedingly quickly.  The book does also describe specific RAW techniques but not in as much detail as either of the the two better selling volumes.

This book alone would not make the best reference for advanced RAW tasks, however, if you are looking for an overview to some of the tools available, their similarities and differences, strengths and weaknesses, Steinmueller’s book is worth considering.  It might also be useful if you are looking to establish a RAW workflow.  If you have already decided on which tool you want to use, and most photographers only use one, then a large percentage of the content will not be that  useful to you.

None of these nooks are perfect.  Unless an author knows you personally and writes for you specifically, you are not going to find the perfect instruction book on a creative/technical subject such as RAW processing.  That makes any book on RAW something of a compromise.  If you are new to Photoshop none of these books are for you.  If you have been using the RAW format for some time already then you may pick up some information from any one of these books but you will already be familiar with much of their contents.  If you are somewhere between the two you will learn from any of these books but don’t rely on one of them alone.  Supplement them with some of the great web resources available out there or, if money isn’t an object, take a class specifically in the RAW workflow. These are available through professional orientated photography stores and specialized trainers.  If this is not an option, try to find a photo-buddy who is familiar with RAW to walk you through their process.  RAW can be confusing and daunting to understand and to learn but once it clicks you will find it difficult to go back to editing JPEGs.


PalmGuard
Company: Moshi

Price: $20
Aevoe.com

My Black MacBook does have a tendency to show fingerprints and smudges. While the outside is something I wipe down constantly, the palm rest and trackpad are areas I’d like to try and keep as smudge free as possible…but that seems impossible at times. Enter Moshi and it’s product, the PalmGuard.

The PalmGuard is a “wear resistant semi-rigid thin film” that you overlay on the palm rests of your MacBook, white or Black, and MacBook Pro.

There are three pieces to the PalmGuard product. There is the palm rest, which is a thin colored (black, white, silver) film, much like a very thin piece of textured leather. It is not clear. It is adhesive backed and is advertised to “leave no residue when removed”. I applied the palm rest piece to my Black MacBook and I think it blends in rather nicely. I tried peeling it up from one corner, and indeed; there was no residue underneath it on the palm rest itself. Since it is semi textured it resists fingerprints and smudges, unlike the MB itself. The second piece is a piece of the same stuff cut to fit your trackpad button. I might add here that each piece is cut with high precision, so they fit perfectly. Peel off the back and stickit on the trackpad button.

The final piece is a clear sheet that goes over your trackpad. At first, I thought, this is going to make the trackpad mushy and less responsive, and at first I thought maybe it had taken a little off, but in fact, I don’t think it made any difference at all, or maybe I got used to the change quickly. Of course, results may vary by user. I must say that I was happy to have “something” on the trackpad, since it seems to get the most dirt and smudges on it.

The packages comes with a straight edge “ruler” type tool to help you smooth down the films, but I really didn’t need it.

The instructions come as “pictures” on the back of the package and are easy to understand. The only gripe I have is that the illustrations have you install the palm rest first, but that makes it difficult to install the trackpad film since it sits below the palm rest. If I was doing this all over again, I would install the trackpad film first, then the others. I also turned my MB on its side to see if the film keeps the MB from closing properly. I don’t think it made any difference, but if it does obstruct the closing at all, it would be minimal.

I think this film would help quite a bit on the white MBs that might have the discoloration problem, but I think all MB and MBP owners, who are as nutty as I am about keeping their computers clean, would welcome this product.

Comes in three flavors: White MacBook, Black MacBook and Silver MacBook Pro.


Rating: 4.5 out of 5

Tagged with:  

Macspiration 74 – Super Quick Tips

On February 27, 2007, in Uncategorized, by Donny Yankellow


This week I have five really quick and easy tips for you.

FIND THAT MISSING EMAIL ADDRESS
Need an email address that is not in your address book, but you have sent to it before? Well, if you’ll know it on site, or you had the recipient’s name in the "to" try this tip. In Mail, go to the "Window" menu. Choose "Previous Recipients." This will produce a list of every email address you have ever sent to through Mail.

MAKE YOUR OWN IPHOTO FILM ROLL
In iPhoto what do you do if you have several photos in different albums which you are constantly using? Easy, turn them into their own roll and group them together. To do this, start by selecting the individual photos while hold the Apple Key. Next go to the "File" menu and choose "Create Film Roll." These photos will now be grouped together in a new film roll.

QUICK IPHOTO ALBUMS
If you would rather have an album with the photos mentioned above, instead of a film roll, you start by selecting the photos in the same manner described above. Instead of choosing "Create Film Roll," you click the "+" under your source window to make a new album. The selected photos are instantly placed in this new album. Name the new album that appears.

CREATE AN ALIAS WITHOUT THE "ALIAS" IN THE NAME
I just learned this one a short time ago. I can’t remember where I learned it, or I would give credit where credit is due. When you create an alias, you are stuck with "alias" attached to the new icon’s name. Of course, you can delete that part of the name, but there is an easier way. First, you need the item you want to create an alias for visible in a finder window. Next click and drag the icon for that item to the desktop while holding the Apple and Option keys. Unclick, and an alias without the "alias" attached to the name will appear on your desktop. You can move this alias icon anywhere you wish.

EMPTY THE TRASH WITHOUT BEING ASKED
When you send an item to the trash it is not wiped from your computer until you empty the trash. To empty the trash go to the Finder menu, and choose "Empty Trash." You’ll be presented with a window asking if you really want to empty the trash. Once emptied, the deleted files are no longer available for recovery (unless you are running a program like TrashMagic which I recently reviewed).

To turn this warning off go the the "Finder" menu from the Finder, and choose "Preferences." Click the "Advanced" icon, and uncheck "Show warning before emptying the trash." Now when you empty the trash it will be emptied immediately.

ACCESS YOUR iDisk FROM ANOTHER .MAC USER’S COMPUTER
Have you ever been on another .Mac users computer and needed to access your iDisk? You can’t choose "My iDisk" from the "Go…iDisk" menu, because that is the computer owner’s iDisk. However, if you look closely there is an option to go to "Other User’s iDisk." This is what you want. A window will open asking for the .Mac username and password. Enter your information, and your iDisk will open on the screen.

Look for more "Super Quick Tips" in future Macspirations. Leave your tips below.


MyMac Podcast 118 with Andrew Shalat

On February 26, 2007, in Uncategorized, by MyMac PodCast


Download the show here

Tim and Chad talk about the latest in Macintosh news. Robert reviews both the EarBuddy and TechTool Pro 4.5. Guy Serle returns with an all-new Not Mac News! And Nemo interviews author Andrew Shalat.


Digg Us!

Leave audio feedback by calling 801-938-5559

Get the show from these links:
iTunes Link

Direct Podcast RSS Feed

Links from the show
Apple Store Prize list
TechTool Pro
EarBuddy
CNET Do-It-Yourself Mac Projects
Mac Design Out of the Box
Andrew Shalat


Dreamweaver 8

On February 23, 2007, in Uncategorized, by John H Farr


Dreamweaver 8
Company: Adobe

Price: $399 full, $199 upgrade
Adobe Store

This is what happens when you procrastinate on a Mac article: the whole world changes before your eyes!

When I first got my review copy of Dreamweaver 8, it was fresh off the presses from Macromedia. I was happy to get it, and then it wasn’t Macromedia’s any more. Hearing that Adobe had taken over, I felt positively parental: “Be nice to my baby!” My younger brother may not have had the same reaction, though. Last October when I complained to him about Dreamweaver’s default action of asking for “alt” tags when inserting an image, he replied:

Yes, you do appear to be in a foul mood. Maybe it’s from using Dreamweaver. I gave up on that piece of s____ after the bootleg Dreamweaver MX I got somewhere turned out to be so buggy. Some of the mistakes it makes in coding tables and images is unforgivable. I’d design a page and spend 5 times as much time fixing table cells that weren’t the right size.

Ouch! He’s right about the squirmy table cell widths (not covered here), but overall, my impression of the previous MX version was better than that. There is at least one nasty bug in Dreamweaver 8 that I’ll talk about later, however, so read on.

I use Dreamweaver to manage over a dozen Web sites. Version 8 was a stronger, cleaner improvement over its predecessor, no question about it. The new integrated file browser was the most obvious change and saved valuable screen real estate. Now, I’m not what you’d call a power user or a Dreamweaver freak; the only times I ever visited the support site or registered for forums were for answers to something specific, like a DHTML question I shouldn’t have been asking in the first place. But I’ve always liked the app for the way using it inherently organizes everything: if I want to edit a specific site file, I can either navigate through the Finder or open up Dreamweaver, which would have to launch anyway after double-clicking on the file. And I really enjoy the FTP component: for those who don’t know, whenever you connect to your FTP server, Dreamweaver generates a temporary file that maps all your directories. To send an image to a nested folder way down deep, just highlight it and click on the “Put” arrow. Dreamweaver figures out where it goes and sees that it gets there. (Contrast that to something like Transmit, which I unstintingly love, but which allows you to put any old file, any old place — a godsend for geeks, obviously, assuming they’re careful.)

The old MX version did that too. But Dreamweaver 8 was faster on my ancient 500 MHz TiBook, not quite so much faster on my even more dated 400 MHz B&W G3 (both with 768 MB of RAM), and now the fastest of all on my 1.87 GHz Core Duo MacBook (2 GB of RAM.) Almost acceptably fast, in fact. It’s running under emulation, but overall seems much faster than on the older models. The MacBook is running Tiger, while the older machines are all using OS X 10.3.9. However, we did just let the cat out of the bag: on older Macs like those two of mine, Dreamweaver 8 can be aggravatingly slow at times.

On the machine I call the “Big Guy,” the venerable but bulletproof B&W G3, with OS X 10.3.9 running on a fast hard drive and 768 MB of memory, just selecting and applying “bold” to a single letter can take long seconds you don’t expect to waste. But the worst thing is that after the change takes effect, the document jumps like you jabbed it with a poker, and you have to scroll back to wherever you were. I would call that the single most irritating issue with Dreamweaver on an older system like this one. If you’re working with a long page and have hypertension issues, this can be fatal. The Spontaneous Auto-Scroll event takes place less frequently on the TiBook and never on the MacBook. Go figure — obviously a matter of how quickly the application accesses memory and how efficiently that’s used. If you’re like a lot of Mac users, you probably have at least one older computer in your stable and may have a chance to pick up an inexpensive copy of this software after CS3 comes out. That’s fine, just be informed.

Being a fairly casual but daily user has worked out well. After Claris HomePage, I never got into GoLive, and Dreamweaver has more features than I will ever need. However, there is one serious bug you need to know about, and it shows up on all my Macs: Dreamweaver 8 mangles form code. There, I said it, and you need to know about it. This one fact can ruin your day.

I had build a fairly extensive online store for a client and done it all by hand. No shopping cart software, just the longest layout outside of ’96-vintage Windows sites — you know, the center-justified ones with multi-colored text on a gray background — with lots of pictures, javascript, and a different PayPal button for each item. Go ahead, laugh. But the pages were a work of art, and once you start down that long, dark road, you’re committed. Besides, the client loved it.

When it came time to add a new category and re-organize the store. I thought it would be easy. All I had to do was copy and paste the long tables onto different pages, and that’s exactly what I did. When I tested the new page in Safari, though, every button was broken! Every single one — I was beginning to think my brother was right. For whatever reason, Dreamweaver had inserted random numerical characters into almost every line of code that makes up the PayPal button. [See below] The new page looked perfect, except that it was useless for online ordering. To keep from having to build the page all over again, I painstakingly went through the entire document in code view, deleting all the extra characters in each block of form code. It took forever and required great discipline. Later I discovered another way to approach this: although copying and pasting even a single button form in layout view invariably produced a broken button, I could paste in the code itself in code view, and that stayed whole.

After I pasted in a table full of PayPal buttons, I had to go down the page, select and delete each button in turn, then switch to code view and paste in a sample of button code from the clipboard, and finally, edit the name and price of the item within the code itself (you can also do that in layout view). Crazy-making, yes, and only arising in this lunatic example of a hand-built Web store, but a definite bug, regardless. If you copy and paste any kind of Web form between Dreamweaver 8 documents, be aware that you may have to go back in and fix things. Just have a look at the following:

So where does this leave us? An exhaustive review of Dreamweaver 8 at this late stage would be silly: within a short time, Adobe will release Creative Suite 3 (CS3), and Dreamweaver 9 or CS3 will be a part of it. (While you’re waiting, take a look at a related feature, Adobe’s new CSS Advisor.) If there’s any justice in this world, the CS3 version won’t build table cells of jello or mangle pasted form code. That alone would be reason to wait for it, but you know there will be a great many more changes. A different splash screen, for one thing:

Hey, where did THAT come from? Heh — I googled “Dreamweaver CS3 beta” and found a Chinese version. That must mean the real thing is coming soon. As the translated page so eloquently states, “Said Adobe Dreamweaver 9 (CS3) Alpha 1 will be released after a two-week test Beta, when you can eat a download.”

Good enough for me. As for Dreamweaver 8, soon to fade into obsolescence, I give it a MyMac rating of 3.5. I couldn’t live without it, but it shakes the code enough to make me worry sometimes. We shouldn’t have to put up with that on our nice new Intel Macs, and maybe we won’t with CS3.

(The new universal version should be lots faster, too. I can hardly wait!)

System requirements: any Mac running OS X 10.2 or higher
PPC application (runs under emulation on Intel Macs)


Bravo SE Disc Publisher – Review

On February 23, 2007, in Uncategorized, by David Cohen


Bravo SE Disc Publisher
Primera Technology, Inc.

Price: $1495 new, $1250 refurbished
http://www.primera.com

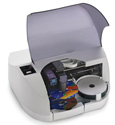
Convergence – it is one of the buzzwords in computing at the moment. It is the joining of disparate technologies in a single device – for example, a cellphone and an MP3 player. Done well, and you are the darling of the industry, (such as the iPhone), and done badly it will be a failure – Motorola’s ROKR comes to mind.

Primera Technology sent me a different and intriguing example of the same convergence concept – their Bravo SE Disc Publisher. What they have done is integrate a DVD writer, inkjet printer and a nifty robot arm to create a unit to automate the production of professional quality DVD or CD discs.

The unit is the size of a large inkjet photo printer. A large smoked plastic lid opens to reveal a hopper that can take 20 blank discs, and a mechanism to lift these discs to a conventional computer disc writer drive (the review unit supported DVD+R and DVD-R at 16x speed, and CD at 40x), with an inkjet printer head mounted above it. The robot mechanism uses a precision pick-and-place arm, and completed discs are dropped in to an output tray that can be pulled out separately while the unit is running.

Installation is simple, as the device is USB connected, and comes supplied with the appropriate cables. The included CD installs an appropriate printer driver for the disc printer, and a customized copy of Discribe Robotic Edition for driving the disc writer and the robot arm. There are also some Encapsulated Postscript templates for creating disc labels, though on my system these were not copied to my drive as part of the installation.

Discribe is not a Universal Binary application, though it ran perfectly well on my MacBook. It is actually quite powerful, though the interface is a dizzying reminder of how OS 9 applications used to look. As such, it is not terribly accessible, though it can write virtually any type of CD or DVD. What it can’t do is encode video or audio to the correct format, so you will need to use another application to prepare your content.

Discribe is also used to print to your discs. Again, it has no creation capability – you import PDF or TIFF images for printing on to your discs, so you have to have created those images in Photoshop or another application. Disappointingly, the Windows version of the package does include a full labeling package.

I used iMovie and iPhoto to create some photo slideshows and movies from a family event I attended in Israel last year, and then used Roxio Toast Titanium to generate a DVD disc image that I wanted to burn and distribute to my wife’s extended family. I had a go at creating a disc label using the EPS template in Photoshop Elements, but I have no skills in graphic design and my effort looked horrible! Fortunately, Roxio Toast includes Disc Cover RE, that can import iPhoto images and has a wide array of colorful and professional looking disc label templates – and it has a Primera Bravo printer profile as well. I was able to create a beautiful disc label using photos of the family, and export it as a TIFF file. Setting up Discribe to burn 10 copies of the disc image and print the label on each one took only a couple of minutes. I put 10 printable DVD disc in to the hopper and clicked the burn button.

Watching the Bravo SE in action is actually quite fascinating! The robot arm drops a disc in to the opened drive tray, and the 16x drive makes short work of burning it. Then the disk is extracted and deposited on the printer tray, which pulls it out of the way and starts printing – the arm then goes and puts another disk in the drive. While that is burning the printer completes the first disk and drops it in to the output tray. This cycle repeats for up to 20 discs.

The end result is a seamless, completely automated disk production process. My test disk was only around 20% of a full DVD, but even so the Bravo SE burnt and printed my 10 disks in around 25 minutes. The disks all played back flawlessly in my home DVD player, and the printing quality of the label to me looked very good indeed, with no banding or dithering visible.

Now, the sharp-eyed will have noticed that this convenience and quality comes at a price. At $1495 (or $1250 for a refurbished unit), there is a good chance that if you buy one of these it will be worth more than the Mac driving it! However, you do have to balance the headline cost against the savings of time that it will deliver if you regularly have to produce multiple copies of labeled discs. It should also be borne in mind that in the past, disc duplication technology has not been available to end users at any cost, and the Bravo SE should be viewed as a breakthrough product.

Consider my test disc run of 10 DVDs. If I had to produce them using my Mac and my HP printer, I reckon it would have taken me around an hour to burn the discs back to back using Toast – because I would not have wanted to just sit in front of my Mac swapping discs when required. The same applies for the disc labeling, assuming that I was printing directly on to the discs rather than using transfer labels. So, the 25-minute turnaround of the Bravo SE would have been at absolute best two hours. Time is money, and on that scale I do not believe it would be long before the device covered its costs, provided you do need to use it regularly. As it is completely automated, even if you need full DVDs, an overnight run can be safely left for completion. You could use an external print shop to provide the same service, but you would lack the direct control and variation that the Bravo SE can give you.

In terms of consumables, $37.95 buys you a new ink cartridge for the Bravo SE, and given the low coverage that a DVD or CD disk requires you shouldn’t be replacing it that often. Primera also offer specialized CD and DVD disks that have waterproof coatings for true label fastness. I used a generic printable DVD disc spindle that cost little more than a conventional name brand, and was perfectly comfortable with the results.

You can probably tell that I really liked this device. However, in considering the review score I must point out that it is disappointing that for such a premium device additional non-supplied software is required to get the best from it. Primera indicated to me that negotiations with a previous supplier of labeling software broke down, and that their surveys determined that 90% of their Mac customer base already had Photoshop or Illustrator suitable for use with their templates. However, having this software does not necessarily mean you can generate quality results quickly with it, and I believe Primera might broaden their appeal and their value offering if they found a way of including this functionality with this product.

Accordingly, I award the Primera Bravo SE Disc Publisher a score of 3.5 out of 5.


Posterino – Software Review

On February 21, 2007, in Uncategorized, by Donny Yankellow

Posterino
Company: Zykloind.com

Price: $24.95

http://zykloid.com/posterino/

If you read my reviews on a regular basis, you know that I love finding art and design programs by smaller companies. I like it even more when the programs are great programs and affordable. Posterino is a great program, and at a price of $24.95 it is definitely affordable.

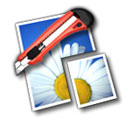
At first glance, Posterino looks like a Print Shop/Photoshop type of program, but it isn’t. Posterino is a program for making photo collages, photo postcards, and more. The projects you work on can be as simple or as complicated as you want. Plus, you don’t have to use only photos. If you can import the image file into iPhoto, you can use it in Posterino.

To start a project in Posterino you select one of the pre-made templates and you select a size. You can also make your own layout with a blank template. Once the layout is made on the blank template, you can save the template to use again later. If you do not see the size you need, you can enter your own dimensions and the templates will adjust to the new size. I tried a long and narrow poster of 35 x 18. The program easily adjusted the template.

The templates have what I would describe as drop-in spaces or place holders for each image. A media window similar to the one in iLife and iWork allows you to drag and drop photos into these spaces. The window gives you access to your iPhoto library and your Pictures folder. You can also drag and drop from the Finder.

Once there you can move the photos around the border of the space and resize them in the space to get it just right. You can also rotate the images. This is a great way for making photo collages. The only drawback is that you cannot use the arrow keys for nudging photos to get them perfect.

If you want to add a picture to the image that does not have a prearranged space you can add those too. An annoyance here is that the drag and drop from the iPhoto window will not work. You have to use the add graphic button to make a place holder. This gets really annoying when you are making a project with the blank template. Instead of quickly dragging and dropping images you want to use, you have to make a graphic space for them.

Once finished laying out the project you make your poster. Posterino will render the poster, and when finished you have a choice of emailing the image, saving it to the hard drive, or sending it to iPhoto. One of the downsides of Posterino is that you can’t print directly from the program. Therefore, you’d have to export to iPhoto or a file and use another program for printing. Of course, most people will not have a poster sized printer and will have to take the file to a printing service; but for those projects that are smaller, it would be nice to be able to print directly from the program.

The included templates are great. Some have text fields for titles, while the postcard templates have a stamp space that you can drag and drop an image into. As I was working on this review, an update to Posterino was released which included even more templates. As I said earlier, if you don’t see a template you want, you can use the blank template.

Despite the drawbacks I mentioned above, Posterino is a great program. The more I use it, the more I like it. The projects you can produce can be used for posters, gifts, yearbook pages, postcards and more. The uses for the projects are only limited by your imagination. Writing about it does not do the program justice. I highly suggest you download the demo and try it for yourself.

If you like it, buy it. At a price of $25, Posterino is a great deal. MyMac.com rating: 4 out of 5.


John Nemo kicks off the conversation:
Apple is promoting its MacBook for consumers, which makes sense due to the modest size and price relative to its set of features. A basic MacBook sells for $700 less in U.S. dollars than the least expensive MacBook Pro, or $800 less when you factor in an AppleCare three-year warranty (which MyMac.com strongly recommends).

For buyers over the age of 40, that extra expense can be a bargain. As we age our eyes and brains prefer a larger screen area. Keys that illuminate in low or dark ambient room lighting are a bonus. Typing keys are engineered to a higher standard, with more tactile response. Trackpad and mouse are larger, and palm rest areas are more spacious. Audio playback is better, with larger on-board speakers. A second FireWire port, with faster FW800, is very useful. Weight and size are only marginally larger on a 15" MacBook Pro than on a 13" MacBook.

Mobile professionals and road warriors consider MacBook Pro to be a no-brainer decision, but what about consumers and students? And, flip side, when is a MacBook just right for business computing?

Eight hundred dollars is a lot of money. You can almost buy a second Mac for that quantity of dough. Is MacBook Pro a premium (meaning overpriced) product for a premium price, or an essential computing tool that is worth every penny?

For me, MacBook Pro is a better deal. I use the FW800 port and illuminated keys every day (and night). Extra screen size is a huge asset. Typing keys and palm areas feel just right for my hands. Processor speed and video muscle are bonuses that come in handy when teaching or using Adobe Photoshop or Elements. DVD burner and extra RAM are essential enhancements.

I need to work nearly an entire week to earn $800, friends, and for me it’s worth it. How about you, David?

David Cohen disagrees, after much personal deliberation:
I actually have owned both. I bought a 15" MacBook Pro 1.83Ghz not long after they became available – my first ever Mac laptop. I upgraded the RAM to 2gb, and I was very happy with it.

However, in my job I travel a lot. I found that the 15" form factor could occasionally seem a drag, and with the aluminum finish I was constantly worried about scratching it.

However, it is a lot of machine. Handled everything I threw at it with aplomb.

A couple of months after the MacBook launched, I happened across one being sold on eBay – it was new, boxed, listed at around £80 ($160) below retail and only had a couple of hours until auction finish. I set up a snipe on it and ended up winning it! I figured I could put some freeware software on it and turn it around for a quick profit.

The machine was the base MacBook – 1.83Ghz white with a combo drive. When I got hold of it I was really pleasantly surprised with the size – it seemed a lot more totable, and the plastic is a lot more hardwearing. In terms of performance, for the majority of tasks with 2Gb of RAM there is not much in it between the smaller machine and the Pro. Of course, the video performance for games or hardcore apps like Aperture really tells the story. I didn’t really notice the lower resolution screen, due to the sharpness, brightness and glossy coating.

Ultimately, I came to the conclusion that the MacBook was 80-90% of the MacBook Pro for 50% of the money, so I sold the Pro and pocketed the difference. My early production MacBook suffered from overheating, but Apple replaced it under warranty for a new machine that, while not a revved Core 2, still runs much cooler than the original laptop.

Now, looking at what I gave up, let’s consider each spec difference in detail:

1) Video Performance – With 2Gb of RAM, I don’t notice what the onboard video steals from the system. Performance is fine for video playback and anything in OS X. Yes, it is not great for games, but even that is OK if you can live with the lower resolutions.

2) System performance – Not really noticed a difference. You would expect that, as it is the same processor and broadly the same graphics board.

3) DVD Burner – I gave this up by going to a base MacBook from the Pro. I don’t miss it, as I have a superdrive on my home machine. If I want to work on DVD on the laptop, I make images for burning later.

4) Robustness – It seems a whole lot more solid than a Pro. But that could just be me. I like that I don’t worry about scratching the wrist area with my watch.

5) Size – While weight is not much different, the smaller machine is easier to move around. The power supply unit is smaller too, and that makes a surprising difference for me.

6) Screen – As I said, only really noticed the different resolution side-by-side. I use Virtue Desktops, so that mitigates any potential real estate shortage by letting me have multiple workspaces.

7) Lighted keyboard – Never really got on with that anyway.

8) Performance – Apart from the video, really very little in it that you can notice. Universal Binary coding improvements help here too with time. Aperture 1.5 runs quite well on the MacBook now, whereas the older versions weren’t so good. As regular podcast listeners know, I am a heavy Parallels user, and that works VERY well on the little guy.

9) Flexibility – You can self upgrade the hard drives in MacBooks, and I like that. I stuck a 100Gb drive in mine for far less than Apple’s pricing. Only upgrade downside is that MacBooks always have both RAM slots filled, so you have to toss the old RAM on upgrade. It doesn’t sell well on eBay, either. I have kept both my original RAM chips and hard drive in case I need to send the machine back to Apple in the future for warranty work.

For me, the cost differential between the Pro and the MacBook is not justified by the extras you get, especially now that they are both Core 2 Duo. The sales figures back this up – MacBook outsells the Pro models substantially. I would only recommend a Pro if you want a big true power machine (say as a desktop replacement).

Sweet spot on the Core 2 Duo line-up for MacBook is the middle machine now (2Ghz white), as a $200 price differential buys you a slightly faster processor, 512Mb more RAM, 20Gb more hard drive and a superdrive.

If you want to save some money, Apple has been issuing refurb Core Duo MacBooks at some terrific prices in the US refurb store, though it looks like they are all gone now. They have refurb Core 2 Duo MacBooks in at around 15% discount, or if you want big iron they have some 17" Core Duo Pros at 15" prices.

Everyone has different needs and requirements, as our differing viewpoints testify. But the long and the short of it is don’t discount one line over the other – consider the benefits of both!


I’ve been finding a bunch of great, free downloads in the past few weeks. That’s about all they have in common. They range from a recipe organizer to a watermark program to a video converter. Here’s a few of them.

Measuring Cup: Want a recipe organizer? Try out Measuring Cup by Shallot Patch. Find it at http://www.shallotpatch.com/.


PicMark: PicMark, from DigitalCalamity, is a great program for anyone that wants to protect images with a watermark. PicMark will apply the watermark of your choice, and it can do an entire folder of images, instead of one image at a time. Normally, you would need expensive software to do this. PicMark is FREE. Download it here.


OfotoExpress: If you use Kodak’s online photo galleries for sharing photos or for making prints you want OfotoExpress. Instead of uploading photos by adding one file at a time to an upload page on Kodak’s website, OfotoExpress lets you upload folders of photos to your account by drag and dropping. It is a great time saver. All you need is a Kodak Easyshare Gallery account (formerly Ofoto).


MozoDojo: MozoDojo, by Pierre Chatelier, is similar to another program, MosaicAIX, which I recently suggested. Like MosaicAIX, MozoDojo is a free program for making photo mosaics. I have found the MozoDojo works better, and is easier to use. Find it here.


MoviesForMyPod/PSP/Phone: MoviesForMyPod/PSP/Phone from Digigami, Inc. Allows you to take Quicktime movies and convert them into formats for your iPod and more. I use it to convert larger Quicktime movies into smaller formats for the web. You can download the program here.

There you go. Five great, and free, downloads. Look for more downloads in future Macspirations.


MyMac Podcast 117 Adam Christianson and Robin Williams

On February 19, 2007, in Uncategorized, by MyMac PodCast


Download the show here

Adam Christianson from The MacCast joins Tim and Chad for lively chat about his history in Macs, the current state of Apple and Steve Jobs, and much more. David Cohen reviews Take Control of Running Windows on a Mac, Second Edition. Robert Essential Acoustic Guitar and DVCreators Final Cut Pro Foundations. To wrap the show, Nemo interview one of our favorite Mac authors of all time, Robin Williams.

Leave audio feedback by calling 801-938-5559
Get the show from these links:

iTunes Link


Podcast-only RSS Feed

Links from the show

The MacCast
Robin Williams
eMedia Essential Acoustic Guitar
DVCreators Final Cut Pro Foundations
The Non-Designer’s Collection
The Non-Designer’s Design Book Second Edition
Take Control of Running Windows on a Mac


Weekend Archive – Does Microsoft Matter

On February 17, 2007, in Uncategorized, by


Almost two years ago, Neale Monks asked the questions Does Microsoft Matter? With the release of Vista, the popularity of Parallels and BootCamp, and all Macs now being sold with Intel Inside, now is a good time to look back on this important topic. From March 2005.


A Better Finder Tool Suite – Review

On February 16, 2007, in Uncategorized, by Neale Monks


A Better Finder Tool Suite
Company: Publicspace.net

Price: $37.49
http://publicspace.net

A Better Finder Tool Suite is a set of Finder add-ons that perform bulk renaming, attribute editing, and file finding tasks. A Better Finder Rename and A Better Finder Attributes are launched through contextual menu items and thereby applied to batches of files, making changes to files that are either slow or impossible to make in the Finder. Via a keyboard shortcut, A Better Finder Launcher gives the user shortcuts to files and applications. Since each is also available as a standalone product, this review will look at each of them separately before balancing up the entire set in terms of value and usefulness.

A Better Finder Rename 7

Many applications will process or create groups of files quite happily. But if you need to rename them afterwards, the Finder itself will only let you do that one file at a time. A Better Finder Rename (here shortened to ABFR to keep things simple) is essentially a one-trick pony — it renames groups of files simultaneously — but it does that trick very well and in a multitude of different ways.

The easiest way to use ABFR is via a contextual menu item that appears when a group of files are chosen in the Finder. The application’s interface consists of two windows, one presenting the various renaming options, and the other giving a “before and after” listing of the files about to be renamed. Pull-down menus and editable text fields give the user quick access to most of the main functions. Users are not limited to just one renaming task, so a batch of files could be converted from lower to uppercase, then given a .JPG suffix, and finally truncated to the DOS-friendly 8+3 character format, all in one fell swoop. About the only real flaw in the interface is the small text size used in the preview window: on Macs with small screens or running at a high screen resolution, like a MacBook Pro, it’s difficult to read the file names.

ABFR is able to read the EXIF data in digital photos and use that to give them names based on creation date. Likewise, artist and album information can be extracted from MP3 music files and turned into their file names. Frequently performed functions are best saved as Droplets, simple applications onto which files can be dragged and dropped as required. In short, anyone who needs to rename batches of files on a regular basis will find ABFR an essential and inexpensive timesaver. Few system add-ons are essential, but this is one of them.

Pros: Nicely integrated with the Finder. Check results in preview window before applying them. User can apply multiple renaming tasks sequentially. Turn common tasks into standalone Droplets. Reads encoded MP3, AAC, and EXIF tags.
Cons: Preview window a bit small and cramped.
Standalone price: $19.95
MyMac.com Rating (out of 5): 5

A Better Finder Attributes 4

Digital photographers are often annoyed to find their Mac gives photographs a creation date based on when the file was imported and not when it was taken. The Finder doesn’t allow the user to edit creation and modification dates, but making these changes is quick and easy using A Better Finder Attributes 4.

ABFA is able to read the encoded EXIF data in photographs and change the creation date from when the file was imported to when the photograph was actually taken. The easiest way to do this with ABFA is simply to select the files in the Finder, and then launch the application via a contextual menu item. The main ABFA interface window includes text fields and pull-down menus for quick editing of file attribute data. A second window gives a “before and after” preview of the changes about to be applied to the files. One minor complaint is with the tiny text size used in the preview window, making it rather difficult to read this information on Macs with small screens (such as a Mac Book Pro).

Besides being a contextual menu item, ABFA can also be launched as a regular application or through a keyboard shortcut. Folders and files can be dragged onto the preview window, and individual items and subfolders removed as required. This is a good way to handle large batches of files, because OS X tends to slow down when contextual menu items are applied to large (50+) groups of files. Commonly used changes can be saved as mini-applications known as Droplets onto which groups of files can be dragged for instant modification.

While there are a variety of attribute change options available, most are concerned with creation and modification dates. The two additional tricks are toggling the visibility of file extensions and changing whether or not a file is locked. Notably missing from the roster of tricks is toggling visibility on and off. Beyond that, ABFA is a useful little program for photographers, webmasters, developers, and anyone else that needs to edit file attributes beyond what the Finder will allow.

Though a relatively expensive one-trick pony of interest to only a very select group of Mac users, if editing file attributes is important to you, then you will find that A Better Finder Attributes does its job quickly and easily. The interface is well thought out, and the ability to create standalone Droplets a real timesaver.

Pros: Easy to use. Reads EXIF data from JPEG, RAW, and TIFF digital photograph formats. Export common modifications as standalone Droplets.
Cons: Preview window a bit small and cramped.
Standalone price: $19.95
MyMac.com Rating (out of 5): 4

A Better Finder Launcher 2

As hard drives become bigger, so finding files quickly becomes more difficult. Spotlight is of course one solution, but because it makes its searches in real time, it can be relatively slow. A Better Finder Launcher works in a different way. Because it searches an index of user-defined folders instead of the actual hard drive, it finds thing instantly.

The basic functionality couldn’t be simpler. A keyboard shortcut brings up the ABFL window. The user types in the search criteria, such as the first few characters of a document’s name. ABFL immediately returns a list of files beginning with those letters, and the user clicks on the one required, at which point ABFL quietly hides itself until called for again. Compared with fiddling with Spotlight, the overall process is quick and easy.

ABFL can isn’t limited to searching for files beginning with certain characters; the user can also search for characters within a file’s name as well as by “wildcard” characters. Of prime importance is how indexing is managed. ABFL can be configured to include or ignore files of a certain type, containing certain characters in their name, or located in certain subfolders within the folders being indexed. Indexing can be set to take place periodically, and obviously the more up-to-date the index, the more useful ABFL will be.

As good as ABFL is, it does have its flaws. Perhaps the most annoying is that files can only be launched; ABFL cannot be used to take you to the folder where that file resides. The interface is also decidedly non-standard. The results of a search are presented in a window without a standard scrollbar, so while there may be results below the ones immediately visible, there isn’t a visual cue making that plain. It isn’t clear what the difference is between two of the search options — “Name contains characters” and “Name contains word” — and the tooltips for all the search options are identical. While they sound the same, the do indeed return different results. Niggles aside, ABFL does what it promises to do, and does it well.

Application launchers and file finding utilities are far from uncommon in the Mac shareware world, but ABFL does hit a sweet spot in terms of speed, ease of use, stability, and price. For any Mac user who finds Spotlight too slow for their needs, ABFL is definitely worth a look.

Pros: Very fast and easy to use. Files and folders can be easily added or excluded from the index. Inexpensive.
Cons: Cannot be used to locate files, only launch them. Interface is non-standard and tooltips are limited in helpfulness.
Standalone price: $14.95
MyMac.com Rating (out of 5): 4

Summary
Buying the entire pack of utilities rather than just one or two of them will depend on how useful each individual utility actually is. As a three-pack you save seventeen dollars ($37.49 versus $54.85 for the three bought separately). But if you actually only need A Better Finder Launcher and either A Better Finder Rename or A Better Finder Attribute, then you’ll save a couple of bucks by just buying those two programs ($34.90). The question is do you really need more than one of them?

A Better Finder Rename is almost indispensable, and quickly pays for itself if you routinely have to rename batches of files. Anyone working in a creative or scientific field will quickly find A Better Finder Rename an essential tool. A Better Finder Attributes is truly useful for only a very specific market, and if you don’t routinely edit file attributes, then there’s no reason to buy this program. It won’t expand your computing or allow you to do any of your usual tasks more quickly or efficiently. A Better Finder Launcher has much broader appeal but is difficult to rate because you either like application and file launchers or you don’t. If you want a launcher, this one is priced well and delivers on its promises. In short, audition each utility independently before plumping for the three-pack instead of buying the one or two utilities you really need separately.

System Requirements
Any Mac running System 10.3+
Universal Binary for PowerPC and Intel


Nemo Memo – At First Glance

On February 16, 2007, in Uncategorized, by John Nemerovski


Taylor Kew and Rich Baker developed and self-funded the concept in 2000, and opened for business in 2002. Veterans of PictureTel, a video conferencing company, they "just wanted the 10:00 a.m. meeting to be able to start at 10:00." Their product, Glance, is being used by over 2,600 paying customers from eighty different industries in forty countries, for live, remote, screen observing "all day and all night." Glance is not in competition with Netopia’s Timbuktu, which is a remote screen controlling application. With Glance, you look but don’t touch.

No, it’s not a chat client either. You bring your own phone, iChat, Skype, or conferencing method when you use Glance. Taylor tells MyMac.com they wanted screen demos to be "easy, reliable, and fast." Being a web interface, they have "tight discipline on the whole user experience."

When your company, small or large, needs to develop customers and markets, you use Glance to present your offering from across the world or across the room, via a live Internet connection routed through Glance’s data network. Currently, most licenses are purchased by businesses with 100 or fewer staff. Twenty percent of on-screen contact is devoted to selling, and eighty percent to subsequent training. Typically a technology-based business uses Glance to present to non-techie customers and users.

Guests just launch their browsers to view the host’s computer screen. Glance automatically uses Java (on a Mac or PC) or ActiveX (PCs only) technology for the viewer. To get started, download the software from: http://glance.net "Download latest version." Readers of MyMac.com are offered a one-month free trial here with the special card code: 1280000. You’ll be given a Glance Address, such as "yourname.glance.net" and password: "yourname." I recommend you spend time with their QuickStart guide: http://www.glance.net/site/support/quickstart.asp. Also play with the tutorial: Click through the application’s "Help" file, or see the online tutorial at http://www.glance.net/site/support/tutorial.asp (choose the one for the Mac).

Let’s meet company president and cofounder, Taylor Kew.

Please tell us, Taylor, about your pricing structure:
 
The best option for an individual or small company is a “named user subscription,” also known as a Glance Personal subscription, which costs $49.95 per month. Also, Glance offers a promotion with this option — buy two and the monthly rate is reduced to $39.95 each, per month. Users can cancel anytime. Customers can save even more with an annual subscription — 12 months for the price of 10.
 

Can people install and run Glance on more than one computer, from a single license?

 
You definitely can. Customers can install it on any number of PCs or Macs. The only restriction is one session at a time per subscription.
 

Why would individuals want or need to use and pay so much for Glance?

 
You mean so little, right? Our typical customer uses Glance as a sales tool to demo a product or show a deck of slides. The people seeing the demo quickly forget they’re miles or oceans apart. Glance helps them “feel” like they’re sitting side-by-side.
 
In most cases, closing just one additional sale pays for a whole year of Glance. An individual can use Glance all day for less than an order of fries. Glance lets many of our customers close business deals that would otherwise require traveling to a customer’s site, saving them a tremendous amount of money and time.
 

How often do you plan to update your client and server software? What’s in your future?

 
One thing we love about the software-as-a-service model is that it lets us continually improve and refine Glance. We have architected the service so that we can constantly add, update and refine it without our users even being aware of the improvements being made. 
 
We have fun hearing a customer say to us, “By the way, our users never seem to run into such-and-such issue any more. Did you do something?” It’s a great feeling!
 
As far as the future goes, we anticipate continuing to add enhancements that bring a lot of value in very subtle ways. However, the challenge is to add capabilities in a manner that does not burden the user experience. You could say our mantra is “elegant simplicity.”
 

Can you give us an example of how Glance is used in an academic environment?

 
We have a secondary school teacher in Alaska who tutors kids who live in very remote regions. She conferences her students over the phone and works through math problems using a graphics tablet that paints on her computer screen. Glance lets the kids watch everything she writes, as though they were in a classroom with her.
 

What are your recommended (free?) voice conferencing solutions for more people than iChat can handle?

 
A lot of our customers use www.freeconference.com. The audio bridging service itself is free. Each guest just dials a long distance number, which for most people is free anyway. Freeconference.com and its competitors make their living thanks to an archaic telecom law that gives them a fraction of a penny per minute for each long distance call they “answer” at their bridge.
 

In my professional work as private computer tutor and group Photoshop instructor, how can I take advantage of Glance to improve my content delivery?

 
Actually, about half of our customers are software companies. The second most popular use of Glance (after Web demos and sales presentations) is customer training. In the same vein, Glance would make it possible for you to provide computer tutoring to anyone, anywhere. Since Glance now works on Macs, it’s great for training people on some of the fantastic applications you can run on Macs, like Photoshop.
 

How was you experience at January’s Macworld Expo?

 
It was a great show for us! The Mac community has been largely ignored by the Web conferencing industry. A frequent comment we heard was, “It’s about time we had a tool like this.” We found that the minimalist design of our desktop sharing tool really appeals to Mac users.
 

What is the division of labor between you and Dr. Rich Baker?

 
We’re a great team. I’ve got the clean desk; he has the messy one. So I do most of the detail-oriented stuff needed to keep the business running, while Rich and our engineering staff take care of technology and product development and “blue sky” stuff.
 

How responsive is your tech support and why are people requiring it?

 
Great question. Here at Glance, we don’t have any automated phone queues. Every phone call is answered within two or three rings by someone who knows how to solve nearly any technical or account management problem. Customers with questions don’t have to deal with voice prompts or automated attendants. Whoever answers the phone can provide BOTH sales and tech support. I should add that no one here works for commission. We believe that commissions would conflict with how we feel customer care should be done.
 
So why do we get calls? Customers call when something prevents them from using Glance.  Ironically, in all but the rarest cases, it’s not a Glance issue — it’s all the Internet “goo” strung between our users and their guests. Glance can work only as well as the network in between.
 
If the network doesn’t work, Glance can’t magically cure it.  But we make it our responsibility to do whatever it takes to help troubleshoot and fix whatever issue prevents our users from having a great experience. Since many small businesses — which make the bulk of our customer base — don’t have the expertise or IT resources to figure it out on their own, we fill that need. We end up being remote IT experts. Often they find that once we fix whatever is affecting Glance, other tools they’ve had problems with suddenly work again as well. 
 
We feel that too many companies make the mistake of “disowning” customer problems. We have found the absolute best “marketing” investment we can make is delivering stellar technical support. Referrals that come from customers who called our support line are golden!
 

What are your parting words for readers of MyMac.com, to encourage them to do more than take a parting glance at Glance?

 
Next time you wish someone could “see what you’re saying," grab some free Glance at http://glance.net!

Thanks, Taylor. Let’s stay in touch. We’ll be keeping our eyes on you.


Keyword Manager – Software Review

On February 15, 2007, in Uncategorized, by Claus Wolf


Keyword Manager 1.1.1
Company: Bullstorm

Price: US$ 19 EU: €19 (incl. VAT)
http://www.bullstorm.se/KeywordManager.php

If you’ve read my review of FlickrExport 2 here at mymac.com, you will already know that I have a bit of a thing going for keywords. Looking at this review you will also note that my biggest regrets about that particular tool were, that it wouldn’t write the keywords back to iPhoto.

The reason I didn’t want to tag my images in iPhoto was that the iPhoto native keywords feature is so limited to beg the question of usefulness. Obviously I wasn’t the only one with this feeling, since two Swedes sat down and developed a plugin for iPhoto..

Keyword Manager does what the label suggests and it does it extremely well.

Installation
Keyword Manager is a 861KB universal binary disk image, once mounted, double click the installer (make sure iPhoto is closed) and let it work its magic. When you restart iPhoto you are greeted with two semi-transparent windows: The first is called “Quick Assigner” and the second one “Keyword Manager”. To switch these on or off you simply click the “key” button in the bottom left of the iPhoto window.

Features & more
To assign keywords, simply type the keyword in the little box at the bottom of the Quick Assigner and hit enter. They keyword will be added to your image and is automatically added to the Keyword Manager in the “Unsorted Keywords” category.

The Quick Assigner can also display a preview of your image, and with the navigation arrows at the bottom you could cycle through your image library and quickly tag all images you want.

Adding keywords this way is actually quite fun and it is quick and most importantly, Keyword Manager takes care of some of the thinking for you. As soon as you start typing it will suggest keywords, which you’ve perviously used, simply click one or use the arrow keys and enter. (Or continue typing it all in)

If you enter a new keyword that is similar to one you’ve already used you will be asked, whether you would like to use the existing entry or add the new entry. This avoids unnecessary duplication: Think house vs. houses – do you really need both?

This way the tool helps you to quickly assign the keywords you want, while keeping the number of keywords as small as necessary. I wasn’t quite able to determine the algorithm here. I was able to add theatre and theater without being asked about adding a new keyword, while words like behavior / behavior, customize / customize were picked up without a problem. So I would say it works quite well and most of us would only be tempted to tag one spelling anyway.

A librarian will tell you that a controlled vocabulary is only good if it is reasonable in size, otherwise you could just as well use a dictionary. If you have an unlimited number of keywords floating around your ability to retrieve easily later on diminishes.

The beauty of controlled vocabularies is that they very frequently make use of a hierarchy, like a thesaurus, and this great little plugin allows you to take care of your own hierarchies. In the window labeled “Keyword Manager” you see categories and underneath the categories you can add your nested keywords. For example Locations > Europe > Germany > Hesse > Otzberg

Do consider to spend some time creating these hierarchies, as they will save you a lot of work later on. You can add your own categories of course, to make it all highly flexible.

Imagine I had an image of the castle 2 miles from where I live. For me it would be sufficient to tag this image with “Castle” and “Otzberg”, as I know where Otzberg is – but you wouldn’t necessarily know. When adding keywords sometimes it is good to account for “the obvious”, especially if others are to find your images based on your indexing terms.

To make retrieval easier (and more inclusive) I would have to add Germany and Hesse to my image to give everyone a good chance of retrieval. Now this is where the time saving comes in. If you’ve setup a hierarchy, like the one shown above, and then add Otzberg as a keyword – Keyword Manager will automatically add “Europe”, “Germany”, and “Hesse” as well. Thus it adds four keywords, based on the one you’ve selected – making sure you consistently tag images within your own iPhoto library. A great time saver, even if you have to take a moment to setup it all up. However the saved time will multiply if you eventually export to Flickr or another photo sharing site.

What’s even nicer – if you change your keyword hierarchy around after indexing, it will fix those keywords for you. So you can get yourself started quickly and then improve the indexing “on the fly” later on. Awesome!

Keyword manager has a few smaller features, that show how much the developers have been thinking about their subject:

•Knows your friends and family
Keyword Manager knows your friends and family from your address book. So just go ahead and add them quickly. As they put it on their website “You’ve already entered them once in your address book; why do it again?”

•Ignore diacritics when typing
If you are located in the US diacritics might be a bit harder to enter. My keyboard has appropriate keys to let me enter diacritics for German quickly – are just a touch away. If you like to call things properly, you might enter Österreich for Austria. But if you don’t have the Ö handy, it might be a pain to enter it this way all the time. Simply enter Osterreich and Keyword Manager will add Österreich for you. Now how nice is that?

• Assign Keyword Type
You have a few pre-assigned keyword types, which allow you to add a small icon to the left of the keyword to indicate the type you are looking at. This makes it easy to differentiate between them, but this is the only purpose. Albeit the programmers tell me that when iPhoto 7 is released that this feature might be expanded upon

Finding your images again – that’s what its all about
After you’ve spent all that time to add keywords, what’s the benefit? Well, for one you can search quickly within iPhoto. Type in what you are looking for and you will find it. That’s a first for me in iPhoto and I still get very excited about it. Remember I never tagged, because iPhoto had such a horrible keyword feature – now it is easy and in the few weeks that I have been using KeyWord Manager I have come to appreciate its ease of use and the speed with which you can do keywords. So much so that I am thinking of sitting down and index all 13612 images in my library.

But it gets better. Keyword Manager has a little circle to the right of every keyword, when you click it, it changes to a green “tick mark” and all the photos with the corresponding keyword show up. Hold down the option key when clicking and it will make it a red x. Why? Well, maybe you are looking for images from the Netherlands, but you don’t want any of windmills… browsing your images this way is very neat indeed.

FlickrExport will automatically select the keywords already assigned to your images – thus this is a perfect solution and to be quite honest it is far better than just using FlickrExport on its own..

Conclusion
Sweden has brought us lots of good things – Saunas, Ikea, Volvo, Saab, Astrid Lindgren… the list could go on – but Keyword Manager definitely impressing me much more than my Ikea desk or the Volvo I just can’t afford. I am not going to pretend that it brings me as much joy as the stories Astrid Lindgren has written, but for a software tool it is pretty awesome.

It does something I would have expected Apple to have implemented themselves, but since they failed to do so, I want to judge the product on its own merit.

Does it do what it sets out to? – Yes, superbly I may add
Does it integrate well into iPhoto? – Absolutely, you wouldn’t know it is a Plugin
Does it integrate well in my workflow? – It not only integrates well, but improves on it considerably
Are there any issues? – Well iPhoto 7 might come out and have the very same functionality

MyMac.com Rating: 5 out of 5

I was hesitant to give it a full score – after all €19 isn’t precisely cheap (iPhoto comes at €79 in a package with lots of other great products). But then again I do believe it greatly enhances iPhoto, so much so, that I believe I wouldn’t want to do without it and I might be waiting to upgrade to iPhoto 07, when it comes out, unless it is compatible with this tool first.

System Requirement
Mac OS X 10.4
iPhoto 06 (iLife ’06)
Universal Binary


Canon EOS 30D: Guide to Digital Photography
by David D. Busch

270 pages
Thomson Course Technology Press
ISBN 978-1-59863-336-8
$29.99 US, $40.95 CN

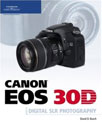
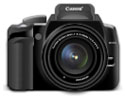
When it comes to books about digital photography, Thomson Press is a sure bet for both beginner and experienced photographers. Their photography books are typically well illustrated, designed, and written from a practical point of view. Their series includes basic guides for beginners and more advanced books on subjects like boudoir and nude photography; nature, sport, and food photography, and a recent one on best business practices for photographers.

Canon EOS 30D: Guide to Digital Photography, by prolific author and award winning photographer, David D. Busch is one of the most recent contributions to the Thomson’s digital photography series. This guide book is the type that I enjoy reading from cover to cover. Busch states upfront in the introduction to his book that he wanted to write a guide to one of Canon’s most popular and professional digital SLR cameras that did not resemble the manual that comes with the camera. And he certainly accomplishes that goal.

In the first three chapters, Busch does provide readers with a basic overview of the 30D’s features. These chapters read somewhat like the manual that comes the camera. If you’re not new to using the Canon 20D or 30D, you might even skip or scan over these first few chapters, though Busch’s writing style is lucid and conversational enough that you could read these and other chapters in the book almost like you’re reading a novel. Though this book is instructional, Busch actually talks to his readers, sharing both objective and personal knowledge about the 30D and digital photography in particular.

When purchasing a semi- or professional camera like the 30D, you typically don’t want to use it as a simple point-and-shoot camera. It would be a waste of money to ignore its advance features. So Busch’s aim is to advance your skills with the 30D, providing you greater control over the choices you want to make as a photographer.

Chapter 4 is where the book begins to get beyond the basic manual controls of the camera. Busch does a fine job in explaining the various concepts about good exposure, metering methods, program mode, aperture shutter priority, and basic use of the histogram. Understanding and practicing how to use these basic digital camera features is essential for capturing good and better photos.

Busch goes on to delve into more advance shooting techniques, including long and short exposure settings, auto-focus mode options, custom white balancing, and the 30D’s popular picture styles feature.

No doubt most Canon 30D shooters will want to get additional lenses to go with the camera. Busch provides a good solid chapter on the function of various Canon and third party lenses. He explains the limitations of lens crop factor for the 30D, over say the Canon 5D. Busch provides recommendations for all of Canon’s lenses, from the basic "walk around" lens to the highly expensive luxury "L" series lenses used by many pros. He of course talks about the benefits of using wide angle and telephoto lenses, and he rounds off his lens chapter with recommendations about lens add-ons and special features such as the sometimes useful and affordable telephoto extenders.

His chapter on lighting is somewhat lightweight, but if you have little background knowledge on the subject, his chapter makes for good introduction.

And finally if you’re using or plan to use Canon’s software applications that come with the camera, Busch provides what seems to be some very good information about how to make use them.

He ends up his book with a chapter on trouble shooting and sensor cleaning a Canon 30D.

All these chapters are well illustrated, with bold subheadings and a glossary and index in the back.

I’ve read through three different resources for using the Canon 30D, and along with the Magic Latern Guide to the Canon 30D, I recommend Busch’s guide above all others for good readability and depth of coverage. It’s not just a manual, it’s a book about Canon 30D digital photography.

MyMac.com Rating: 5 out of 5


Create a Digital Workflow for iPhoto

On February 14, 2007, in Uncategorized, by Bakari Chavanu


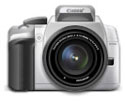
Anyone who regularly shoots digital photographs realizes just how easy it is to fill up a photo management system like Apple’s iPhoto with thousands of images. In fact, uploading, managing, and processing digital photos is probably the most difficult part of digital photography. Everyone loves to shoots pictures, but digital photos can easily fill up a hard drive just in same way many old school shutterbugs could fill up shoe boxes and plastic covered album pages.

If you’re using iPhoto, or any other photo management system, it’s very useful to develop and maintain a practical workflow for importing, organizing, processing, and outputting your digital images. Having a workflow can enable you to process photos faster and make photo management effectively manageable. I would never say that digital photo management is fun, but I would say that it’s a lot better than keeping your photos in shoe boxes.

First off, if better digital photo management is going to be one of your new year’s resolutions, I would suggest reading Peter Krogh’ The DAM Book: Digital Asset Management for Photographers (O’Reilly Press) for some very powerful suggestions about the subject. His methodology for photo management is largely for professional and prolific digital photographers, but it’s a good resource for anyone interested in the subject.

Though I’m moving away from iPhoto for my management system (now using Apple’s Aperture and Adobe’s Bridge program), I did create a workflow using iPhoto that helped me complete client projects in a much more effective way. My workflow for using iPhoto largely revolves around family and professional wedding and event digital photography. Because I shoot of a higher volume of professional photos than family projects, I used a couple of client projects to establish and literary document (with a typed outline and screen shots of the process) of my workflow. If I were still using iPhoto for wedding photography, I would regularly perfect my workflow to make it even more useful. I’m now developing the same process for using Aperture and Bridge.

Each user’s workflow will be different, based upon purpose, needs, resources, time, experience, and creativity. So in this article I will simply to provide general guidelines for creating a workflow using iPhoto 6 or a similar program.


Step 1: Deleting the Duds

The first part of digital photo management is to get rid of the duds. I try to delete as many photos from on my digital camera while I’m on a shoot. The most obvious duds might include:

Seriously out-of-focsed/blurry photos that can’t be repaired even in Photoshop C2
•The subjects in the photo are not appropriate. Maybe their eyes are closed, their back is turned toward the camera, or they are clearly shown in an unflattering light.
•The photo is simply uninteresting to you as a photographer. You know you’re not going to keep it after you upload it to your program.

The criteria for what is a dud is of course subjective, but it’s important that you don’t simply hang onto bad photos in your digital camera just because you shot them. Learn the features of deleting photos from you camera and use that feature regularly and wisely. This will not only save time, but it will make you feel better about the good and much better shots left on your digital card.


Step 2: Importing, Rating, and More Deleting

With iPhoto, there’s really only one way to import photos. The program essentially does the storing and labeling of photo files for you. It’s rather cumbersome to get your photos in iPhoto’s file system. But there are plenty things you have control over once you have your photos imported into the program.

After you import your photos into iPhoto, you should view them using the Play slide show feature. This can be easily done by pressing the Play button in the tool bar at the bottom of iPhoto. The is Play feature does not build a slide show that you can return to after you play it. It’s purpose is to provide you quick way to view your photos.

If you can’t see this Play feature, it’s because it’s hidden in the arrow. You don’t want to create an actual slide show at this point. So when you set up this Play feature, deselect the Automatic Ken Burns Effect, choose None for the transitions feature, and turn off the play music button. Deselecting these features will enable you to delete and rate photos a lot faster.

Rating Your Photos
As you run this Play slide show, simply click on the stars to rate your photos. You should have some sort of rationale for your rating method and try to be consistent with it. In my view, how you rate photos depends on what type of photography you do and what your purpose is for rating them. For example, for my wedding photography projects, I give higher ratings for photos that will be useful for a wedding album, slide show, and other forms of media projects for my clients. I know going in that most of my photos will be rated a 3, which means they’re good enough for 4×6 prints.

In fact, now that I’m using Aperture and Adobe Bridge, I batch rate all my imported photos with a 3 star rating and then raise or lower those ratings as I process through the photos. You can do the same with iPhoto. Before you run the slide show, select all the photos you want to rate, control or right click on a selected photo and give them all a 3 star rating. When you view these selected rated photos in the slide show format, you can simply increase or decrease the rating.

While rating photos in the slide show format, you can also delete unwanted photos by clicking the trash can icon, or you can give all the photos you’re thinking about deleting a rating of 1 or 2. Either way, iPhoto will not permanently delete your images until you’re ready to empty the trash can. The important thing is to reduce the amount of photos you’re importing into your hard drive, but at the same not be so hard on yourself whereby you delete photos that you later wish you hadn’t.


Step 3: Backup

Backing up and archiving photos is to me one of the weaknesses aspects of my current workflow program. I don’t like burning photos to DVDs, though I typically do so to be on the safe side. I prefer to simply have my photos backed up to external hard drives each night using the .mac Backup system. There should be some sort of plan and purpose to backing up and archiving your photos. I back up my family photos on a DVD disc about every four to six months depending on how much shooting I’ve done. These files are also backed up to an external hard drive. Additionally, because I regularly post many of my favorite images on my Flickr account, I view that as another way to archive my favorite photos, especially beyond my home computer.


Step 4: Titling and Keywording

The key to effective digital management is being able to find your photos when you need them for various purposes. iPhoto makes that process extremely easy.

Before or after you’ve deleted unwanted photos, you want to give them a title according to their subject. Because the metadata (the date and time the photo was taken, for example) are included in each file, renaming and keywording these files won’t do any harm. (By the way, it’s important to make sure the time and date stamp on your camera is always correct and maintained. Though you can change date and time metadata after you import files in your computer, it saves you time if it’s recorded correctly before you import. I’ll explain below why even the correct time is important when using iPhoto.)

Keywords, Ratings, and Smart Albums
For my wedding shoots, I have a set of 15 keywords I use for each project. I title all the photos with my clients’ first name. I then keyword groups of photos accordingly, e.g. ceremony, Bride, Bride&Groom, Family Portraits, cake cutting. I use these key worded photos to set up a smart albums—my most favored feature in iPhoto and Aperture. Using the title and keywords, I can set up smart albums that get updated automatically as I change the rating or keywords of various files. I even crate a smart album for client photos that are not keyworded or rated just to make sure I haven’t looked over some photos in the process. When you shoot several hundred to a thousand photos at a time, using the smart folder feature is a huge time saver.

You should always use Smart Albums that hold your best five star rated photos and another album for lowest rated photos that you might end up dumping, depending what you plan to do with them after they’re processed.

If you think Smart Albums (File>New Smart Album From Selection) are too time consuming to create, be sure to at least manually select groups of photos and put them in a regular album (File>New Album From Selection.) iPhoto comes installed with default albums, such as one for the Last Roll of photos you imported into the system, but you need to take advantage of creating specifically labeled albums and folders in order to find photos and keep them grouped together. It’s a serious waste of time to have several "untitled" folders and albums that you have to go back and click on to discover their content.


Step 5: A Hierarchy of Folders

Creating a filing folder system is about much fun as making up your bed, but making use of iPhoto’s folders features can save you lots of time when managing and sorting through photos.

I recommend creating folders to hold sub-groups of albums. In terms of my wedding projects, I create one folder with the names of a wedding client. That folder will house all the smart albums, regular albums, slide show, book and calendar layouts associated with each client. After I finish a clients’ job, I move their folder in to another folder titled Archives. I leave these folders there for a few months, but I also archive those photos on a DVD where they will contain all their adjustments, ratings, and keywords. Aperture has more robust archiving features in this regard.

So basically I try to keep no more than three or four holding folders and a few albums on the left side panel of iPhoto at any give time. This hierarchy enables me to get a subfolders a lot quicker and to keep the left side of iPhoto less crowded long rows of albums and projects. The hierarchy will be different of course for each user, but the important thing is to create a structure that helps you get through projects without a lot of fuss. If you leave folders or album untitled it will simply mean having to click on the several times to discover their contents.

Step 6: Image Editing
While iPhoto has some very useful editing and image adjustment or improvement tools, it’s not a very good program for digital power shooters. Simply put, iPhoto lacks a batch processing features found in Aperture and Adobe Bridge. But again if you’re not a high volume shooter or professional photographer, this shouldn’t stop you from taking advantage of iPhoto.

In terms of batch processing, I wrote a short article about an excellent third party program called iPhoto Batch Enhancer which is useful if you have small jobs. I used it several times before moving on to Aperture.


Sort by Date

Another way to sometimes speed up the process of making image adjustments in iPhoto is to sort photos by date. By doing this, photos get grouped together based the date and time they were taken. Photos that were taken within a few seconds or sometimes even minutes of one another will often share the same lighting and exposure conditions. This means that if you use iPhoto Batch Enhancer, you can copy the image adjustments you made to one photo and apply them to one or more others. Even without the Batch Enhancer, though, you still can take advantage of sorting by date as you edit, for you can also compare photos and manually make similar adjustments where needed.

Making Image Adjustment
There’s not much to an image adjustment workflow in iPhoto. But when I use the program, I basically work from the bottom up on the Adjust palette(Levels>Exposure>Sharpness>Temperature and Saturation> and Contrast/Brightness only if needed.) Before using these adjustments, I also click the magic Enhance button to see what effect it will have. Sometimes it really does a surprisingly effective down and dirty job. I avoid using the Brightness/Contrast feature mainly because the Levels and Exposure adjustments do a better job. You’ll notice that when you make changes using the Brightness/Contrast adjustments, those changes are also made in Levels and Exposure at the same time.

Many photographers will say that Sharpening should be done last, but I find it helpful to sharpen a little before adjusting for saturation or tone. A little sharpening creates more clarity in the photos when making other adjustments.

Step 7: Do Something with Your Digital Photos
Now comes the fun part of the digital photo workflow: actually doing creative things with your images. For many digital shooters, their images rarely make it out of the camera, or at best they make 4×6 prints and that’s the end of the process.

If you’re shooting photos to make money, it’s quite easy to know what your output will be. The goal is sell your work, be it in the form of single photos, albums, or archival DVDs.

But as part of Apple’s iLife programs, iPhoto was equally designed as a powerful, multimedia output application. The system is set up to easily make slide shows, photo books, calendars, and greeting cards. The Share Menu is just about that, sharing your work by emailing or exporting your work to for website display are as part of a multimedia DVD project. Again, Apple made this sharing, output process very clean intuitive. Nearly all of Apple’s other multimedia programs connect directly to iPhoto. (I wish the same were true for Adobe’s Bridge.) Even Apple’s professional photo management program works with her now little sister, iPhoto. (The best resource for getting these and other type of image process done in iPhoto is David Pogue and Derrick Story’s iPhoto 6: The Missing Manual (Pogue Press/O’Reilly.)

So there’s no reason not extend the workflow process and create say an iDVD slide show of last year’s family photos or a professional looking calendar of selected for your son’s soccer team. The more you share your photos, the more you’re realize the power of a good workflow process. It’s really that simple.

Last Words
Finally, before closing this article, I must add that digital workflow management can seem very right brain and tedious at times. Applications constantly change, and there’s always something you wish an application would do to make the workflow process easier or more productive. But as you begin to figure out and develop a workflow process for your individual needs and purposes, you can begin to make wiser decisions about new applications or application updates you will want. You can make decisions about whether iPhoto addresses all you needs or whether Adobe Bridge is more suitable to your needs as a RAW photo shooter. Whatever the case, I predict the digital workflow process will only get better and more exciting for digital photographers because that’s what good application programs and workflow processes do. They help users get work done effectively in a shorter and shorter amount of time.


Thumbn@ils 37

On February 14, 2007, in Uncategorized, by Donny Yankellow


DRM – a Disaster Regarding Music

On February 13, 2007, in Uncategorized, by Knot Gullible

Music is something shared by friends.
In your lonely room you listen to your tunes. Certain songs strike a chord somewhere inside you.

You share these songs with your friends. You play them when you get together. You tell them of your newfound gem. You look up a band’s website together and see what else they’ve done. This is a social interaction . . . an age-old bonding ritual. Mom did it with CDs. Her mother did it with Cassettes. Her mother did it with 45s. Her mother did it with 78s. Her mother did it with sheet music and a piano.

This is how music GETS to be popular. This is the mechanism by which music is found by an individual and subsequently purchased.

Boys do it. Girls do it.

Boys play tunes on their car radios and roll down the windows to Impress others with their subwoofers.
Girls get together and share feelings.

Boys boast of 23,840 tunes on their ipods. (More than is on any of his friends’? He wins!)
Girls know the words to every song on theirs.

Peeps, I’m leading you someplace with all this.

That place is here:
The proponents of DRM are music industry executives and lawyers.
Their goal is to keep Junior from getting 23,000 tunes. (Not that he listens to most of them)
Their goal is to keep me from putting an MP3 on a thumb drive and sharing it with a friend.
They are guys grown up.

They do not understand that I bought a CD BECAUSE I got a song from a friend.

DRM creates a dead end and inhibits the propagation of a song’s popularity, thereby decreasing the number of sales. Exactly opposite of the music industry’s intention.

Does anyone listen to radio any more?

Those who embrace the new era of music sharing will survive.

DRM = a Disaster Regarding Music.


Macspiration 72 – Sharing Files With .Mac

On February 13, 2007, in Uncategorized, by Donny Yankellow


Do you have to send a large file to someone and it is too large for email? If you are a .Mac member you can easily do this with iDisk and the Public folder, and it’s really easy.

First you need to get to your iDisk folders. To do this use the “Go” menu from the Finder, and choose “iDisk”. Next, choose “My iDisk.” This will open your iDisk window where you will see a folder called Public.

Open the Public folder. Now drag and drop the files you need to transfer into the public folder. A progress bar will appear, and when it disappears your file is in your public folder.

Now, anyone with your .Mac member name can access you public folder.

All they have to do is use the same “Go” menu, but instead of choosing “My iDisk” they would choose “Other User’s Public Folder.” A window will appear asking for the .Mac username. The Public folder will then open, and the needed files can be dragged and dropped from the folder to the person’s computer.

You can access files from other .Mac members in this manner as well.

If the recipient is on a Windows computer, give the person this url: http://idisk.mac.com/-Public. Replace with your .Mac name. If the person is asked for a username and password, they should use public.

If you are on a Windows computer and need to add a file to your iDisk (public or private folders) you can even do that. Directions for accessing your iDisk from a Windows computer can be found here: http://www.mac.com/1/learningcenter/Modules/dmStoringFiles_t3.html.

Remember, anything in your iDisk’s public folder can be accessed by anyone with your .Mac username. DO NOT place private documents in your public folder!


Download the show here

John Nemo talks with author Joli Ballew about her new Do-It-Yourself Mac Projects book. Robert reviews two Logitech products, the diNovo Edge keyboard and the MX Revolution mouse. David Cohen talks more on Virtualization on your Mac, while the round-table discussions with Tim, Chad, and Guy hit on many different subjects.


Digg Us!

This podcast is sponsored by SmallDog.com, and Inno-Tech.com

Leave audio feedback by calling 801-938-5559
Get the show from these links:

iTunes Link


Podcast-only RSS Feed

Links from the show

Logitech diNovo Edge
Logitech MX Revolution
CNET Do-It-Yourself Mac Projects
Degunking Your Mac, Tiger Edition
Microsoft Article on speeding up Virtual PC
Windows Optimisation Guides
OverclockersClub
Beemers Windows Tips


Looking for something?

Use the form below to search the site:

Still not finding what you're looking for? Drop a comment on a post or contact us so we can take care of it!