
![]()
Joe Kissell’s new ebook, Take Control of Running Windows on a Mac is the best book so far for the average Mac user who wants to jump into the world of running PC applications. He covers the pros and cons of Apple’s Boot Camp, Parallels Desktop, and the Q emulator.
Month: May 2006
Take Control of Running Windows on a Mac
Digital Religion
With all this high-tech lifestyle surrounding us, we tend to spend more time in front of computer screens then we spend praying. It could reach a point where it would be easier to convince anyone to convert to a new religion rather then switch to a new operating system.
Macspiration 37 – iTunes Tips
This week I’m going to give you a few tips for using iTunes. Just like my normal Quick Tips, these are short tips that are too short for their own article, but still useful.
Read MoreWeekend Archive – Bits and Pieces – My Mac Magazine, July 1996

Bits and Pieces was a monthly column that featured a look at what the PC Press was writing about Apple. This week, we look back ten years (July 1996) and learn what PCWeek was saying, Apple at Comdex Chicago, and more. Written by Grand Cassiday. Read it HERE.
Kibbles and Bytes – 467

MacBook or MacBook Pro, All About iDisk, Google Me This, Soapbox, New Products, Specials
Timbuktu Pro 8.6
Review
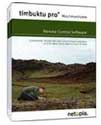
For those unfamiliar with Timbuktu, let me give you the basics. It is remote control software, meaning you use it to either take control of another computer (Mac or PC, but for this review, I’m only looking at the Macintosh version) or you allow someone else to take control of your machine. Sounds simple, and it is. But there is much more to it than that.
MyMac Podcast #83
Marketcircle and GeeThree
![]()
Tim and Chad look at the latest Mac news, including teachers in Scottish teachers wanting to ban the iPod, anti-iPod websites, the Creative lawsuit, Nike and Apple, and more. Guy Serle busts out with a new Dashboard Minute, while Nemo reviews the OtterBox. Plus, we talk to Alykhan Jetha, CEO of Marketcircle. The contest returns! Listen to find out how you can win a copy of Volume 9 and 10 of Slick Transitions and Effects from GeeThree.com.
Download the show
Direct MP3 Download
iTunes Music Store
Podcast RSS-Only Feed
Check out our listings at YaHoo, Podcast Pickle, or Podcast Alley.
The show is sponsored by SmallDog.com , RamJet.com, and Inno-Tech.com.Want to sponsor the show? Email us.
Leave audio feedback – 1-801-938-5559
Links from the show:
MarketCircle
GeeThree.com
MacMinute.com
iDont.com (But really, no reason to go there)
VLC Media Player
Dashboard Minute links
Sing that iTune
xCuts
No Snooze Reviews link
OtterBox
ABT iJet for Nano FM
Review
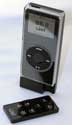
If you are in the market for a wireless remote and/or an FM transmitter for your iPod Nano, look no further than the iJet for Nano FM by ABT. The iJet for Nano FM is both of these accessories in one, and to top it off it is also a protective case for your Nano.
Macspiration 36
Refurbished Macs and the Verbose Mode Dilemma

This Macspiration is going to be a little different – More of a story with a solution to a problem. This may not be a common problem, but I have seen it more than once, which makes me think there are more people out there with the same experience.
Read MoreThumbn@ils 24 – New Apple Store New York

Kibbles and Bytes – 466
The All-New MacBook, Awesome Apple Tech Suggestions, iLife ’06 Upgrades, Saft Improves Safari, Every Small Business Should Use a Mac
Photoshop Filter Effects Encyclopedia
The Hands-on Desktop Reference for Digital Photographers
Book Review
Photoshop Filter Effects Encyclopedia is an impressive resource for getting the most out of Photoshop’s extensive collection of filters. The 109 built-in filters are presented, grouped into 13 categories, and include the new additions for CS2.
Total Training for Adobe Go Live CS2
Review
Watching a Total Training DVD takes you on a wild ride. The graphics are fun and it is a professional series. I quite enjoyed Lynn Grillo and her mode of instruction. She was clear, fun, and precise in showing me each step in GoLive CS2.
MyMac Podcast #82
MacBook – Jansport
![]()
The MacBook takes center stage this week on the podcast. Tim and Chad look over the specs, price, and more. We also announce the winner of the Jansport.com Audio Livewire Backpack. And as Tim guessed, we were stood up in our interview segment this week. Sgt. Perry drops by with his opinion on the new Glossy Screen on the MacBook, as well as Nemo with No Snooze Review and Guy’s Dashboard Minute.
Leave audio feedback – 1-801-938-5559
Download the show
Direct MP3 Download
iTunes Music Store
Podcast RSS-Only Feed
Check out our listings at YaHoo, Podcast Pickle, or Podcast Alley.
The show is sponsored by SmallDog.com and Inno-Tech.com. Want to sponsor the show? Email us.
Links:
JanSports.com
MacMinute.com
PlayListMag
Dashboard Minute Links
QuExp
Digg Widget
Snooze Links
MaxProtect II
Laptop Sleeve
MacBook Pro (Rev. E)
Product Name: MacBook Pro (Rev. E) Company: Apple URL: http://www.apple.com/macbookpro/ Category: Laptop Price: $1999 Specifications: 1.83 GHz 1.5 GB RAM 80 GB Hard Drive
Read MoreLapvantage Loft
Review
If you need a stand to get your laptop, PowerBook, or MacBook Pro up and off your desktop, look no further than the Lapvantage Loft.
iDefrag 1.2.2
Review
To Defrag or not to Defrag, that is the question. Or at least the reason for this review.
Macspiration 35
Sharing Text Files Between Computers

Have you ever sent a word processing document to another person, but they could not open the file? If so, this installment of Macspiration should be able to help you out.
Kibbles and Bytes – 465
Mac Maintenance Checklist, Pre-Install XP on Intel Macs, MacSpotting Redux, 11 Favorite Address Book Tips and Tricks, New Products
Charge While You Listen – DLO’s TransDock micro
Review
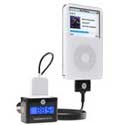
One of the first features that drew me to this iPod gadget was the battery charger. I listen my iPod (using a cassette player adapter) mostly in my car and I can’t count how many times the battery has come close to running down or out because I hadn’t charged it for several days. So when I saw that DLO’s TransDock micro would charge my 4th generation iPod while it broadcast my music , I wanted to check out its other features as a possible upgrade to my current transmitter.
Read More