
Voyager S3 External HD Dock
Company: Other World Computing
Price: $37.99
NewerTech offers a variety of hard drive docking solutions for those of us who prefer to use bare hard drives for external storage. These docks also come in handy for those who need access to a hard drive they pulled out of a Mac or Windows machine.
MyMac’s David Cohen reviewed the NewerTech Voyager Q Hard Drive dock back in September of 2009.
While the functionality for the NewerTech Voyager S3 is basically the same as the Q Hard Drive dock there are interface and hardware differences in the S3 model. These docking solutions only work with Serial ATA (SATA) drives up to 4.0 TB.
First, let’s discuss what these docking units are actually used for.
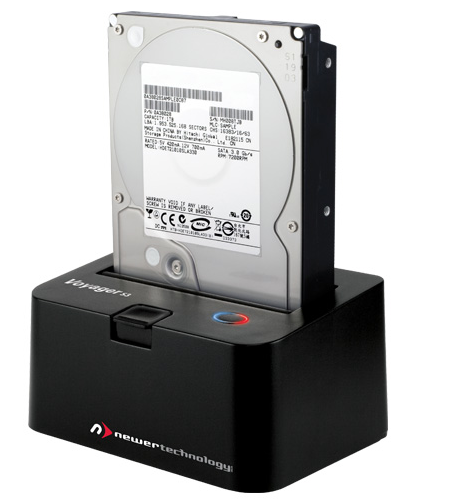
David describes these docking units as “Looking like a small digital toaster†and I agree that is exactly what they look like. The inserted drives do stick out of the top, so unlike a toaster the drive does not disappear inside of them.
If you’ve been using computers for a while and you’ve ever upgraded or replaced a hard drive in either a desktop or laptop system there is always the inevitable question of what to do with the drive you pulled out of your computer. If the drive was upgraded you could use the old drive for external storage by either buying an external enclosure, or if you have many of these drives like I do, you buy one of these NewerTech Docking solutions.
The cost of empty external enclosures can add up over time and then there is the problem of where do you keep them. I know because before the advent of these docking solutions my desk was scattered with hard drive enclosures. Also, I have been able to resurrect “damaged†drives by reformatting them in a Voyager Dock, which is something you can’t do if you only have a single drive slot inside your computer.
The S3 unit itself:
The S3 differs from the Q dock in some significant features. While the Q docks have multiple interfaces (USB 3, eSATA, FW 800, FW 400) the S3 docks have a single USB 3 interface which is backward compatible with USB 2. The Voyager S3 is also $40 cheaper than the Q model. Inside the S3 box you will find the docking unit, a power cable, and a USB 3/USB 2 cable.
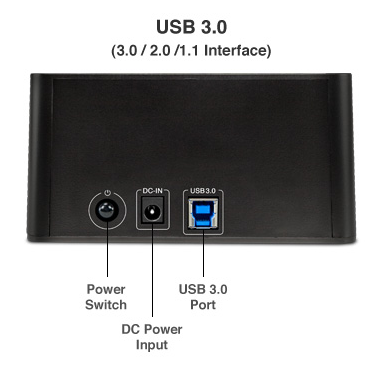
On the back of the unit you will find the on/off button, the jack for the power cord, and the USB 2/3 plug. Looking at the unit from the front there is a hard drive eject button and an activity LED that glows blue when the unit is powered up and flashes red as any inserted drive is being written to.

Using the S3:
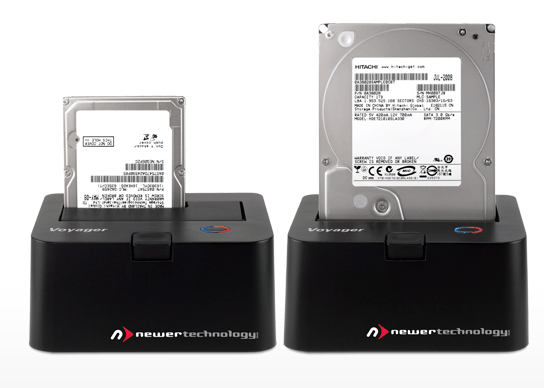
Looking down into the S3 there is a hinged flap that folds down when you push a 3.5†SATA drive into the slot. You have to make sure you line up the SATA connector on the hard drive with the connector inside the S3. This is rather easy and the drive smoothly connects when pressed down. If you mount a 2.5†drive the hinged flap stays in place as there is a slot in the flap that allows 2.5†drives to simply be pressed into the same S3 internal connector that is used for the larger drive.
Once that is accomplished you push your drive into the slot and press the power switch to turn the unit on. If you have a formatted drive, the drive icon appears on your Mac desktop just like external drives, DVDs, CDs, or your own internal drive. There are no drivers required, nothing to install. If the drive is not formatted your Mac will recognize this and ask you if you’d like to format the drive. Using the S3 is that easy.
Other observations:
In my house there can be up to four laptop Macs and my Mac Pro at any one time. Two of those laptops are on college campuses but when they come home to visit I back them up to external bare SATA hard drives using the S3. I use Super Duper! Â to back up computers in my house and I have this utility set up to make incremental back ups and then boot from the back up. I do this to make sure I actually CAN boot up from the back up because this is the situation back ups are created for: so you can boot off of them if your main hard drive should fail, and it will fail. See my reference (Whoops!) below.
When I use my NewerTech Q dock for these back ups, the bare drive inserted into the unit boots right up after Super Duper! finishes running my back up. However, when using the S3 on a new 2012 MacBook Pro running the latest version of Mountain Lion (OS 10.8.x) I find the drive will not boot up after Super Duper! finishes creating the clone drive. This may have something to do with the USB 3 connection or some bug in the Super Duper! program. I can not confirm which is causing the automatic re-boot to fail. The drive does boot up after I tell Super Duper! to re-boot, it just doesn’t do it automatically. I have contacted Dave Nanian at Shirt Pocket about this problem and I will be adding Super Duper! comments later as we explore whether the issue is being caused by Super Duper! or the S3.
Other than this minor glitch the S3 performs as well as the Q docks and at a cheaper price.
If you do own bare hard drives and you don’t have a place to store them, I highly recommend the NewerTech “StoraDrive†storage cases I reviewed back in January of last year. Review Link.
In closing I highly recommend that you own either an S3 or a Q dock if you are the type of person who has bare hard drives laying around your desk. They are also invaluable if you have to boot up from something other than your Mac’s internal hard drive. During a recent hard drive failure, that I had the displeasure of having to work through, (See Whoops!), I had a successful conclusion because I had a Q drive to fall back on.
MyMac Review Rating is 9 out of 10
Leave a Reply
You must be logged in to post a comment.