
I don’t know why but with iPhoto 08 Apple made what was an easy printing process into something complicated. Straight forward printing is still easy, but doing something like fitting a large image into a size is a mystery-unless you have some help. This Macspiration will help solve some of those mysteries.
Choosing to print an image in iPhoto 08 presents you with the screen below. It is pretty straight forward. You choose what you want to print and print. Then you get sent to the standard print window. One thing to note here is the standard 8×10 photo size is missing from the print sizes. You have to create that and other missing sizes from the “Custom†option in that pull down menu.
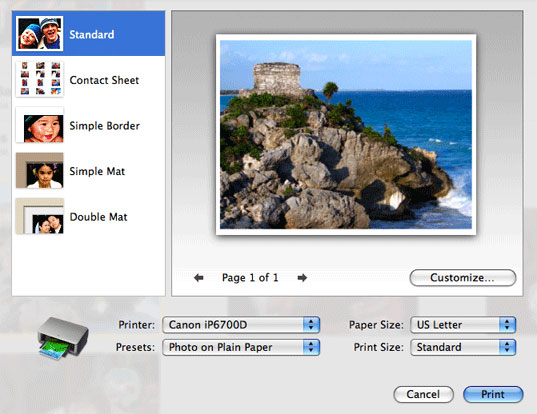
Important note #1: If you have multiple printers make sure you have the correct printer selected on this screen. You also have to choose the correct printer on the actual print screen, after choosing “Print,†but not choosing it here will cause layout and formatting errors.
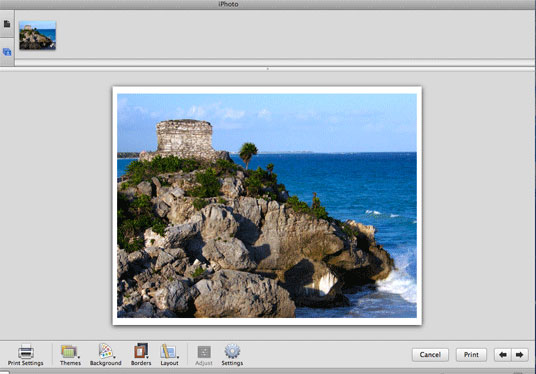
If you want more printing options you have to click the customize button. On the next screen you can choose the color of the mat (if you choose one), the type of mat, and the layout if you are printing more than one photo on a page. This is very similar to layouts if you make a book in iPhoto.
All of the above is not a mystery. The mystery or mysteries appear in what is missing from these two screens. What is missing is a button for fitting a large photo into a smaller dimension, or flipping a photo for a mirror image, or a button for removing a photo from a page. All of these are found by control clicking the photo you want to apply one of these options to. By control clicking you get a menu with these options and a couple of other options.
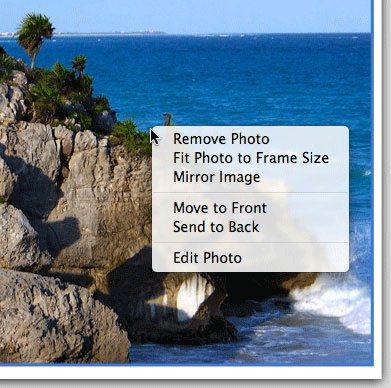
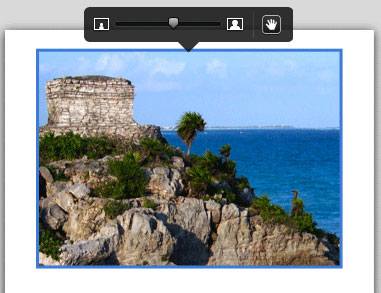
By clicking the photo you will get a resize slider to zoom in or out of a photo and only print the portion you want. You can also click and drag the zoomed photo to fit in the frame the way you want it to. Again, this is similar to the process of designing a book in iPhoto.
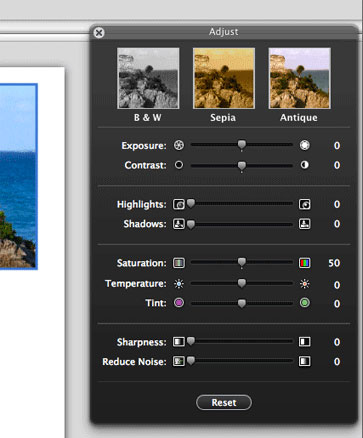
You can also click a photo and click “Adjust†to do some last minute adjustments to color and exposure before printing.
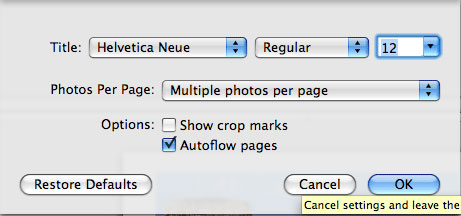
Here’s another mystery- What happened to the options to print one photo on a page, multiple photos on a page, or duplicates on a page? These are found by clicking the “Settings†button.
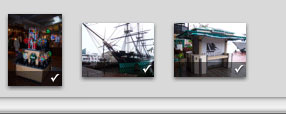
Important note #2: If you are printing multiple images you must apply any settings, like fit to frame, to each photo. Applying the setting to one photo will not apply it to the others. On top of the window will be a frame showing all of your photos you are printing. Clicking each one will allow you to edit them. You can also switch photos by using the arrow keys on your keyboard or the arrows at the bottom right of the screen.
So that is all the mystery answers I have for you today.
I have one mystery which is unsolved. If you can provide a solution I would appreciate it. If you print from the customize screen, that screen still remains open after you print. You have to click “Cancel†to leave that part of iPhoto, or click Events, or and album. However, unless you click cancel the chosen photo or photos appear in a printing album in the Library frame if iPhoto. Why is this? Why won’t the print job just disappear after you choose to print it? Why do you have to click “Cancel�
That’s my final mystery. If you have an answer post it below along with any comments or questions about the above.
Leave a Reply
You must be logged in to post a comment.