
With Mac OS X 10.5 (a.k.a. Leopard) Apple has introduced a very nice new feature called “back to my macâ€. For those with a .mac account, you can now setup a secure way of accessing your Mac from on the road. Useful? Oh yes it is.
However as usual there are two problems, firstly you need Mac OS X 10.5, which many of us haven’t purchased yet. Secondly, you need a .mac subscription, which I am being told is very useful, but so far I haven’t had a need for.
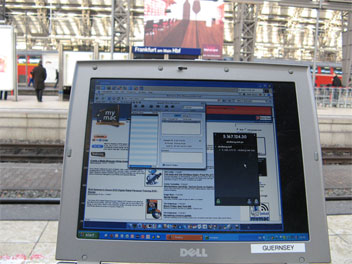
So let’s built a similar feature to “Back To My Macâ€, which not only will work without a .mac account, but will also be cross-platform compatible. For the lack of a mobile Mac on my end, I have chosen to demonstrate this feature using my Dell laptop.
Basically we will be accessing the Remote Desktop sharing ability of Mac OS X 10.4 with a VNC client. Chicken of the VNC will do the trick on a Mac, Ultr@VNC is my preferred solution on a Windows XP PC.
Within your home network, this really would be all that is needed, but the reality for most of us is, that we are behind a firewall built into our cable or dsl modems / routers. These are usually NAT (Network Address Translation) devices and for the VNC connection to be established, you’d need to poke a hole in your firewall (port forwarding). As you might be using someone else’s internet connection, adding a port forwarding rule to their firewall is out of the question.
This is where Hamachi comes in. Hamachi uses a server-assisted NAT-traversal technique, which is supposed to work in 95% of all cases. But the NAT-traversal technique wouldn’t do us any favors, if there wasn’t VPN (Virtual Private Network) like techniques that are added to the product, giving you what in effect could be called your own private VPN.
Hamachi is mostly used by serious gamers, but it will work just fine for our purposes here.
What you’ll need on your Mac:
Mac OS X 10.4 (or higher)
HamachiX
Chicken of the VNC
What you’ll need on your PC:
Windows XP or later
Hamachi
Ultr@VNC
Setting it all up
The setup process won’t take long. Basically what you’ll do is this:
i. Download, Install and Configure Hamachi X
ii. Setup Remote Desktop Access in System Preferences
iii. Make changes to the Energy Saver settings in System Preferences
To download Hamachi X go to www.hamachix.com and follow the link provided. At this time the current version is 0.9 (1B3). Once you’ve mounted the disk image, drag the Hamachi X logo to your application folder, really the usual stuff.
When you launch Hamchi X for the first time it will alert you that you lack certain system files for Hamachi to work. OK this notice and Hamachi X will install all the necessary drivers for you.
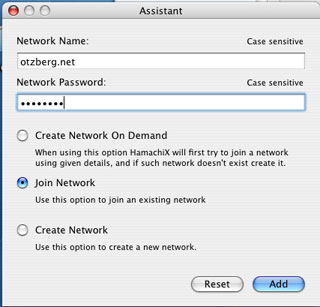
The next thing you need to do is to go to Preferences and give yourself a nickname, by default you are going to be called anonymous, which for larger networks doesn’t make things easier. Now you will have to create your own Hamachi network. Simply enter a Network Name and a Network Password and click ‘Add’. To make the entire construction a bit more secure, use a strong password.
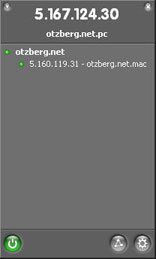
In the screenshot below, you’ll see me join a network called “otzberg.netâ€, which I had previously created.
Once the network has been setup, you are virtually done. To make the entire process happen automatic in future, ensure that in Preferences you selected to automatically connect to Hamach Rootserver at Startup. In addition you might want to right click the icon in your dock to set Hamachi X to Open at Login.
The reason for these automatic settings it that you will not want to have to interact with this at all and you have just accomplished this.
Your next task is to go to System Preferences and click the Sharing icon. Here you want to go ahead and tick the Apple Remote Desktop icon and then click the Access Privileges. All you need to do is enter a password to be used for VNC connections, again pick a strong password and ideally one that differs from the password for your network.
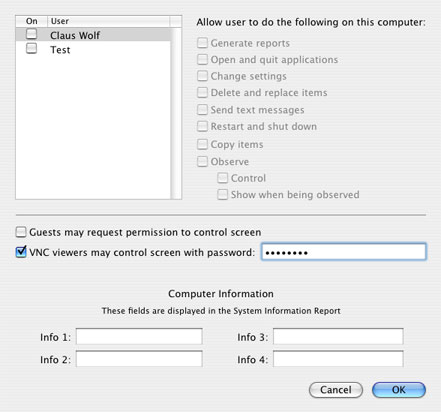
Nothing more is needed here – you are virtually done.
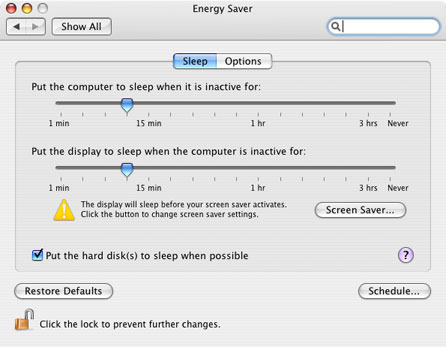
The next stop for you is to click on the Energy Saver preference pane, as you need to stop your computer from sleeping. This is the one area that I consider problematic, but you can’t help it. If your computer is “sleepingâ€, it will not wake up for the VNC request later on, therefore a must have step.
The outstanding scheduling abilities here, allow you to wake your computer automatically and shut it off – this will help you save energy. Let’s say you are going to need access only in a set time window – make the appropriate settings and your PC will power up and power down automatically. Almost like magic. The minimum change here is to stop your computer from sleeping by moving the slider all the way to “neverâ€.
Unless you consider this solution a remote support solution, in that case, it is fine to leave the Energy Saver settings as they are.
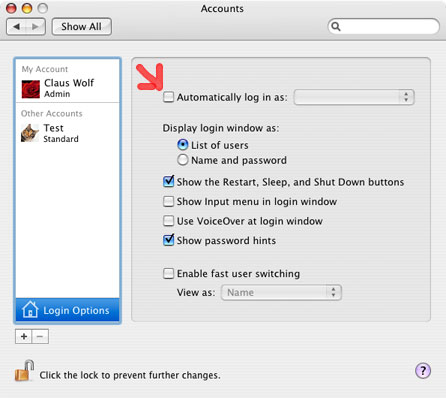
A quick notice, you need to enable auto login for your account, otherwise the computer will wake, but not log in and that surely won’t help you. So remember to enable auto login – you do the Accounts Preference Pane in the Login Options.
But now you are finally done – all of this will take considerably less than 30 minutes.
Now over to my Windows PC and I will make it short. Go to https://secure.logmein.com/products/hamachi/vpn.asp and download the software. When you install it make sure to select the basic Hamachi version, you really do not need the premium version. Once you launch Hamachi for the first time, you will be pleasantly surprised, the guys at Hamachi did a fabulous job creating a simple to use application, that has a helpful guide telling you what to do.
While I think that Hamachi X does a fine job, the Windows version does an excellent job and is very stylish.
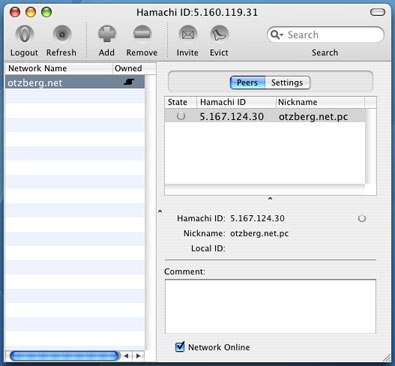
Once up and running, simply connect to your previously setup network – you should see your Mac’s alter ego listed with a green dot indicating your online status. For testing purposes you can actually do this from behind the same NAT device.
Now it is time to install Ultr@VNC, you can download it from http://www.uvnc.com/. You should pay good attention to the selections and options during the install process, as it will determine what background services will be running later on.
Ultr@VNC comes with both a client (green logo) and a server (blue logo). If you want remote access from your Mac to the Windows PC, you will want to setup the server as well and have it run in the background. If this isn’t something you desire, go ahead and just use the client.
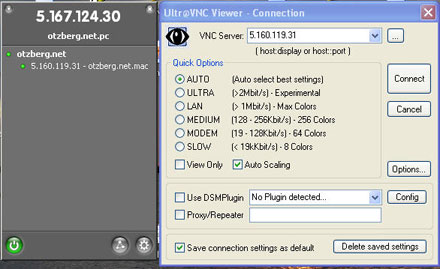
You will be asked for a VNC Server – take a look at your Hamachi client and identify your Mac – in my case (see image below) the address is 5.160.119.31 – simply enter it, nothing else is important. You want to have the client automatically select the best settings for connection speeds and select Auto Scaling.
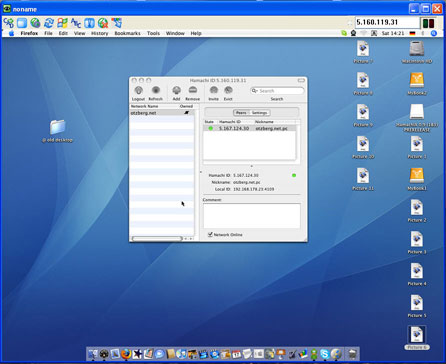
Once you click on Connect, it might take a second or two for your Mac to respond with a password request, type in the password, you have set a bit further up and you should be seeing your Mac’s desktop in full glory.
If you use two Macs, basically repeat the steps outlined for the Mac above, but use Chicken of the VNC to make the connection. It works quite well and I wish you good luck with implementing a “Back to your mac – for the rest of usâ€.
From looking at the release notes of Hamachi X, it is suggested that sometimes Intel based Macs might have trouble with the solution. Not having an Intel Mac myself, I can not comment on this – but I have read enough reports saying that things work just fine.
Lastly, this could be a great solution to provide remote help to your friends and family, rather than tell them to click that icon, you could just show them.
To show you that it does indeed work, I took a photo a Frankfurt am Main Train Station with me controlling my Mac from home.
Leave a Reply
You must be logged in to post a comment.