
![]()
Welcome back. In part two of “Using iWeb 08â€, we’ll look at the main screen icons, and what they do. Check out part 1 here.
iWeb’s Basic Interface
Apple likes to create software with as many on-screen buttons as possible. This makes it easy to find commonly used functions and speeds up the workflow. The iWeb interface is no exception. While there are certainly many things you’ll need to do via the menu bar commands (or through keyboard shortcuts), you’ll find that most of the time you’ll be using the various icons or on-screen windows to accomplish your tasks.
The one you’ll use most often will be the “Inspectorâ€, but we’ll get to that later. In this part we’ll talk about the icons on the bottom of your screen. Each one adds some functionality or allows easy insertion for common elements on to your web page.

Themes
You’ve seen them from when you first start up iWeb, but just in case you didn’t read the 1st part, here it is again. The first button all the way over to the right at the bottom is “Themesâ€.

You can select a different theme (from iWeb’s 26 or so choices) for the page that is currently displayed. How it will look depends upon the type of page in question, but keep in mind that this doesn’t change any of your other pages. You’ll need to go to each page in turn and select the new theme to make them identical if that’s what you want to do. If you’ve made some changes to the overall layout, the results may be either amusing or disturbing. Don’t expect all the formatting you’ve done beforehand to remain exactly where you placed it.
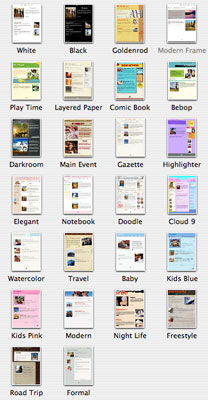
You could naturally choose a different theme for every page on your site, but in this way lies MADNESS! If you go this route, please don’t send me a link as my eyesight is bad enough already.
Your best bet is to choose a theme before you start wisely, or except that changing your mind later will have consequences.
Text Box
It puts a Text Box on your currently viewed page. Once it’s there, move it to where you want some text to go. What? You expected some long-winded explanation?
Shapes
Another easy one. Want a shape like an arrow or square amongst others? Here’s where they are. Select one and move it where it’s needed. It doesn’t get any easier than that.

Web Widgets
Web Widgets are all new for iWeb 2. Frankly this alone almost makes iWeb worth getting for easy web page making. Prior to adding Web Widgets, the only way to add things like Google Ads or YouTube videos was to do it through third-party software that you had to run EVERY time you updated the page. Major pain now removed.

At first glance your choices might seem somewhat limited, but the add-ins are very powerful and will accept just about anything you can throw at it. Some are pre-built for you like Google Ad-Sense advertisements that can actually make you some money for every time you con …trick … CONVINCE a visitor to click-through your links. You do have to set it up through Google, but it’s not very difficult.
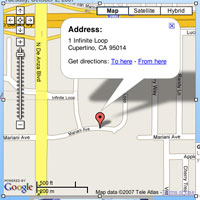
Speaking of Google, you can also add Google Maps to your site. Adding a Google Map is as easy as specifying what map (you know, like where in the world you want to show) you want and a simple cut & paste of the code that Google provides on the map page into iWeb. Once the code is entered, iWeb will even give you a live preview so you know just what it’s going to look like before posting.
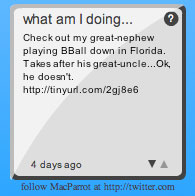
Getting away from the Google lovefest for a moment, iWeb also lets you add embedded html code into a box Apple calls a Web Snippet. Ever see those little weather widgets that some people have on their pages? Now you can tell the world just how crappy the weather is on your page too! Doesn’t thrill you? No problem, there’s code available from many of the currently popular sites like digg, FaceBook, MySpace, Twitter, the list goes on and on. You can add your own html code here if you know how as well. I’ll show some examples and list links to the test pages I’ve created so you can see what I’m talking about when we get to adding those parts to a site.
The last bit you can do from Web Widgets is “.Mac Web Galleryâ€. If you’ve published iPhoto events or smart folders to your .Mac account, you can easily add them to an iWeb page. Since iWeb is tied to your .Mac account, it already knows about any photo galleries you’ve created. If you go to the Web Widgets icon, check the .Mac Web Gallery part of the drop down menu, and any galleries you’ve published will show up here in the sub-menu. Don’t have a .Mac account and/or any galleries? Then that part of the Web Widgets will be grayed out.
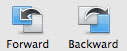
One step forward, two steps back
Since every element in an iWeb page is essentially text and graphic boxes, it’s easy to sometimes cover one with another. Many times as well you may have different layers of graphics or text purposely on top of each other. In order to change the order or just bring out one hidden behind another, just select the one that needs to move forward or backwards and use the (what else?) “Forward†or “Backward†button.
Unmask
The “Unmask†button is another one those, “Gee what can we call this?†Apple moments. It doesn’t in my opinion actually unmask anything, but brings up the “Edit Mask†function that works for almost every type of image other than galleries and movies. With the mask window selected, you can crop out certain sections of an image that aren’t needed or expand an area to the full size out to where you want the image. Keep in mind that this is only capable of square or rectangular edits. If you have an oddly shaped image you want to resize or edit, you’re better off using a real image editor to do so. Unmask works well for easy, or quick and dirty edits though.

Sit on it and…
The “Rotate†button allows to you to quickly rotate almost any object 90 degrees at a time. Clockwise naturally. Holding down the Alt/Option key will rotate the same objects counter-clockwise. Movies and .Mac galleries will not rotate.

Media
The “Media†button brings up audio, movies, and pictures from the default locations (or where you have designated them to be in each programs preferences) of iTunes and iPhoto. Keep in mind that both iPhoto and iTunes are capable of storing and displaying movies from their default folders, and that iTunes and GarageBand have default folders for audio. One weakness of iWeb is that you can’t designate different folders to pull content from outside of those pesky default folders of the other iApps. Fortunately, you can just drag and drop from the Finder almost any graphic or audio element and iWeb will do something with it. Maybe not what you intended for it to do, but chances are it will available for you to use.

Adjust
Ever play with the some of the possible adjustments to your pictures within the iPhoto edit window? If you have, then you know exactly what iWeb’s “Adjust†window looks like. This only works for individual pictures, not movies or frames with multiple images in them. A handy button for bringing up the window quickly.

The Inspector
By an amazing coincidence (or maybe not so amazing since I knew I would write this), the “Inspector†is going to play a HUGE part in the next part of this article. I’m not going to say too much about it now except to say that iWeb would be almost impossible to use without the Inspector.

And the rest…
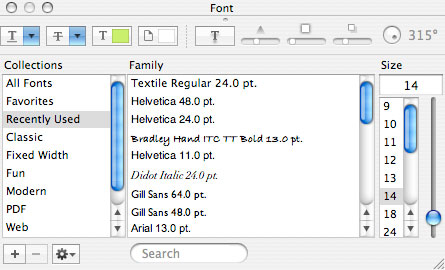
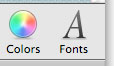
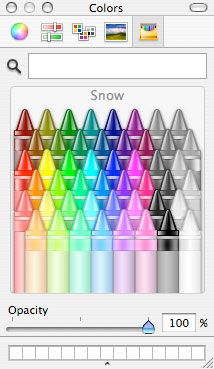
The last two buttons you can kind of put in the “Sure is nice to have, but I probably wouldn’t miss them if they weren’t there†category, we have “Colors†and “Fontsâ€. Colors bring up the Apple color selection window that we’ve all seen before in various other programs and the Font menu does much the same. These are convenient ways to bring up the functionality these windows bring, but you could just as easily have done it through the “View†menu. Various parts of the Inspector will also bring up these windows automatically.
You’ve now seen most of the on-screen icons and separate windows that are available in iWeb 08 to make your site with one major exception. The “Inspector†window. There’s so much functionality packed into that one box that it deserves its own section! So I will. Join me next time for the “Inspectorâ€.
Leave a Reply
You must be logged in to post a comment.