

Recently, I was helping a friend install Mac OS-X onto some Macs that were donated to his school. While doing this, I figured I’d take some pictures of the monitor and write an article about how to install Mac OS-X onto a Mac. The steps described below also work for upgrading Mac OS-X (i.e. going from Jaguar to Panther), or reinstalling Mac OS-X for those rare times that you just need a fresh start. The pictures are from a Panther install, and might vary slightly with other Mac OS-X installs.
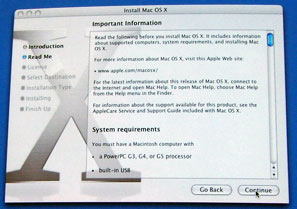
If you are installing Mac OS-X 10.2 or higher on a Mac that has never had 10.2 (or higher) on it before, you want to make sure your Mac has enough memory and the latest firmware installed. Mac OS-X through 10.3 requires a minimum of 128mb of RAM, while 10.4 (Tiger) requires a minimum of 256mb of RAM. I suggest having at least 512mb with any version of OS-X. Not sure what your machine has? In Mac OS 9 or Mac OS-X go to the Apple Menu in the top left and click “About this Mac.†The window that comes up will tell you how much memory you have in your computer.
Firmware, in simplest terms, is the programming built into your computer. The latest firmware updates can be found here: http://docs.info.apple.com/article.html?artnum=86117. You must be in Mac OS 9 to install these updates. Firmware is easy to install, and you can find directions on this page also. For detailed instructions on checking your firmware version see this page on Apple’s site: http://docs.info.apple.com/article.html?artnum=60351. The installer will also let you know if your firmware is up to date when you run it.
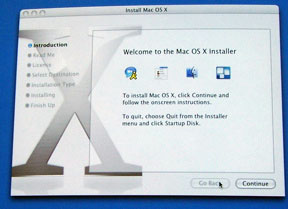
Now that you have your firmware up to date, and you have enough memory, it is time to start. Insert Disc 1 of the Mac OS-X installation and double click the CD icon. In the window that opens, there will be another icon that says “Install Mac OS-X.†Double click that, and you will be prompted to restart your computer. On restart, the computer will boot from the CD to start the install process. You can also boot directly from the CD by restarting your computer and holding the “C†key down during boot. You can let go of the key when you see the gray Apple on the screen.
Once the computer is booted, you will be presented with a window where you have to choose the language of the install. Choose your preference, and click continue.

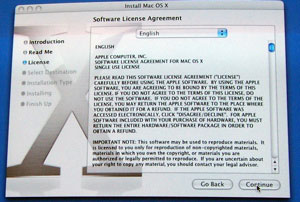
You will then go through a series of screens with information about the install and the license agreement. Read as much as you like, and click continue each time.
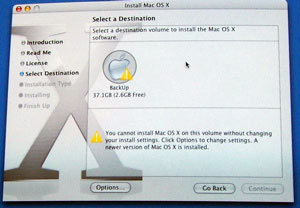
At the next window you will be prompted to choose the drive that you would like to install Mac OS-X onto. If you only have one hard drive (which most people reading this will) you will only see one drive. Hopefully, you will see a green arrow on the drive, which means you are good to go.
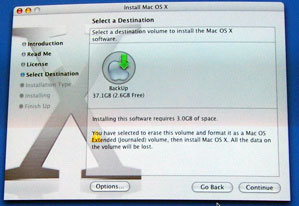
If there is a red stop sign, it means that there is a problem. The most likely issue that would cause a red arrow is not enough space on your hard drive for installation. The computer will tell you the problem underneath the drive icon. If your hard drive is too full, you will need to restart from the hard drive and delete some files from your computer. If these are important files, make sure you have them backed up someplace. Once they are deleted, they are gone. Also, remember to empty the trash. All of those deleted files are still taking up space on your drive, until you empty the trash. When you are finished, restart the process of booting from the Mac OS-X CD. You might have to repeat this step several times before you can continue.
You may also get a yellow yield sign at this point. This is a warning from the installer. I’ll discuss what to do about the yield sign in Part 2 of this article.
Once you have the green arrow on the drive, you can press continue. Continue pressing continue on the windows that follow for the default install of Mac OS-X. Eventually, the actual install will begin.
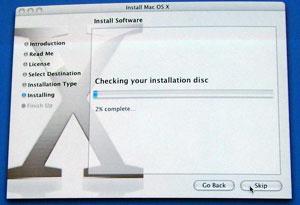
First, the installer will check your hard drive for any problems. If it finds something, the install will be aborted. If you find yourself in this situation you might want to run Alsoft’s Disk Warrior. It will probably help resolve the problem. I use it all the time for maintenance on my computer, and it once helped me out of a major jam. It is worth the investment.
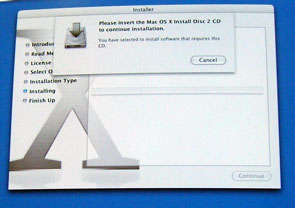
Assuming everything is good, the installation will continue. Along the way, you might be prompted to insert another CD. Just follow the directions, and you’ll be good to go.
Once the installation is finally complete you will have to restart the computer. Depending on the type of installation, you might be presented with Apple’s introduction sequence and you’ll have to run through the setup and registration procedure. After that you’re done!

For those new to OSX welcome and enjoy! Continue to read Macspiration for helpful Mac OS-X tips and tutorials, and be sure to check older Macspiration articles that are available now.
Next week, I’ll discuss how to customize the Mac OS-X installation. There are several options you can change for a quicker and smaller installation. I’ll also discuss what to do if you get the yellow yield symbol that I mentioned earlier.
Until then, leave your comments below or email me with any questions.
Leave a Reply
You must be logged in to post a comment.