
mimoLive from Boinx Software
Subscription pricing, varies depending on use case
I have been dabbling with online streaming for over 2 years and have used a variety of different software packages to do so. Some were alright, some where downright awful, and some were just too expensive for casual use. So what category does mimoLive fall into? Kind of in one all it’s own.
On the free side of things there’s OBS (Open Broadcasting Software) which is very powerful and yes, free. However it’s an all or nothing kind of experience in that you have to create “Scenes†in order to switch between different views. Each scene must contain each element required that is going to be seen or heard during the time that scene is the most prominent. So if you have say a video source along with other static images over that source that you want to show, that scene must include them all. If you want to re-use those elements in a different scene you can, but you have to include them separately each time. If you’re the kind of person who can painstakingly plan out each and every scene you want to use for each livecast, then it won’t be that big a deal, but depending on how complicated each scene is or how many different scenes you may need, this can become overwhelming. OBS is trying to make it a little easier by allowing you to group items like cameras, audio sources, and so on to reuse, but it can still be confusing. You also have to set up your own streaming sources and that can be a mixed bag as well with so many variables that getting just one wrong can ruin an entire session.
There’s another choice though and while it isn’t free, the UI is a fresh look at what can be done with all the options you might want. Easily add various video and audio sources, with options for lower thirds, bringing pre-recorded audio and video, live streams from url streams, and much more. Naturally since it’s in the title of this article, I’m talking about MimoLive from Boinx software.
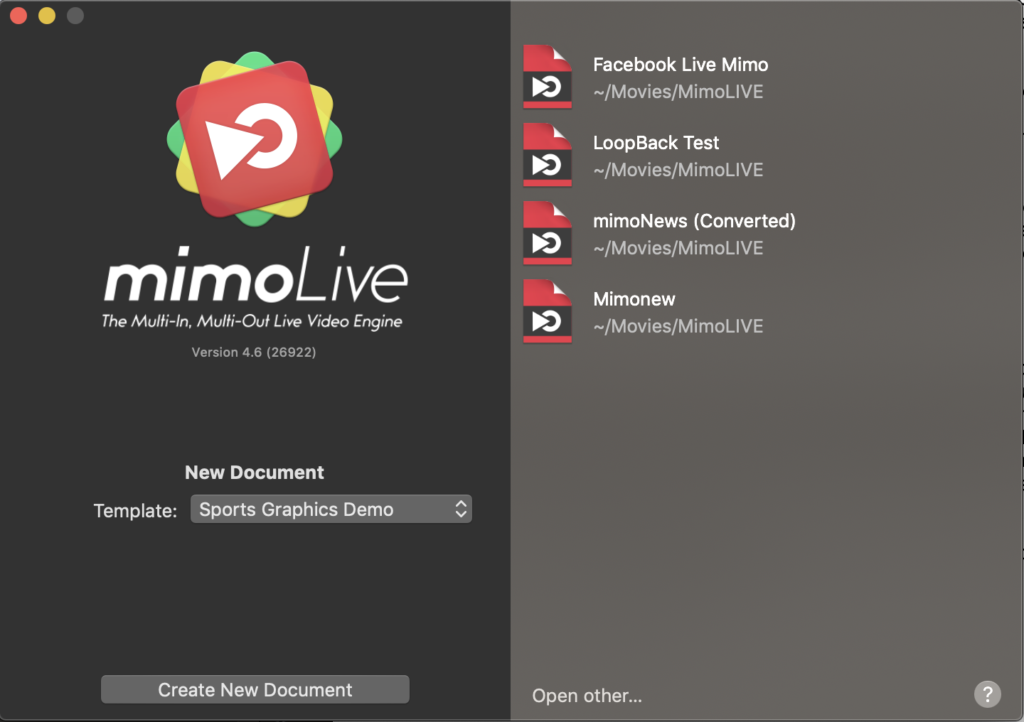
Getting started is not complicated. Upon the program’ start, a window will open asking whether you want to use one of MimoLive’s templates (there are many available) or create a new one from scratch. Both have their advantages, I prefer to start with a template (mimonews) and then adjust my sources (more on this later) as I go along. You can also break out into live monitors Layers and Outputs and (this is WAY cool) a virtual control surface for turning on and off different sources while live!
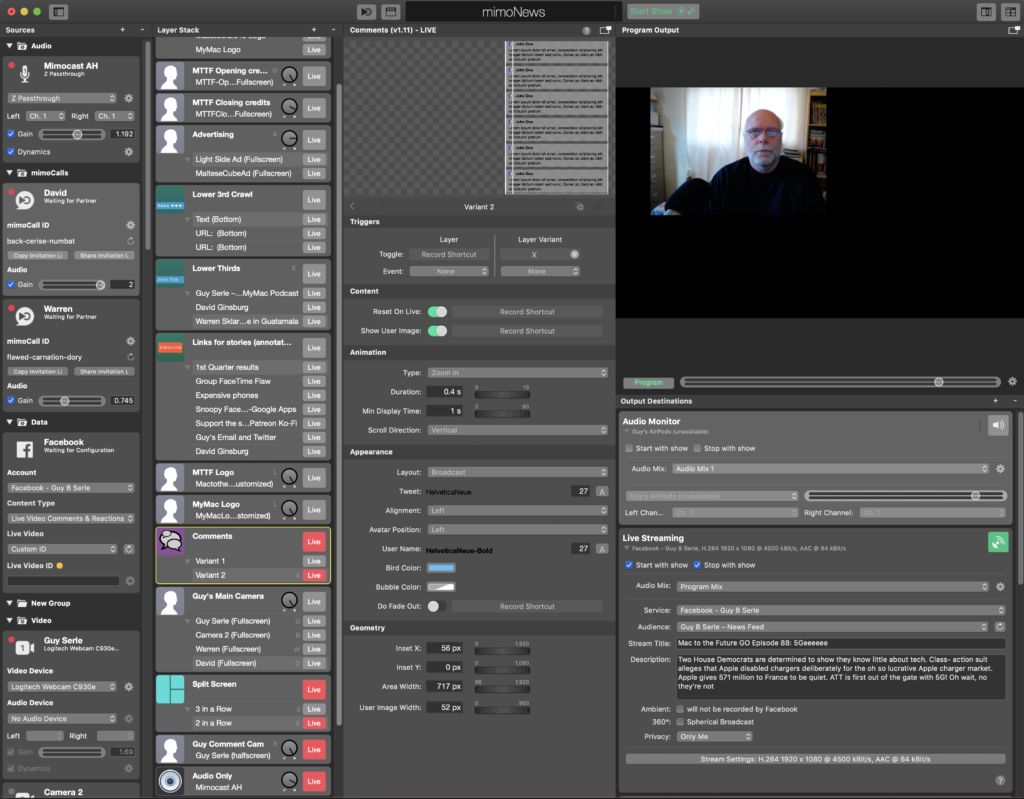
The layout for MimoLive is unique, in that it has a clear, readily apparent, and easy to understand right out of the virtual box User Interface (UI). The four main parts are “Sourcesâ€, “Layer Stackâ€, Layer Preview, and “Program Outputâ€. Each part of the UI also has editing options, some within the window you want to edit, others (like in the Layer Stack) that can break out into a separate part of the main window (Layer Preview) which may be easier for you due to the sheer number of options that can be available. Overall, very easy to figure out which is which, and what each part does. Let’s go into what each section does.
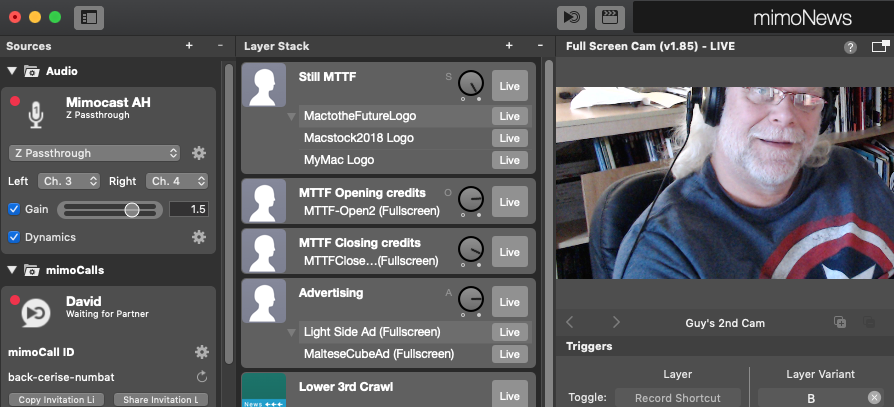
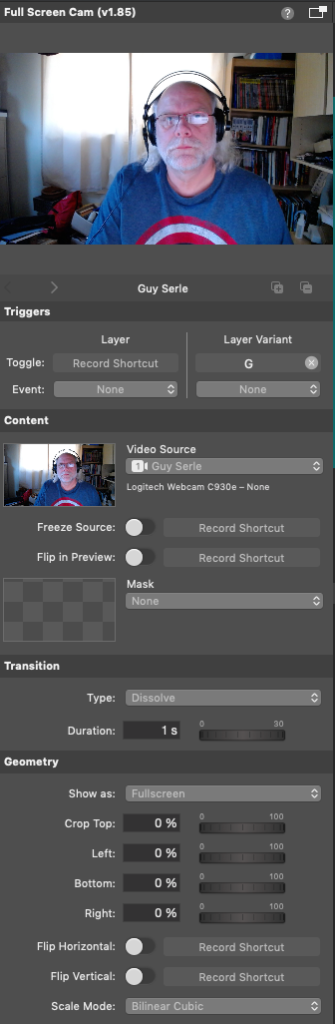
First up is sources. Obviously this means what audio, video, or computer generated graphics do you want to have available from within your MimoLive document. Sooo many options to choose from, so I’ll just talk about a couple of stand outs. Naturally you have video sources, like webcams, computer cams (if you have one built-in), and others. From within your video source you can select any source audio on your Mac. You can also select audio sources. Again, any audio source you have available on your Mac.
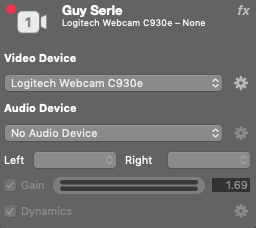
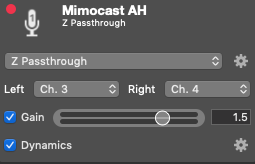
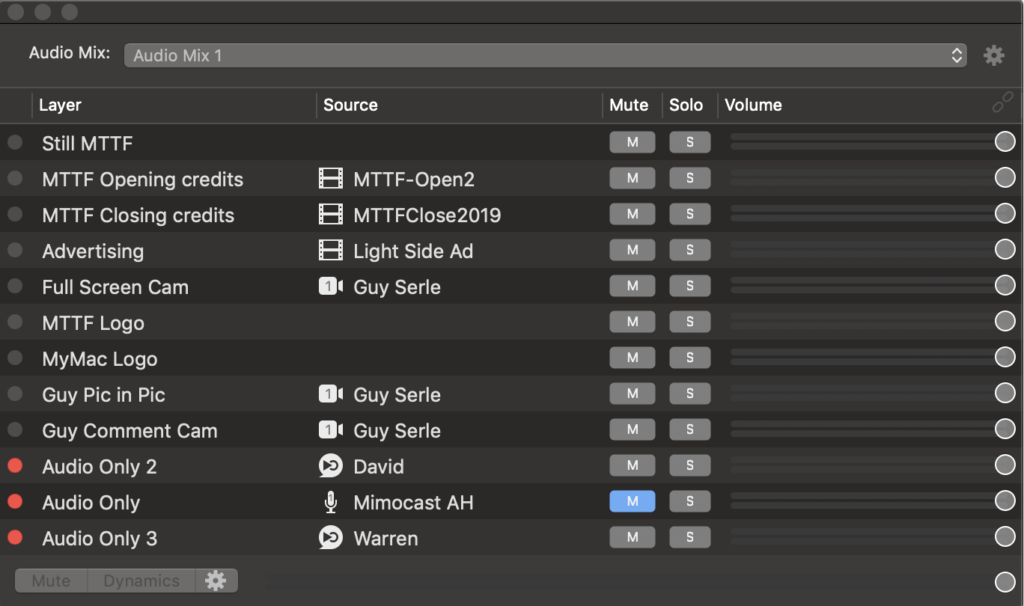
In the example above, I’m choosing to not use the built in microphone for my webcam (because it sounds terrible). In fact I’m not selecting an audio source for my video input at all. In the second image, I’m using a separate audio source so I can include it anywhere within the live cast that I choose.
Beyond just audio and video sources, you can have Screen and Window captures, and many others. However one of the REALLY cool sources is a feature Boinx calls mimoCall. Think of mimoCall as similar to a video call from Skype, but all done from within the program and for the person you’re talking to, through their browser. No client to download and configure, just a weblink you send to them. They add their camera and audio source at their end, and it all just works with no lag that I could see. I’ve used it with three people at one time and it’s been flawless. Having high speed internet is a must have though and unfortunately you can’t use Safari. Google’s Chrome browser is recommended. Speaking of web browsers, you can have as a dedicated source a window on your web browser too. Nice. Also the basics like full screen or application windows from your computer to display live as well.

There are also other sources like team logos and lists of players. Social media sources which depending on configuration can let you have live comments from your audience from FaceBook or Twitch right there on the screen or display. The variety (some of which are an added cost) of the kinds of sources is staggering and well laid out.
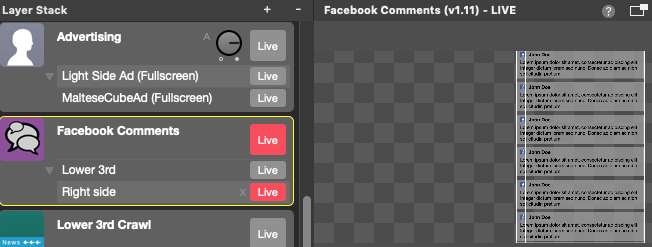
Moving on from the Sources section you have what Boinx calls the Layer Stack. There are tons of options here as well. The basic thing to remember about the Layer Stack is whatever is highest in the stack will be overlaid on top of the layers underneath. Not unlike a photo editing application, but with actual live sources. There’s a lot of pre-configured items (including iOS device demos) like fun and eye catching lower thirds, Picture-in-picture, top or bottom text crawls, specialized sporting event layers that you can sync with other sources (this is also extra cost), and the ability to use chromakey (green or blue screen effects). There’s a lot more too, way too many that I could give in a general overview, but chances are if there’s a visual effect you need for your livecast, mimoLive will have it.
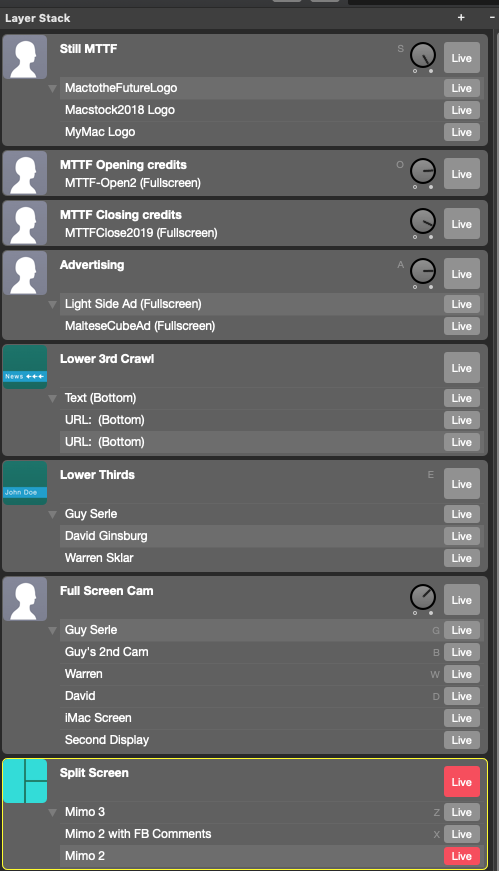
So with all these options, how do you change it to make it look like you want it to? In the Layer Preview section. This is where you select each layer in the stack to see all the available ways you can make it yours. Add variants in each layer to make make switching between similar sources a breeze, make visual cues larger, smaller, change their position or transition characteristics. It might sound overwhelming, but the UI is about as straightforward as it could be. If you get stuck or can’t quite figure out what to do next, Boinx software has the entire manual online with demonstrations and lots of help to get you past any issues. You can also trigger multiple layers and variants at the same time with shortcuts. So say you want to go from a full screen talking head to a three shot with Facebook or Twitter comments off to the side and a scroll at the bottom with links or recent quotes relevant to whatever the conversation is about. Easy, just select a letter, number, or symbol for each of those elements to use as a shortcut, and hitting just that one key will bring each of them up instantly or conversely make them all go away.
The last part is your output options and output monitors. This is where you set up your audio, video, and recording settings. Your audio mixer lets you set levels for each audio source that is coming into the program and you can have multiple audio mixers and create one specifically for each mimoLive output. I use two different ones myself. I have one set for the main live output going to Facebook (which is also the one for the live recording happening at the same time), and then another one I use to monitor all the live sources except for my own microphone.
Other outputs include simple to set up Facebook, YouTube, or Twitch streaming. Also a separate recording output for editing in post-production.You can also output your entire production as an NDI (Network Device Interface) for use elsewhere as well as have NDI source material as inputs as well as connectivity to Blackmagic Design hardware.

The possibilities in using Boinx Software’s mimoLive application when talking about closed circuit, streaming, or the creation of videos for education or business is nearly endless and whether it will be useful for you depends on what your needs are. I can say after having tried many different programs for streaming that in my opinion, mimoLive is both the most powerful and easiest to use software currently made, and is a huge step up from free and inexpensive alternatives.
Leave a Reply
You must be logged in to post a comment.