
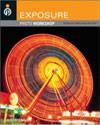
Exposure Photo Workshop
by Jeff Wignall
Wiley Photo Workshop Series
http://www.photoworkshop.com
ISBN 978-0-470-11435-3, 299 pages
$29.99 US, $35.99 CN, £19.99 UK
*SEE JEFF WIGNALL INTERVIEW BELOW*
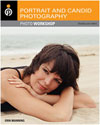
Portrait and Candid Photography Photo Workshop
by Erin Manning
Wiley Photo Workshop Series
http://www.photoworkshop.com
ISBN 978-0-470-14785-6, 299 pages
$29.99 US, $35.99 CN, £19.99 UK
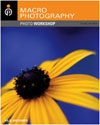
Macro Photography Photo Workshop
by Haje Jan Kamps
Wiley Photo Workshop Series
http://www.photoworkshop.com
ISBN 978-0-470-11876-4, 299 pages
$29.99 US, $35.99 CN, £19.99 UK

Photographing Children Photo Workshop
by Ginny Felch and Allison Tyler Jones
Wiley Photo Workshop Series
http://www.photoworkshop.com
ISBN 978-0-470-11432-2, 299 pages
$29.99 US, $35.99 CN, £19.99 UK
Wiley Publishing teams up with PhotoWorkshop.com in these four titles, plus three more we haven’t received yet: Composition, Lighting, and Photos that Inspire. Every page in each book is loaded with colorful examples and comprehensive instructional material. Images are large and expressive, and type is just the right size for easy reading, without too much text on a page.
Tutorials and illustrated examples are concise and straightforward. Authors write in a relaxed first person style that is comfortable to read once, or over and over. Technical and equipment details are delivered in a non-threatening way, with specific suggestions that will benefit most readers.
All demonstration photos are first rate, but are not so intimidating that plain folks can’t produce them with the help of these experienced authors. Both color and black and white examples are used, which we applaud.
When topics turn from physical photography to computers and the digital darkroom, Mac screenshots are used with Adobe’s affordable Photoshop Elements software. You won’t become an expert at Photoshop from this series, but you can easily achieve camera and subject mastery.
Do you understand the difference between using flash to illuminate a night scene, and fill flash during daylight hours? Do you know how to design a photo in your mind before you put camera up to your eyes? Can you comfortably get up close and personal with your human subjects to explore areas of the human body with a macro lens? Do you know the optimum shutter speeds for stopping motion of people doing active sports?
MyMac has reviewed dozens of photo technique titles, and this Photo Workshop series stands out. By addressing specific methods, one per volume, the expert authors are able to give multiple examples and techniques that you can learn sequentially or by skipping around pages and chapters.
Each chapter ends with an assignment you’ll want to complete after having read about its technique. Readers are encouraged to join the online community here. You can “view what other readers have created,” then “post comments and read other encouraging suggestions and feedback.”
Included are glossaries of technical terms, plus software and web site recommendations. Photo captions are excellent, as are the numerous tips and supplemental sidebar suggestions.
Most of my adult photo students don’t proceed past beginner status. They are uncomfortable with their cameras, and with books that claim to deliver successful methods. I’m going to circulate the books in this Photo Workshop series during future class sessions, and watch my students welcome the refreshing look and feel of the series’ hands-on material.
Book Bytes could devote many dozens of paragraphs to raving about Wiley Publishing and their collaborators at PhotoWorkshop.com. Instead, we’ll leave you with high praise for this series, and a strong recommendation that any and all of its titles will make you a better photographer. More than anything else, this series propels readers to pick up a camera and have a little fun while becoming a better photographer.
– – – – – – – – – – – – – – – –
Here’s a fascinating interview with JEFF WIGNALL, author of the Exposure title.
MYMAC: How can people know if their cameras are metering accurately when set for auto exposure?
JEFF: Digital cameras are so reliable and their metering systems so accurate, that I think if there was a real problem with the metering/exposure system, it would be pretty obvious because the exposures would be consistently bad. To be honest though, I’ve never seen that happen.
The real problems come, not from the hardware, but from metering the wrong areas of the subject and not knowing how the camera’s light meter will respond to certain subjects. For example, all light meters are all designed to record whatever you point them at as a medium tone (in black and white that would be a medium gray tone, for example). If you aim the meter at a white swan, you’ll get a gray swan. If you aim it at a black cat, you’ll get a gray cat. Once you know this and are aware of it you can use certain exposure tools, like the exposure compensation control, to adjust the exposure and place the subject values back where they belong.
Also, it’s important to meter the actual subject — not the bright sky or dark pavement surrounding it. If you’re shooting a photo of some friends sitting on a picnic bench in a park, for example, it’s important to meter them: their faces, medium colored shirts, etc., and not the bright white sky behind them. Matrix meters (the main type of meter found in most digital cameras) are extremely good (almost spookily so!) at knowing what the important subject area is, but it’s still very important to meter the area that you think is important. If that area happens to be small (a person on a bright beach), you can use the center-weighted metering feature to meter just that subject and then use your exposure-lock feature (usually just holding down the shutter-release button halfway will do it) to lock in that meter reading.
All of these adjustment tools sound a bit complicated, but they’re not and they are all described in the camera manual. (The what?) Take time to read the manual and you’ll find that all of those little buttons and dials have real and useful purposes.
Also, it’s important to pay attention to the lighting. You’ll get much more accurate metering results if the light is landing on the front of your subjects — though this isn’t always the most creative or attractive light. The key thing is not to aim your lens directly into a bright light source behind your subject (the sun behind your dog, for instance) and expect the meter to know whether you’re trying to expose the light source (the sun) or the subject (the dog). Try to think like a camera!
MYMAC: Should photographers try to get their exposures correct in camera at time of shooting, or go for best subject/composition then, and improve exposures afterward in computer or at photo lab?
JEFF: Well, that’s a very good question because if you have some basic skills at editing you can correct a lot of exposure problems with a few creative mouse clicks. But there is a danger to relying on post-production skills to bail you out. You will always get the best results if you get it right from the start. I think that choosing a subject and designing a composition should take exposure and lighting in as inherent parts of the creative process. It’s easy to think of them as separate things (“I want a photograph of that barn, I’ll worry about exposure after I compose it”); the reality is that lighting should be a huge part of your composition process and so should exposure.
Let’s say you’re photographing a farm scene early in the morning and the sun is low on the horizon and the contrast is very gentle, the long shadows are soft and open. Those things, the soft light, the open shadows, the gentle textures are all a part of the composition. You can separate them from the physical objects in the scene. So in order to capture them the way that your mind’s eye is seeing them, you must exposure things correctly at that moment. Yes, you can soften contrast or open shadows later in editing, but if you don’t start with a good exposure, you’ll always be rowing upstream trying to get back to a place where, if you had taken careful meter readings and studied the light, you would be at already.
MYMAC: Are you personally involved with the assignments and reader participation at the PhotoWorkshop.com web site?
JEFF: I wrote each of the assignments that are a part of the Exposure book (the assignments that are online are also included in the book). And yes, I do prowl the uploaded photos and comment on them. I’ve just begun that this week, in fact. Â I love critiquing photos and love seeing how people handle assignments, and I think encouraging people, regardless of their technical level, is important. It’s a part of who I am as a teacher. For years I taught online classes with both Better Photo and Bryan Peterson’s Picture Perfect school, and if you were to ask any of my students, they loved my critiques. My passion in photography really lies more in people’s visions of the world than in cameras, lenses, etc. The main reason I write about technical things is to help my students set themselves free to be creative. Once you can put the technical issues behind you and let them become second nature, you can just wander the world with your camera and your imagination.
MYMAC: Should pointnshoot photographers spend time learning to use manual exposure or the different exposure modes included on their digicams?
JEFF: I think that the first thing everyone (including experienced photographers, by the way) should do with any new camera is to sit down and read the manual with the camera in their lap: find out what modes the camera has and how to access them. It’s interesting that exposure modes (like the manual mode, as well as aperture- and shutter-priority modes) that were once found almost exclusively on higher-end cameras have now trickled down to the point-and-shoot level. And that is a good thing because creative exposure is the essence of great photos and so it’s important that you have complete control over that exposure, rather than relying on automatic to set it for you.
That said, I think the first thing everyone should do (after reading their manuals!) is to shoot a lot of photos in either the Automatic mode or the Program mode (they are essentially the same, incidentally, though the Program mode allows more flexibility, like being able to change the ISO setting while the Auto mode doesn’t) just to see what correct exposures look like. The time will come, however, when they will notice that action subjects (kids playing baseball, for example) are not as sharp as they want or that landscapes don’t have the depth of field (the near-to-far sharpness) that they want and that is when it’s time to start experimenting with other exposure modes.
In the aperture-priority, mode, for example, you can select the aperture setting and the camera selects the correct corresponding shutter speed. You use this mode to control depth of field (smaller apertures create more near-to-far sharpness, while larger apertures create less) so that they have control over what is and isn’t in focus. In the shutter-priority mode you select the shutter speed and the camera selects the correct corresponding aperture. This enables you to use a long shutter speed to blur things intentionally (like water coming over a waterfall) or fast speeds (to stop sports action). Knowing that you can make these choices really helps you to add a dramatic and creative twist to your exposures.
In the full manual mode, you select both the shutter speed and the aperture and the camera stays out of your way more or less (though you use the meter to guide your exposure). This mode is useful in unusual situations such as photographing fireworks where you might want to leave the shutter open for 20 or 30 seconds, for example. The manual mode is also useful when you know that you are facing a difficult situation that could fool the meter: I use it often if I’m photographing brightly colored water lilies floating on a dark reflecting pool at a formal garden, for instance.
It does take some knowledge of aperture and shutter speed to use any of these modes — you have to know why you would alter them. But anyone can learn to use these features and I think that they open the door to truly creative exposure. My book explains all of the basics and theory of exposure in a lot of detail but I think it’s broken down into basic pieces that are logical and simple enough for anyone to follow. I was fortunate in that my father was a photographer, so I grew up around f/stops and shutter speeds, but I’ve taught everyone from teenagers to doctors and professors in my classes and so far I haven’t left anyone behind!
MYMAC: What is exposure compensation, and why should we use it?
JEFF: Exposure compensation is a very simple and extremely useful control on almost all digital cameras that allows you to add or subtract light from the exposure that the camera determines is correct. This is really useful when you are shooting a subject that might fool the camera’s meter. Again, all meters are designed to turn what they see into a medium tone. Snow, swans, black cats, red cars, yellow flowers: Â all become medium toned. But if you allow this to happen to snow, for example, you’ll get pretty dingy snow! By “adding” a stop or a stop-and-half of exposure using the exposure compensation dial you’ll return the snow to its nice fluffy white state.
How do you know how much compensation to use? It’s really a matter of experience, experimenting and reading about exposure. The camera won’t explode if you use the wrong setting and you may just learn something about light and exposure if you experiment. Exposure compensation is easy to use and it really can transform your photos. But don’t forget to set it back to zero when you return to other subjects or you’ll end up shifting all of your exposures. I’ve done that a thousand times.
MYMAC: Do readers need to memorize all the techie material at the front of your book, or can they plow right into your lessons and projects?
JEFF: I think the Wiley Exposure book serves several purposes: as an overview of exposure and as a reference book (as well as an inspiration, I hope). So I think the first time around it’s worth just reading the book and getting familiar with how all the pieces fit together. I think once readers do that they’ll see that none of the technical info is in any way complicated. It’s like anything new, once you get familiar with it, it becomes second nature.
I do an FM radio show and it’s a self-engineering station, which means that if you’re on the air, you’re also working the board and controlling the transmitter, etc. When I first started 15 years ago, sitting down at that console was like trying to land a 747 in a tornado, but now it’s so second nature I don’t even have to look at it. I’m more worried that I’ll spill my tea on it than anything. Exposure is like that too: once you understand that there are only *three* camera controls that regulate exposure — aperture, shutter speed and ISO speed — then you see the mystery fall away.
I can actually put the entire theory of exposure in one sentence:Â “Exposure is controlled by the lens aperture which lets in light, the shutter speed which determines how long the light enters the camera and the ISO speed that determines the light sensitivity of the camera’s sensor.” That’s the whole shooting match. Yes, that’s a bit like saying that a car is controlled by brake, a gas pedal and a steering wheel, but essentially that is also true! Finesse and skill come with practice, practice, practice..
Also, as I say over and over again in the Exposure book (to the point of driving people nuts, I’m sure), exposure is more than “right or wrong” it’s about creating a bold first impression and capturing an emotional interpretation of your subject. This is not just any sunset, this is YOUR sunset. How do YOU want it to look? So you make some mistakes, who cares. Digital is free, after all. I had an art teacher in high school who used to see my intense frustration when I couldn’t get paints to do what I wanted them to do and she always said “The great thing about being a frustrated artist is that at least your an artist, and you’re better than you think you are.” She also told me that there are no mistakes, only new roads to be taken. Despite all the prints I throw in the trash, she was right.
MYMAC: You sure like cactus pictures! When are you coming back to Tucson? I’ll give you a grand tour!
JEFF: I am basically a travel photographer and one question I always get is “What is the most exotic place you’ve ever been?” My answer is always the same: The American Southwest. There is no place on this planet as mystical or as challenging as the Southwest, and few places are as extraordinary as the deserts outside of Tucson. The saguaro are magical and some of them have been around 200 years — think of that! You can photograph cactus that were here before Lincoln was president.
Plus, Tucson has the coolest photography museum around at the <http://creativephotography.org/> Center for Creative Photography (University of Arizona at Tucson). The greatest exposure master of all, Ansel Adams, helped created that facility and it’s worth a trip from anywhere.
MYMAC: Thanks to author and photographer, Jeff Wignall for this exceptional interview.
Leave a Reply
You must be logged in to post a comment.