

No doubt, either version of Adobe’s Photoshop offers the best tools for photo enhancements, but Apple’s iPhoto image Adjustment tool provides a quick, down and dirty, method for enhancing your photos. I rarely print out or publish a photo to the web without at least using one aspect of this Adjustment tool.

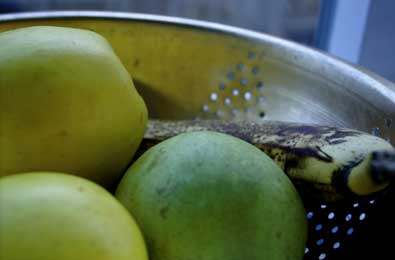
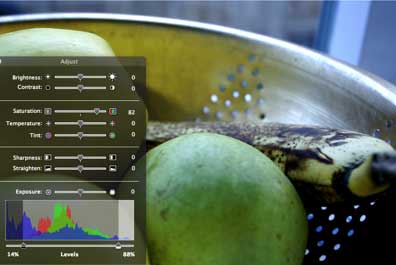
The above photo is my original shot. As you can see from from the exposure information below, the shot was taken under normal indoor light, in normal program mode. No exposure adjustments were made when taking the shot. The shot as it is, is okay. It’s a depiction of how the fruit actually looked in the tin bowl. But as a photograph, it could be enhanced. The exposure is flat and lacking some detail which you will see brought out in the changes below.
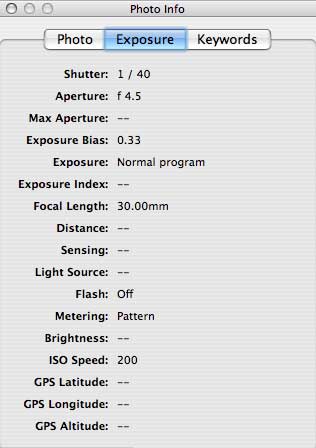
(You can get this information box by selecting a photo and then going to Photo>Get Info>Exposure.)
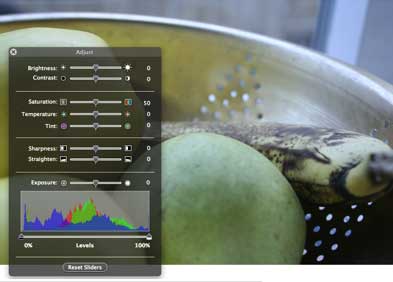
At the bottom of the Adjustment window is what is called a Histogram which depicts the exposure levels of an image. You can see it’s a pretty even exposure show levels of whites one side and darks on the other, but the contrast could be bumped up some.
This screen shot doesn’t show it, but to develop better contrast, I move the Exposure setting a little to the left and then move it to the dark side of the histogram towards the right.
Note: When using the sliders on the Adjustment tool, I’ve often found it easier to simply click on the slide rather than moving the pointers back and fourth.
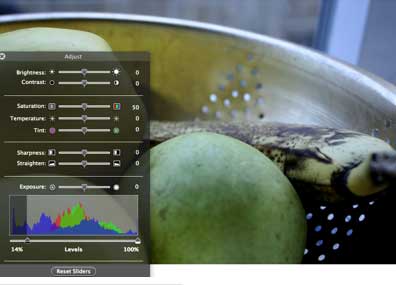
Notice the contrast is deeper in this shot. There’s also more detail. On some monitors, this image may appear too dark (overexposed).
The Saturation feature is one of my favorite tools with in iPhoto’s photo “darkroom” box. I pull the Saturation slider to the right when I want to enhance or enrich the colors. This process can be done better of course in Photoshop, but for a quick down and dirty process, it works fine.
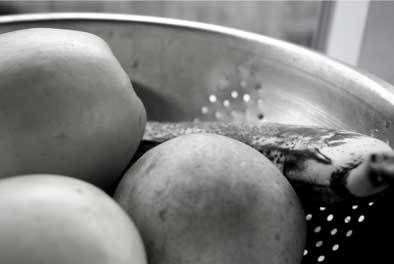
You can also use the Adjustment tool too convert color photos to monochrome. You can do this by simply clicking the B&W button as seen below. But I like to use the Saturation tool to get sligtly better control over the process.
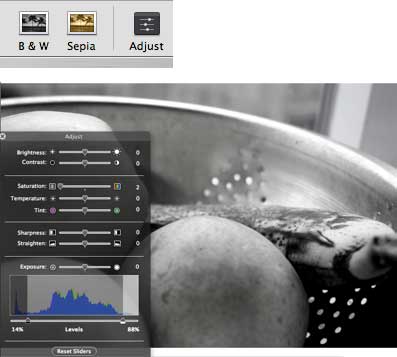
Notice by the way how the Histogram has changed to depict a lack of color in the photo. It also shows how the contrast is improved.
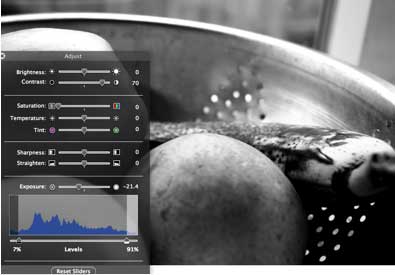
Using the Contrast button, second to the top of the adjustment tool, also beefs enhances the photo. This control, along with the Brightness control, can be useful, but I find them to not be as useful as the Exposure, Levels, and Saturation settings.
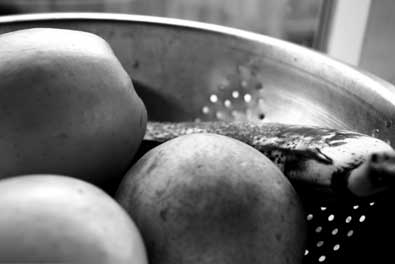
Though the color photo is the better one of this series, the manipulation of this photo is improved by increasing the contrast whereby you see white, black, and gray areas in the shot.
Part II of this article will look the adjustment features of iPhoto 6.
Leave a Reply
You must be logged in to post a comment.