

Want to spruce up you desktop or folders, and make it more pleasing to your eye? One way to do this is by changing the icons. An icon is the little graphic that represents a file, folder, or application in your computer. Changing these icons is very simple to do.
First, to change the icon you need some new ones. You can find icons for downloading all over the Internet. My favorite icon source is “InterfaceLIFT†at http://interfacelift.com/icons-mac/. This site has a great catalog of free icons for downloading that includes cartoons, hardware, foods, you name it.
Once you have your icons downloaded, you’ll need to find their folder and pick the one you want to choose. Click the icon once, so it is highlighted.

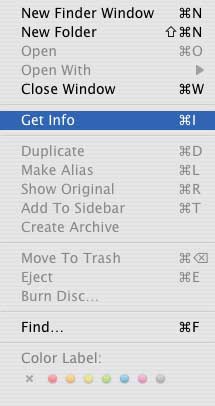
Next in the “File†menu choose “Get Info.†You will now be presented with a window about that file or folder.
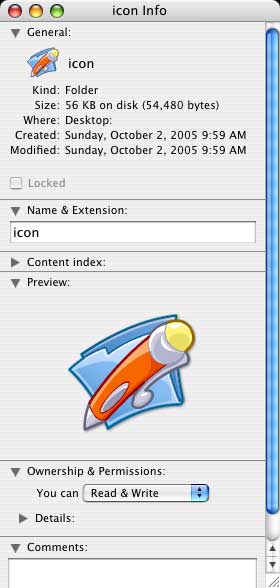
Click the icon in the top right of that window (a blue outline will surround it). Next go to the “Edit†menu, and choose “Copy.†You have now copied that icon into memory, and you can close the info window by clicking the red button.
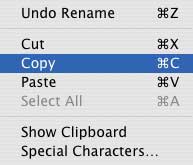
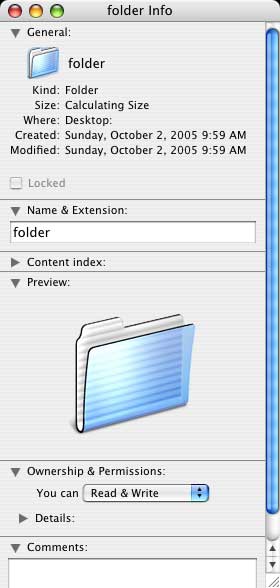
Next you want to find the icon you want to change, and follow the same steps as above. However, this time when you go to the “Edit†menu you will click “Paste†instead of copy. The old icon will be replaced with the one you preciously copied. You can now close the information window, and you are done!

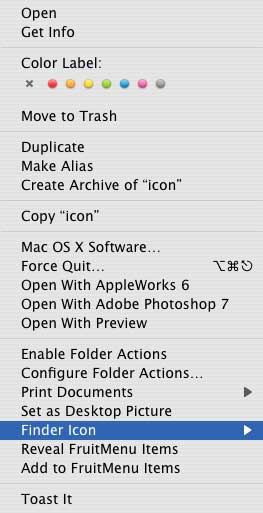
As easy as this is, there is even an easier way to change icons with the help of a great freeware (free) application called “FinderIconCM,†by Hide Itoh. You can find it on the web at www.pixture.com. Once you download the file, and run the installer, a contextual menu will be installed on the list of options when you click your mouse with the control key pressed. For those with three button mice, you can do this by right clicking.
“FinderIconCM†has many great features you can play with. The only one I use is the copy and paste feature for changing icons. Just like before, you need to have a new icon you want to use. Instead of using menus, and opening windows, all you have to do is control-click the icon, go to the “Finder Icon†menu, and choose copy.
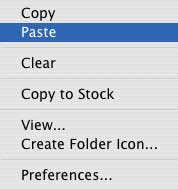
Next you go to the icon you want to change. Control-click on the icon, and choose paste. You’re done! You have changed your icon at record speed! I highly recommend this little program for all users, beginner and advanced.
I have found that in some instances I have to restart my computer for the icon change to take place. This is with the traditional method, and “FinderIconCM.†Now, there are some icons that cannot be changed with either process. For example, the trash can. To change the trashcan icon, you need to change some system files. This is not recommended for beginners, so I will not go any further on that topic.
You now have the tools to change most of the icons in your computer, and you know where to get some really cool icons. Have fun customizing your computer to represent you.
Until next week, feel free to email me any comments and questions, or leave a comment below. I’d love to hear from you.
Leave a Reply
You must be logged in to post a comment.