
Download the show here, and subscribe via iTunes Some talk about databases (ACK!) and feedback from Reb Bliefernich which leads into a discussion about
Read MoreTag: iPhoto
Macspiration 111
Uncle Joe
Last week my uncle made the switch from his Windows computer to a MacBook. Of course, I am his “guide” as he makes the switch and I made him a cheat sheet for some of the common questions he’ll have as he works. When I was done, I thought, “Why not make this a Macspiration article?” So here is the cheat sheet I made him in all of its simple glory.
Macspiration 102
iPhoto CD Automator Action

I recently blogged about a missing feature from iPhoto which lets you burn a CD of photos that is not in iPhoto format, but instead a CD of JPG images that any computer can read and that you could take to the store for developing in a photo machine. Right after I posted that blog, I discovered a way to create an Automator action to do this for you.
Macspiration #77
When iPhoto Edit Tools Are Not Enough

I use iPhoto as my primary photo editing program. Most of the photos I take just need some minor adjustments and cropping. However, there are those occasions when the editing tools in iPhoto don’t cut it. That is when I call in the big guns, i.e.. Photoshop. There is the quick method for doing this, and one that is a little longer. I’ll cover both in this article.
Read MoreMacspiration 75
Baby Announcements in iPhoto

Normally, Macspiration has articles geared towards beginners. This week I have a more advanced tutorial for you.
Read MoreMacspiration 74
Super Quick Tips

Create a Digital Workflow for iPhoto
Anyone who regularly shoots digital photographs realizes just how easy it is to fill up a photo management system like Apple’s iPhoto with thousands of images. In fact, uploading, managing, and processing digital photos is probably the most difficult part of digital photography. Everyone loves to shoots pictures, but digital photos can easily fill up a hard drive just in same way many old school shutterbugs could fill up shoe boxes and plastic covered album pages
Read MoreFrom iPhoto to Aperture
I’ve been an avid fan of iPhoto since it was first introduced about five years ago. Of course the revolution in digital photography inspired me to take videography and photography to a professional level, but having an effective way to organize and edit my photos was equally inspiring.
Read MoreWhat to do with your old iMac
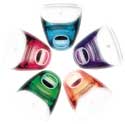
Do you have an unused iMac G3 sitting around? Before you relegate that old iMac to the garbage heap, or turn it into a planter or an (mac)aquarium, here are some other ideas to put it to good use.
Read MoreMacspiration 39
iPhoto Tips
Here’s five iPhoto quick tips for you on Export, Merge Rolls, Batch Change, Quick Rotation, and Duplicate.
Read MoreThe Adjustment Tool in iPhoto 6 – Part 1

No doubt, either version of Adobe’s Photoshop offers the best tools for photo enhancements, but Apple’s iPhoto image Adjustment tool provides a quick, down and dirty, method for enhancing your photos. I rarely print out or publish a photo to the web without at least using one aspect of this Adjustment tool.
Read MoreMacspiration 16 – Burning a CD in iPhoto
Learn how to burn photos from iPhoto to a CD simply, and Donny shows us the way
15 Tips – Making Better Use of iPhoto

Bakari gives fifteen tips for making the most out of iPhoto. If you find these tips useful, all we ask is that you donate $1,000 to MyMac.com. Okay, not really. Well, unless you really want to.
Read MoreMacspiration 17 – Cropping to Size in iPhoto

This week, learn all about how to crop your photos in iPhoto.
Macspiration 15 – iPhoto Albums
Macspiration – Emailing Photos using iPhoto

How easy is it to email pictures using iPhoto? Find out here!
Macspiration
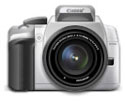
Importing Photos from a Digital Camera into iPhoto
Learn how to easily connect your digital camera to your Mac and have iPhoto do all the work for you. If you are new to the Mac, you will be amazed at how simple it is to get the photos off your camera and into iPhoto!
Nemo’s Ten Point Tutorial #1
Why The Keynote Was Good News
Why The Keynote Was Good News
Read MoreWhy iPhoto Matters – A Lot.
iPhoto has turned our Macworld upside-down. It is, in an interesting way, very different from from iMovie and iTunes, though each is equally a
Read More