

This new edition of the Mac OS X “Missing Manuals†series shows no signs of relinquishing its position this country’s bestselling computer book. In fact, given all the well-publicized problems with Apple’s latest OS, it might become the most-needed computer book in the U.S. as well.
Author: Gil Poulsen
U-Hip Pop case for iPhone 3GS/3G and iPod Touch – Review

Despite sporting a name straight out of a Dr. Seuss storybook, the U-Hip Pop for iPhone 3GS/3G and iPod Touch is a sturdy, attractive, and very practical belt-clip case that should appeal to all those so enamored of their iPhone that they wish it to be permanently attached at the hip.
Renamer 4.0 – Review

Renamer 4.0 from Dare to be Creative Ltd. is the Cuisinart of filename conversion, with powers and abilities far beyond those of manual renaming or even AppleScripts. Throw in saved presets, instant previews and the ability to utilize regular expressions, and you’ve got a remarkably useful tool that’s as easy to use as it is powerful.
Clickfree Transformer Special Edition – Review
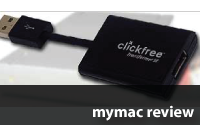
No, it doesn’t morph into an Autobot, but the Clickfree Transformer Special Edition does transform any unused space on your iPhone, iPod Touch or external USB drive into backup storage. While the device is simple to use and works well, it’s hampered by a few software glitches and a relatively steep price.
Trend Smart Surfing for Mac 1.0 – Review
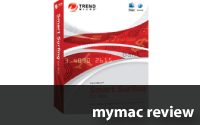
Offering innovative, up-to-the-minute protection from social engineering threats as well as viruses and spyware, Trend Smart Surfing for Mac is a “set-it-and-forget-it†security suite that’s designed for Mac novices yet offers plenty of configuration options for experienced users.
OWC On-The-Go Pro 500GB 7200RPM FW800/FW400/USB 2.0 Storage Solution – Review
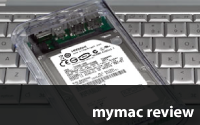
Until now, if you wanted a high-capacity 2.5" portable drive, you had to settle for lackluster performance from USB 2.0 connections and/or 5400RPM mechanisms. Those days are over now, courtesy of OWC’s new take-no-prisoners 500GB FireWire 800 7200RPM Mercury On-The-Go Pro portable.
Read MoreF-Secure Online Backup – Review
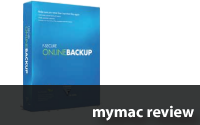
In a field already crowded with remote backup services for Macs, F-Secure Online Backup trails the pack, courtesy of a poorly executed port to the Mac platform, a bewildering file selection process, and default backup settings that leave many important files unprotected.
TechTool Pro 5 – Review
What doesn’t this program do? With a plethora of tests, tools and utilities, plus a comprehensive printed manual with useful reference info on Mac troubleshooting, Micromat’s TechTool Pro 5 is hands down the most comprehensive troubleshooting utility available for the Mac platform.
HP OfficeJet Pro 8000 Wireless Printer – Review
As long as you don’t mind clearing a large space on your desk for this wireless workhorse, HP’s OfficeJet Pro 8000 Wireless inkjet printer is an extraordinary value that would be suitable for any home or small- to medium-sized office.
Apples2Oranges – App Review

It sounds like some mysterious “fruit transmogrifier,†but Ilium Software’s Apples2Oranges iPhone/iPod Touch app is actually a measurement unit converter on steroids, capable of translating between different units of measurement while revealing which of the two products you’re comparing is the most nutritious, or the better buy.
Mac OS X Leopard Killer Tips – Review

In spite of the fact that some of its tips are more "filler" than "killer," Mac OS X Leopard Killer Tips contains a wealth of useful information and would be a helpful companion to both intermediate and advanced users of Mac OS X 10.5.
AppleScript 1-2-3 – Review
The preeminent introduction to AppleScript for newbies. If you’re new to AppleScript and want to get up and running quickly with scripting, it simply doesn’t get any better than this.
Giftory 3.0 – Review

Thanks to a clumsy, inconsistent interface and a number of significant omissions, a program that attempts to bring organization and efficiency to the process of gift-giving brings only frustration for what might have been.
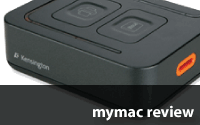
Kensington ComboSaver Combination Portable Notebook Lock – Review
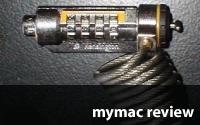
The Kensington ComboSaver Combination Portable Notebook Lock is 4 ounces of prevention that equals 5 pounds of cure—when it comes to protecting my precious black MacBook 13.3†laptop.
Axio 13.3Ë Hardsleeve MacBook Pro – Review
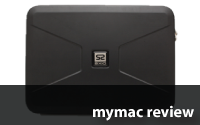
Stylish but strong, the Axio Hardsleeve MacBook Pro case is so tough-looking, your MacBook will command a whole new level of respect from all the other laptops out there.
Stellar Phoenix Macintosh 3.0 – Review

Frustrating stability issues, excruciatingly slow media scanning and a clunky, dated interface make this a program one tends to swear at, as opposed to swear by. That’s unfortunate, because in the end it does a pretty decent job of data recovery.
ShareCentral 2 – Review
Poor documentation, non-functioning driver software and a confusing control panel mar Kensington’s ShareCentral series of devices, designed to enable one-button switching of USB devices between two computers.
eWallet for iPhone – Review

With data encryption that meets U.S. Government Top Secret levels, flexible security settings, and infinitely customizable “cards†that hold a myriad of personal info, the only thing eWallet lacks is a convenient way to move all that info from your real wallet to your virtual one.
A.D.A.M. Symptom Navigator for the iPhone
Review

Is there a doctor in the house? If you’ve got an iPhone, the answer is a qualified “yes†—now that you can access up-to-date, expert-reviewed medical content via A.D.A.M.’s Symptom Navigator for iPhone.
The C.E.O: Premiere for iPhone
Review

The C.E.O: Premiere for iPhone is a solid, sturdy and very classy folio-style case, one of the few I’ve seen that actually complements a business suit. So if you can’t be the CEO, at least you can look like one.