My husband always says I should be in a Mac commercial!
Why, you ask? I’m a Mac-a-holic, and proud of it!
It all started many years ago, when my oldest son was in 2nd grade. My husband and I felt it was time to enter the ‘90’s and buy a computer. Plus our kids would eventually require a computer to do their homework, so it was really a need, not a want. Since our school district used Macs, that’s what I bought. At that time I had no idea about the differences between Macs and Windows machines. It was just easier to buy what the schools used.
So, off I went to an appliance store – yes, that’s right, an appliance store – to make my purchase. Apple Stores weren’t around then, so my choices of retailers were quite limited. I bought a Performa 200, an all-in-one computer with a 9 inch black and white screen. Who needs color, I thought. Ah, so naïve! This baby had a 16MHz processor, 2MB of RAM and a 40 MB hard drive. To complete the package, I added on a StyleWriter printer, also black and white.

I brought the new computer home, hooked it up in no time flat, and started exploring. It’s amazing how much you can learn just by opening and closing the windows. I was careful not to change anything; I spent those first few days just looking, seeing where I would end up if I opened a folder within a folder.
Very quickly I fell in love with my new Mac. I subscribed to all the Mac magazines that were published at the time. I continued to learn how to use the programs that came with the Performa and the ones I bought, which included many educational titles like Math Blaster, Reader Rabbit, and Super Solvers: Spellbound. I told my friends who hadn’t yet made the plunge into the world of computing to buy a Mac.

I absolutely loved using my…er…I mean our Mac. In 1997, it was time to upgrade. This time, we bought a Performa 6400, with a color monitor and color printer. I was like a kid in a candy shop – all I wanted to do was play with the computer. The thought of having to share with my kids did not thrill me; I wanted to play! But, seeing as we did buy the computer for them, I conceded. To my kids, the computer was just something they used to help them study their spelling words, help with reading and practice math skills. To me, however, it opened up the entire world. I could go online through AOL and communicate with other people! How exciting is that? I could use the computer to find out how much tickets were for Disneyland, or if my favorite rock band was touring. The possibilities were endless!

Since that fateful day in 1992, I have purchased a total of eight desktops/laptops, including a G3 iMac, MacBook and MacBook Pro, around ten iPods (it’s easy to lose count) and two iPhones. I have converted many friends and family members to “leave the dark side” and get a Mac, and I have been tech support for countless iPod questions. In fact, my sister-in-laws parents have called me long distance with iPod questions, but that’s a story for another day. I will preach the gospel of the Mac to anyone who will listen. I point out Macs in movies and TV shows, to which my husband just rolls his eyes.
I admit that Macs aren’t 100% perfect; issues do crop up from time to time. But compared to using a Windows machine, well, take my word for it – you don’t want to be around me when I have to use one. The things I say are not family friendly. Macs are intuitive, easy to learn, fun, and just work they way they are supposed to. As long as Apple continues to make quality products, I will continue to buy them, and get others to buy them, too!
email – MyMac Magazine – Twitter – Advertise – Reviews Archive – Podcast
Apple Support rocks! Here’s why.
Last Sunday, I went up the street to the local Tucson Apple Store, and pulled the trigger on a purchase of a new Mac Pro Quad-Core 2.66 computer. I had previously owned an original, first generation Mac Pro from 2006, so I’m very familiar with Mac Pros, especially the variable-speed fan system.
Back at the ranch, I toted the big cardboard box into the study, slid the Mac Pro out, and moved it into its new home. All of two minutes were needed to connect the monitor, printer, and backup hard drive.
My original plan was to boot from the external backup drive, and clone it onto the 640 GB in the new machine.
One quick press of the power button, hold down the Option key to select the external drive as the boot drive, and I’d be on my way.
But, as John Lennon said, "Life is what happens to you while you’re busy making other plans."
The Mac Pro started up, but the fans revved up to full speed, and stayed there, maxed out. If you’ve not heard a Mac Pro with fans at full-tilt, you’ve not heard a noisy computer. It’s hard to talk over what sounds like a small jet engine in your study.
Clearly, this was not right. A reboot didn’t change anything. Booting off the factory-installed drive did nothing. I went through the entire setup procedure, just in case. No dice. I did a clean installation to no avail. All the fans still ran at full speed.
At this point, I used my MacBook Pro to explore the Apple Knowledge Base for articles on Mac Pro fans. I found several that had various troubleshooting techniques involving resetting the SMC chip (Systems Management Controller). Nothing worked. Google turned up nothing that helped.
It’s now about 3 P.M. on Sunday afternoon. I called the Tucson Apple Store, and after a short wait, spoke with the Genius on duty. I told him the machine left his store about one hour ago, had a bad case of "fans gone wild" and I had followed the procedures in the various Apple Knowledge Base files.
He had me redo one of them, and concluded there was a problem. He was kind enough to transfer me right then and there to Level 1 AppleCare Support. I was very pleasantly surprised to learn that AppleCare was open on Sunday afternoon, but hey, it’s starting to look like paying the Apple tax has some benefits. After 30 minutes with Level 1, the agent escalates me to Level 2.
I repeated my tale of woe, and the agent asked some more questions about what I did and in what order. Soon he said, "yes, that fan behavior is not right, and it looks like a hardware fault."
I asked him if I can just go back to the Apple Store up the street, and exchange it for a new one. He checked the serial number, and says that since I bought it that day, he’d authorize an exchange. "Normally, we’d do this as a repair, but this machine is brand-new, so we’ll just swap it out."
By this time, it was minutes before store closing time, and I couldn’t get back in time. Mr. Level 2 called the store, and made arrangements for me to do the swap first thing the next day.
Monday at 10:00 A.M., I dragged the box bearing the bad computer into the store right after opening, planning on spending an hour or more waiting around. I was more than a little surprised to find the Genius expecting me. He had all the details, and the swap was already approved by the Powers That Be. A new Mac Pro Quad-Core was in my hands in five minutes, and I was out of the store in ten.
The new Quad worked perfectly from the first moment I powered it up, and has been trouble-free ever since.
Walking out of the store, I thought to myself "THIS is how computer warranty support ought to work!"
Apple warranty service may not always get it right, but it certainly did this time.
email – MyMac Magazine – Twitter – Advertise – Reviews Archive – Podcast
K321, K330, and K340 Ear Canal Headphones
Company: AKG
Price: $80, $100, and $120
http://www.akg.com
There was so little audio quality or comfort/fit difference between these three moderate-priced in-ear headphones from AKG, that our recommendation below will surprise you, as it does me. But please read through the entire review.
After completing a prior comprehensive evaluation of this company’s ear buds, in which the most expensive model was the clear winner, I expected the same from their ear canal headphones. I was wrong. There is some improvement in audio delivery from lowest price to highest, but not enough to scream "spend more!"
I assembled my test panel again, to confirm or deny my initial impressions. With the exception of a single hard core audiophile, not one person said the K340 top model sounded the best, or felt best inserted into their ears. The K33o middle-range headphones were consistent losers in all categories for every person. Over and over again, men and women, young and old, serious and casual testers chose the low-priced K321. They fit best and they sounded "really good, Nemo."

Experienced reviewers and audio aficionados will recognize that K340 is slightly more classy, with its stylish, black appearance and inline volume control. K340′s sonic experience is equivalent to our recommended competitors in the $100-150 price range, which is a good thing. Bass is rich and full, midrange is clear and complete, and treble intensity is noticeable but not problematic.

Playing the same song through K330 is consistently disappointing, and I’ll leave it at that for the middle model. Cases, fit, and interchangeable ear tips for all three earphones in this series are similar enough that neither of them would dramatically influence a comparative decision. (One pair of three sizes of tips is included with a purchase.)

It is with the lower-priced $80 K321 in-ear headphones that smiles show up on faces, toes start tapping, and members of the test panel ignore requests to "take them out so someone else can have a chance, please!" An $80 price is not cheap for many music lovers, but if the fit, feel, and performance of K321 is to their liking, they will skip a week or two of deluxe lattés to fund the purchase of these ear canal headphones. The audio spectrum is especially seamless on K321, with the bass less ponderous, and the treble being more transparent.
Example: I know it’s a little early for New Year’s Eve, but "Auld Lang Syne" by the vocal group Straight No Chaser sounds magnificent when listening to K321. I can hear my wife talking on the phone as I write, with K321′s tips inserted and the music silent, but audio immersion is splendid once I press the play button. Ambient isolation is not especially great with either model, but that is no deal breaker.
Be careful wearing these or any headphones while crossing the streets of Manhattan, Madrid, or Montreal. Ironically, 
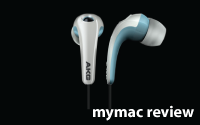
K321 is more forgiving of artifacts from compressed recording than are most over-$100 earphones, without any diminishing returns when recordings are full-strength audio.
Speaker enclosure stems connecting to the cables are long and straight on every one of these headphones. Try ‘em before you buy ‘em, or make sure you can return them, if these straight stems are not comfortable. I never forget I’m wearing either model in my ears, but that probably is okay for most purchasers. You will get some transmitted noise when you touch the cable, which is a bit more annoying on the K321 than on the K340, with its more flexible cable.
MyMac ratings:
LINKS:
email – MyMac Magazine – Twitter – Advertise – Reviews Archive – Podcast
Laptop Cushion "CushDesk"
Company: Belkin
Price: $29.99
belkin.com
Glued to your laptop? Then your battery’s probably gotten hot enough that the bottom of your computer has melted into the literal extension of your lap. And as much as Lady Gaga makes it look like it’s in fashion this year, it’s as uncomfortable as her Moscow arrest. So if getting your hard working legs fried into fresh bacon isn’t your thing, you’ll want to consider Belkin’s CushDesk.
The device is a flat platform, with a cushion underneath (hence the fancy name I suppose). Unlike my previous laptop resting device, the cushy part is actually glued to the thin platform. That means you don’t have something dangling, or squiggling around while you’re maddeningly typing that email about the revised-almost-final-needs-revision project you’re sending to your boss 20 minutes ago.
As promised in the marketing material, the CushDesk comes at a slight angle. To say that it’ll relieve your back pain and soothe your carpal tunnel is as far a stretch as claiming it’ll prevent all spelling mistakes and turn your drama queen assistant into a miracle worker. To be fair, it’s flat on top, and guess what — that holds the laptop just right.
Enough with comfort. Let’s get to the heart of the matter: is it cool enough? Well, for $30 (I’ll spare an extra penny), it certainly doesn’t turn Arizona heat into Alaska cool. It provides the core need: two inches of vital separation between the deadly battery and your delicate lap. After about 40 minutes of use, the heat from the battery did slowly make its piercing way to my legs. In other words, instead of getting charbroiled, you’ll get slowly baked. And that’s actually quite an improvement, short of moving to Anchorage and actually seeing Siberia from your living room.
The Belkin CushDesk is available in three trendy colors, for an economy-friendly price of $29.99
email – MyMac Magazine – Twitter – Advertise – Reviews Archive – Podcast
Download the show here, and subscribe in iTunes
This week, we have Paul Kent with some Macworld Expo news, and it’s also Listener Invite show with our guest Annette Benkie from LearnMacsOnline.com. Be sure to send feedback to us at feedback@mymac.com. Thanks for downloading, enjoy!
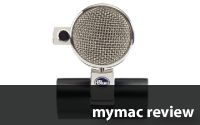
OWC pick – Blue Microphones Mikey iPod Recorder
Please review our podcast in iTunes here.
Links from the show:
Macworld Expo
LearnMacsOnline.com
email – MyMac Magazine – Twitter – Advertise – Reviews Archive – Podcast
Westone 1 True-fit Earphones
Company: Westone
Price: $139.00
http://www.westone.com/content/300.html
It’s not an advertisement for laundry detergent or breakfast cereal, but where else can you get two-thirds the joy for one-third the price? If Westone’s mighty super-premium, ultra-audiophile, Westone 3 in-ear headphones are too expensive for you but you wish you could afford them, the wait is over.
Westone 1′s under-$150 price tag is a sweet spot for many serious music lovers. MyMac considers Westone 1 True-fit Earphones (abbreviated here as W1) to be a bargain at that cost. I have been a little uncomfortable carrying $400 W3 headphones with me for routine usage, but with a $139 alternative, I have no such concerns.
I am not usually happy draping earphone cables behind my ears, but the fit and listener experience are both enhanced when doing so with W1. The driver enclosure and speaker tip fit nicely into my ear cavity. 
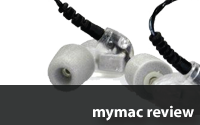
Their weight is so light, and their feel so comfortable, that within a minute or two after inserting W1 I am immersed in the music.
Again I am pleased with the flexible gray blob tips, described in our earlier review of Westone 3. Many serious listeners prefer Comply tips. Their new Tx series should deliver outstanding audio with a snug, squishy fit.
* * * * * * * * * * * * * * * *
I had several questions for the company about these W1 in-ear headphones. See our Q & A below:
MYMAC: Are ALL the tips included with W1 mentioned in your included accessories catalog? Are users given full info on how and when to replace the included tips?
WESTONE: Right now they are not, but in the new one, yes. Tips are replaced when the user feels they need to be. No real timeline. There are instructions on how to change the tips in the users guide.
MYMAC: Where are users supposed to put all the extra tips? They don’t fit into the new case. Why not have a simple gadget bag for extra tips, manual, and the other plug accessories, with your logo?
WESTONE: We’ve found that most folks will only keep the tips they use and maybe an extra pair with their earphones. Most will keep them in the baggie at home or in their desks at work. To create a second pouch would be a waste for the vast majority.
MYMAC: Which tips do people use most with W3 and W1? Which do you and your colleagues at the company use most often?
WESTONE: It varies greatly, from what I have read online. I would say most in the office use the Comply tips. I’ll use the soft grey ones while riding my MTB bike, but chilling at home or the office, I’ll also use the Comply tips.
MYMAC: How do the new Tx series tips from Comply fit into the scheme?
WESTONE: No current plans to move to the Tx Series. They fit fine and I have a few sets in my desk.
MYMAC: Did you ever consider making a larger ear cavity driver enclosure for W1, similar to the one for W3? Is the latter more or less comfortable for most people?
WESTONE: No reason to make the enclosure larger than needed. The W1 doesn’t need all the extra space and this design will fit in most people’s ears.
MYMAC: Am I correct that W1 is louder than most other in-ear headphones?
WESTONE: It’s not that they are loud, it’s that they are very efficient drivers, so it takes very little to push them compared to a dual or even the Westone 3. I noticed I had to use a lower volume right off the bat when we started playing with this one.
MYMAC: What is the most important thing our MyMac readers need to know about W1?
WESTONE: The single driver, lower cost, personal listening earphone.
* * * * * * * * * * * * * * * *
When I asked the company, "Why do you make it so difficult to determine left from right ear quickly," I was told they are aware of this complaint and are working on a solution. Come on, Westone — how about a blue dot for left and a red dot for yellow, placed conveniently but stylishly, on the appropriate speaker enclosure?

Westone’s custom black case has been redesigned and improved substantially since we reviewed W3 last year. The case is now constructed out of stiff, rugged nylon. The zipper pull is a little too small. There is a handy two-sided carrying clip. A useful inline volume attenuator and a 1/4 inch plug adapter are provided, along with an ample supply of ten different types of ear tips, plus an ear tip cleaning tool. Only a black color is available for W1. These headphones do not have an iPhone microphone; they are exclusively for listening.
As with all in-ear products, you must try before you buy, or be able to return them if they don’t fit well or sound right to you. And as with all headphones, keep the volume at a reasonable level. I’m an aging hippy rock ‘n’ roller who still has good hearing, because I didn’t overdo it in my wilder years, and I still don’t. W1 earphones are so efficient that you are being very foolish if you take your iPod/iPhone’s volume level up to or past the halfway point. You will damage your hearing before these headphones peak or distort, so don’t push your luck.
The sonic experience is exceptionally clear. There are no obvious emphases or gaps within the listening spectrum. These are not "neutral" or "reference" headphones, which is a good thing for consumer audio. Bass is ample, treble is crisp, and midrange has plenty of punch. With volume levels in the thirty to forty percent range that is safest for personal loudness, sound isolation is good from ambient noise with the flexible tips, and is almost complete with the foam or flanged tips.
An inexpensive way to test everything in the paragraph above is listening to the new song "Dangerous" by Kardinal Offishall, which was a recent free weekly iTunes offering. If your taste in music is more sedate, you can try "Life’s a Railway to Heaven" by Patsy Cline, with its rich vocal harmonies and bass. Do you miss disco? "Automatic" and "Jump" by the Pointer Sisters will challenge any headphones or speakers.
MyMac awards Westone 1 True-fit earphones a strong recommendation. Your music will sound as good as the original recording allows, relative to your equalizer setting. These are not upper bracket audiophile headphones, but for moderate-priced consumer models, they are tops.
email – MyMac Magazine – Twitter – Advertise – Reviews Archive – Podcast

Eyeball Web Cam
Company: Blue Microphones
Price: $80 to $100 online
http://www.bluemic.com
When your computer or display doesn’t have a built-in web camera, you need to obtain one before you can use iChat, Skype, or other video/audio applications. Most recent Apple (and many Windows) computers and displays have onboard web cams. Why would owners of these Macs and PCs want to buy a third party camera with microphone? What can it accomplish that a built-in web cam does not do?
Eyeball from Blue Microphones is a USB web cam with a press-in retractable lens, for when you need only its microphone. With the lens popped out, Eyeball is ready for prime time for either/both video/audio, as appropriate. Eyeball rotates and pivots on a built-in stand that doubles as a hanging display mount. The company provides a nifty rubber spacer to hang Eyeball on chubby monitors or pianos (see below) that aren’t as skinny as are Apple MacBooks.
There is no software to install. Your Mac instantly recognizes Eyeball. You may need to choose it for audio/video input from the preference area of the application you are using, such as iChat, Skype, PhotoBooth, or Audio Hijack Pro, because your computer may want to default to the built-in iSight camera. Once selected, Eyeball is ready to roll for your next conversation or recording.

Read the included instructions. I know you want to blast off and see how your new gizmo works, but the written info will make the experience more successful, especially the first time. The company has a superb dedicated web site for its Eyeball, with photos, specs, a comprehensive FAQ, a video demo, plus much more. I urge you to spend time learning as much as possible about Eyeball before and during your initial usage.
I was concerned, in my test iChat conversation with a colleague, about the color balance on my skin tone in a room that was not well illuminated. "You look like a tomato, Nemo," he said. After reading the manual and asking the company rep about the problem, he explained that very low light or strong backlight are less than ideal for Eyeball’s video signal, and skin tone will suffer. This won’t be a negative factor in a typical environment.
Returning to our original questions in the first paragraph above, I have the answer. I teach piano lessons to an adult student who is located in a different state. With Eyeball’s cable plugged into my MacBook Pro’s USB port, I can position the camera pointing downward so my student can see the keyboard. It’s effortless, and worth the entire price of this web cam by the third or fourth lesson. I’m sure I’ll come up with a dozen or more ways to take advantage of using Eyeball, as I spend more time with it.

Video quality is very good, given decent lighting. Audio quality is also fine, as you expect from this company with "microphone" in its name. Brian from Blue Mic tells MyMac (excuse the hyperbole):
We designed the Eyeball to deliver an amazing webcam experience with minimum difficulty. The plug-and-play design of the Eyeball means you’re up and running in no-time without the hassle of installing system-clogging drivers. Blue’s legendary sound quality is coupled with a high quality, 1.3M video sensor and high quality large diameter lens array for impressive video performance in a wide range of conditions.
We even innovated in the design of the Eyeball, giving it a unique video "shuttle," which places the camera on an easily-retractable sliding unit that can be hidden inside the Eyeball for easy storage and physical proof that you’re not on camera. The base of the unit even doubles as a storage case for the USB cable, meaning you can travel with the Eyeball in one compact package. Blue even includes a rubber monitor adapter that allows Eyeball’s metal base to mount on almost any monitor or surface for optimal positioning.
Eyeball even has a lot to offer those who already have built-in webcams. The audio performance of Eyeball means chats and recordings that sound incredibly realistic, the video sensor and high grade optics provide greater clarity and motion capture over built-in webcams, and the separate design means you can point, pose, angle, or aim the webcam wherever you’d like, independent of the laptop screen.
- – - – - – - – - – - – - – - -
Eyeball falls somewhere between "How did you ever live without it" and "You didn’t know you needed it until you had it." If you are completely satisfied with your built-in or external iSight or other web cam, keep Eyeball in mind for when your video/audio situation or needs change. Families, businesses, schools, and many other settings will benefit from the versatility and ease of use of this innovative, affordable, compact product.
email – MyMac Magazine – Twitter – Advertise – Reviews Archive – Podcast
Within the Frame: The Journey of Photographic Vision
By David duChemin
Peachpit Press
http://www.peachpit.com
Price: $39.99 US
272 pages
ISBN: 0321637836
Know someone who’s into photography but has no formal training? Someone who may not have the time to take classes, but would love to learn more by talking to a pro, one on one? Then you’ve got a winner. Within the Frame is all about storytelling, and is written to reflect it. In a conversational style, duChemin covers the basics (composition, rule of thirds), and even some of the more technical aspects of photography (lighting, catch light). From the start, he also tells his story, and what the less tangible aspects of photography are.
duChemin makes it crystal clear in the introduction: the world doesn’t need yet another how-to book. To say this is not a how-to book would be erroneous however, it definitely sets out to equip the aspiring pro with tips on gear, and every image (hundreds of them) show you which camera was used, with what lens, and what shutter speed, which aperture settings, and at what ISO. He goes as far as showing series, or three shots bracketed (faster shutter speed, a "medium" shutter speed, and a slower shutter speed to see which exposure is best), explains which shot he ended up picking, and why. You’ll also find discussions on presets in Photoshop, and how certain shots are altered to get a more foggy effect, or a slightly greener tone to get the atmosphere that he felt at the scene.
To reduce this book to a how-to would also be mistaken; it’s more of a conversation where technique and tools come to the service of what you see, what you feel, and to borrow from duChemin’s opening chapter, "Shoot What Moves You." The didactic success of the book lies in the multiple layers of answers duChemin gives us. His stories intertwine the technical "how," that which relates to tool, shutter speed, lighting conditions, cameras, and the practical, human "how," that which tells of talking to people you meet, how to ask for permission, what to do when someone asks you to pay them to take their picture.
duChemin will not stop at the more ethical side of photography, and his answers are sometimes as creative as his work. If someone asked him for money for example, he would deny them national currency, going instead of his own trade’s currency: a photograph. In the third world country, he says, where landmarks mean high tourist density, asking for money is common; but he believes it’s a fairer trade to give his subjects the photograph he took of them.
It’s hard to walk away from the book having learned nothing; more than practical advice, his story is really about what it feels like, what it "thinks like" to be a pro, the challenges one crosses, and how one solves them, topic by topic. It’s rich in examples, devoid of banalities, and rich in detailed, practical tips. If you want to learn and want something that’ll keep you hooked, you’ll want to get Within the Frame.
It’s a pleasure to read, written in a friendly, conversational style that makes absorbing so much information much easier. I especially like the parts where the conversation is turned back to the reader, and he invites you to go out and shoot what could be mini assignments, exercises to help you get to the next level. Overall encouraging, inspiring, and a great birthday present for anyone (including yourself!) who has a DSLR and needs a little extra inspiration to go out there and shoot more.
email – MyMac Magazine – Twitter – Advertise – Reviews Archive – Podcast
DotHub
Company: Macally
Price: $19.99
http://www.macally.com
One of the attributes of Macally’s 4-port hi speed USB2.0 DotHub is its size. It’s a small square. At a little under 2-inches square it takes up no more space than a small brownie (except it’s white) and because it’s small the company says it’s a great accessory to use with a laptop. That’s undoubtedly true, but I found it also made a very unobtrusive accessory for my desktop. Half the time I forget it’s there.
The DotHub comes with a USB port on top and one on each of three sides. The fourth side has ports for a DC connector and USB connector for the computer. It’s Mac and PC compatible. There are any number of USB hubs on the market, of course. I like this one better than the others I own mainly because there is only one port on each side, so there’s nothing to block those big clunky usb connectors that come with some devices. The DotHub is simplicity itself.
email – MyMac Magazine – Twitter – Advertise – Reviews Archive – Podcast

Mac OS X Snow Leopard Bible
By Galen Gruman, Mark Hattersley, Timothy R. Butler
Paperback: xxxvi + 804 pages; published September 8, 2009 (language: English)
Price: $39.99 (US)
Publisher: Wiley
http://www.wiley.com
ISBN-10: 047045363X
ISBN-13: 978-0470453636
Race in the Snow
There are three ways in which a book on something as potentially ephemeral as an operating system (that’s no denigration: we love our big and powerful cats!) deserves success:
• comprehensiveness
• accuracy, being well-conceived and written
• being published first
Mac OS X Snow Leopard Bible by Galen Gruman, Mark Hattersley and Timothy Butler certainly wins on the third count. At the time of writing (just ten days after the book’s publication) there is no available competition… the relevant volume in the ‘Missing Manual’ series is still a couple of weeks off, although it’s apparently 200 pages longer. One or two smaller, lighter-weight titles make have been published already – less than a month since 10.6 was made available by Apple – but they don’t try to compete with this excellent Wiley offering in scope or depth. O’Reilly’s Mac OS X Snow Leopard Pocket Guide (ISBN-10: 0596802722; ISBN-13: 978-0596802721) seems to have more material relevant specifically to Snow Leopard than to other versions of OS X.
And this is the key point: you have to turn to the outstanding PDFs made available by the TidBits people for a true distillation of subject matter dealing (almost) exclusively with (the very few material changes introduced in) Snow Leopard. The over 800 substantive pages of Mac OS X Snow Leopard Bible address much else besides.
Context
That’s no bad thing though: the book is aimed at anyone using OS X from beginners to advanced users. It provides details on navigating the Finder (for instance, there’s a nice little sidebar [on page 40] providing the rationale for the Menu Bar – something with which Windows users may be unfamiliar). The new system’s architecture is laid out, and a good explanation of what is and what isn’t (true) 64-bit is given. There’s a lengthy and reassuring description of installation – important, of course, because this differs from the procedure with earlier 10.n upgrades.
Nor is the breadth of Mac OS X Snow Leopard Bible’s coverage of the operating system in general something to criticize: given that there are so few really new features to Snow Leopard, it would be unreasonable to expect 800 pages to be devoted to them. Rather, Mac OS X Snow Leopard Bible is a worthy introduction and reliable reference source to using Apple’s latest operating system – almost whether or not you’re familiar with Leopard (10.5) or earlier versions.
Clearly, much of what’s covered does apply specifically to 10.6 (installation, Spaces and Exposé, Services, some troubleshooting routines, Stacks, the new QuickTime and so on). So, although much of it does not, it would make little sense to buy this book if you’re still running 10.5, 10.4 or earlier – unless to provide an in depth and authoritative insight in what awaits you once you do decide to upgrade (to 10.6).
Snow Leopard-only features, procedures and tips for its use are flagged in Mac OS X Snow Leopard Bible with a ‘New Feature’ subheading; they are also set in bold. Usefully, differences between the way things work in the new OS and previous ones are also detailed: e.g. "The Input Sources pane in Mac OS 10.6 Snow Leopard had been called Input Menu in previous versions, and now has several new controls. Also, the Character Palette is now called the Character Viewer (but is otherwise unchanged)" [581]. These changes are not – unfortunately – aggregated anywhere such that you could gain instant access to everything that’s new in Snow Leopard. There is a ‘Cross-Ref’ icon, but it’s not so widely used as one might have expected, or hoped.
So, if you already own, or intend to own, OS X 10.6, this well-written book is as good an introduction and reliable a reference source as you can currently get and can be thoroughly recommended for all but the most specialist and knowledgeable users of the Mac.
Structure
Mac OS X Snow Leopard Bible is divided into five main sections: Getting Started with Snow Leopard (or about 46% of the text of the book); Networking and the Internet (18%); At work with Mac OS X (just 8%); Maintaining your Mac with OS X (17%); and Beyond the Basics (11%). In each section are from three to nine chapters – each further broken down into subsections which deal with specific topics. There is a comprehensive index of 25 pages, and 30 pages of glossary.
This typical Bible arrangement works well and provides ample structure and mileposts, should you decide to work your way right through the book, rather than dip in for topics in which you were interested, which is also possible, given the non-linear narrative and ways in which concepts and terms are covered.
Quality
There are plenty of black and white screen shots, though their reproduction is a little on the small side at a times. Each is referenced sequentially within its chapter – something that might usefully have been done with subsections too… iTunes as music library could have been 9.1, iTunes for podcasts 9.2, for radio 9.3 and so on. Not that the book shows any signs of having been rushed.
Indeed, Mac OS X Snow Leopard Bible easily meets the other two criteria outlined at the start of this review for success: it is comprehensive (a page and a half is devoted to ‘Enabling Keyboard Assistance’, for example; almost a page to Safari’s ‘speciality’ controls; half a page to the location of fonts on your hard drive etc). It is well written and largely avoids that annoying, ‘chatty’ style which bedevils other authors’ attempts to sound ‘accessible’. At the same time, the language is not forbidding; difficult concepts are explained well. With plenty of white space, topics use clear, consistent and pleasing typographical conventions which make use of bold, indenting, bullets and simple, short paragraphing with plenty of white space.
Using Snow Leopard
Probably the reason that most people will buy Mac OS X Snow Leopard Bible is to learn how to make (better) use of the amazingly sophisticated and flexible operating system – in all its complexities. This, indeed, is the declared aim of the authors… "As a new authors team, we have focused much more on providing tips and how-to context so you can get more out of your Mac than ever before" [xxxi].
Since a tutorial approach has been avoided, if you want to skip the chapters on scripting, Automator and the Unix shell script, for example, without then being left high and dry because a step is missing, you can. If you want aggregated in one place many of the keyboard shortcuts useful in navigating the file system, it’s there – actually, in two places. If you need to set up Wi-Fi from scratch, there’s more than enough to get you going – with a nice little introduction to IP addressing [p.441] at the start. Small steps, maybe, but no attempt to infantilism the enthusiast. Most sections conclude with a simple, useful summary. And those procedures and applications (such as printing/faxing and Mail, say) which are more complex are in fact covered step by step; often menu item by menu item. A true (Wiley) Bible.
All the major Apple utilities are outlined – proportionate space being devoted to those which most would agree are of greatest important – Mail, iTunes, Address Book etc. There’s a whole chapter [16, pp 487-476] devoted to Services. MobileMe is covered in great detail; though only a couple of pages devoted to synching in that context. The fact that there are lengthy chapters (of 55, 20 and 22 pages respectively) devoted to system preferences, fonts and security makes it clear that Mac OS X Snow Leopard Bible is about the operating system – in the widest sense of the word – and not about all the things like multimedia, twitter, web design and databases that you can do on a modern Mac.
Conclusions
Once you understand – and are satisfied with the fact – that Mac OS X Snow Leopard Bible deals with OS X from the point of view of users of the Mac’s operating system, which is now 10.6, Snow Leopard; and that it is not devoted exclusively to the operating system’s new features, you are likely to be impressed by its standard of presentation, handling of the material, comprehensiveness and ease of use. At present this book represents the best available printed resource on Apple’s latest operating system.
Pros: Mac OS X Snow Leopard Bible is comprehensive, accurate, accessible and well-researched. It will answer most users’ questions and guide most users – new and ‘seasoned’ – towards getting the best from Snow Leopard.
Cons: For those who are very familiar with OS X, the absence of an aggregated list of new features and functionality in 10.6 is a missed opportunity.
MyMac.com Rating: 4.5 out of 5
email – MyMac Magazine – Twitter – Advertise – Reviews Archive – Podcast

Mac OS X 10.6 Snow Leopard
Author: Robin Williams with John Tollett
Publisher: Peachpit Press
ISBN: 978-0-321-63538-9
Price: $34.99 US/$41.99 CAN
Page Count: 459
http://www.peachpit.com
So you’ve purchased yourself a new Mac or decided that it’s time to update your Intel Mac and you’ve bought Mac OS 10.6, Snow Leopard. You’re not really sure what to expect.. so what are you going to do? Consider purchasing Robin Williams (not the actor) and John Tollett’s new book, “Mac OS X 10.6 Snow Leopard – A Quick Reference Guide to Mastering Snow Leopard!” Ms. Williams is well know for her writing style that beckons the reader into the book, based upon her years of experience in writing and teaching, making books a pleasure to read. Mr. Tollett, well known as a designer, art director, and illustrator, has worked with Ms. Williams on many of her books.
Ms. Williams book is designed for the new user, either of a Mac or of Snow Leopard, and begins with the very basics, getting to know and use the desktop and the Finder. The first section, Mac OS X Basics, covers everything from Home, through Folders, the Finder Window, the Dock, Keyboard Shortcuts, Expose and then works its way into the next section, Applications.
For someone new to OS X and Snow Leopard, Ms. Williams starts you off with an introduction to the Applications Folder, what’s there and then proceeds to cover the basic apps that one finds on the OS. TextEdit, Mail, to include breaking it down to setting it up, customizing, smart mailboxes, Notes, To Do Items, downloads, attachments and then into the Address Book, Safari and even into RSS. She then moves on into iCal, iTunes, iChat, Preview and the other miscellaneous items on the system; DVD Player, Font Book, Photo Booth, QuickTime Player, Spell Checker, Colors, Character Palette, Speech and working with multiple apps at once.
As Ms. Williams continues teaching the reader Snow Leopard, and that is exactly what she is doing, she works the reader into making the Mac their own. How to do that? By customizing the Dock, the Finder, Finder Windows, Preferences, working with Dashboard, setting up printing and faxing, taking one Mac and sharing it amongst many users, using Spotlight, and learning all about Time Machine. Now that she has shown the reader the basics, she continues on connecting to the Internet, and more into the Tech aspect; troubleshooting your internet connection, troubleshooting Mail, sharing files, Bonjour and screen sharing. As she nears the end of the lessons, Ms. Williams covers basic troubleshooting, making sure that your Mac and your files are secure and lastly, how to upgrade your Mac and migrate from one computer to the new one.
As one reads through the book, one is also struck the by fantastic illustrations that abound. No simple basic drawings here, Mr. Tollett has done a superb job of illustrating this book. It is really a pleasure to see the care that both Ms. Williams and Mr. Tollett have taken to produce a really fine tutorial, if you will, on how to work with Snow Leopard.
So to review:
A very well written and superbly illustrated book that explains the internal workings of Snow Leopard, covering all the things that a new user should learn from A to Z. If you are looking for a really good book to have on hand or to give as a gift to someone, consider Ms. Williams and Mr. Tollett’s Mac OS X 10.6 Snow Leopard book. If you are a seasoned Mac user, you may also wish to check out Ms. Williams and Mr. Tollett’s book. Either way, I don’t think you’ll be disappointed.
email – MyMac Magazine – Twitter – Advertise – Reviews Archive – Podcast
I love headphones. I love great sounding headphones that are both a comfort to wear and reproduce sound in a natural way. Not all headphones are created equally, of course, and sometimes you do get what you pay for. And sometimes, no matter how great something sounds, there is just no way you can justify paying that much money for headphones. But for me, if I have the money, and the audio quality and comfort is there, well, I am always a sucker for a great pair.
Last time around, I reviewed the Sennheiser HD 650‘s, which became my (then) favorite all-time headphones. Yes, of all time! A few tears actually fell as I boxed them up and shipped them back once my review period was over. But onward and upwards, I always say! It’s time to try out some new headphones!
This time around, I am looking at four different headphones from four different companies. Each headphone represents a different type of buyer, from the very high-end to low-end novelty variety. So no, I won’t be directly comparing or rating these headphones against each other. The headphone are:
iHome iHMP5 – $69.99
Audio-Technica noise-cancelling QuietPoint ATH-ANC7b – $219.99
Shure SRH840 Professional Monitoring Headphones – $199.99
AKG K 272 HD High Definition Headphones – $349.95
iHome iHMP5
Company: iHome
Price: $69.99
www.ihomeaudio.com/

Now, as an audiophile, the chances of my actually buying these headphone after having seen them in a store would be next to zero. While the idea of a pair of headphones that can also transform into a pair of speakers sounds interesting, experience has taught me that gimmicks of this sort usually do not translate into great sounding headphones. And the iHome iHMP5′s prove that out. While it is nifty to be able to take off your headphones and turn them into speakers, the end result is sub-par audio quality.
Honestly, for a pair of headphones that only cost $69.99, the audio quality is probably middle of the road, with a prevailing curve to the low-end. Shriek-y highs and muddy bass for compressed audio (MP3s) are the norm when playing on the iHome headphones. CD quality audio fares better, but still not good enough that I could recommend to anyone based on headphone use only.
Comfort in headphone mode is a little cumbersome. They just were not all that comfortable. I could use them for, at most, an hour before I would have to take them off to give my head and ears a break.
But then there is the whole speaker-transformer thing. Granted, the audio playback via the speaker mode is twice as bad as it is in headphone mode, there is a nugget of a good idea here. My wife, for instance, speculated that she would like this feature so that, if she wanted someone else to hear a song and they were not comfortable simply donning her headphones, this would come in handy.

To turn the headphones into speakers, you flip the ear pieces around and connect two magnetic proximity connections together. (A red light comes on when done correctly.) At that point, the batteries (2 AAA) located in the left earphone kick on the small amplifier, and audio is clearly heard as if a small pair of speakers were playing. Again, the audio quality in this setting is, honestly, atrocious. But the gimmick idea itself is not, and I don’t remember ever seeing this done before. I give iHome points for a creative idea alone, if not for the actual execution. They work as advertised. You clearly hear music. As a podcaster, of course, I tried out spoken word content via the speaker mode, and found the audio passable if not inspiring. I could listen to podcasts like this, if I had nothing else, but I would not want to.
MyMac.com rating: 1 out of 5 in speaker mode, and eking out a 2 out of 5 for headphones.
Audio-Technica noise-cancelling QuietPoint ATH-ANC7b.
Company: Audio-Technica
Price: $219.99
www.audio-technica.com

I have to admit, I have a soft-spot in my heart for Audio-Technica. Long before I was the Mac publisher and podcaster that I am today, I was huge into audio equipment, dating back to the mid-1980s. Back when CDs were still just around the corner, and serious audiophiles had expensive record collections to play on a top-quality turntable. And for me, that turntable was an Audio-Technica. While I forget the details on what model it was, I loved that turntable.
At a list price of $219.99, the QuietPoint’s are the second most expensive headphones in this review. They use active circuitry to cancel ambient noise, such as those on an aircraft or loud conversations going on behind you at work. To do this, you have to install a single AAA battery in the right earphone. Fear not, you won’t start tilting your head in that direction because of the added weight. I didn’t even notice it.
The QuietPoints also come with a hard case for storing both the headphones and included accoutrements. (Adapters include 1/4-inch, airplane jack adapter, and the cable itself.)
The included audio cable that connects to the jack in your iPod/iPhone/receiver is very, very short. For these types of headphones, I can’t remember ever having such a short cable: 42". Now that may not sound short, but I assure you it is. If you have these plugged in to your computer, and turn around quickly, you are liable to rip the headphones right off your ears. (Says the voice of experience.) The cable also detaches from the headphones themselves, so you could conceivably replace them with a longer cord. But why should you have to? And why did Audio-Technica make the cable so short? The cable is also very thin and prone to crimping.
But wait, what’s this still in the case? Another, longer cable? Yes, a 60" cable is also included! I am saved! Now here is where Audio-Technica makes good. Because the longer cable is what I want when sitting in front of the computer listening to music, I don’t need, nor want, such a long cable if I am on an airplane and my iPhone is sitting in my pocket or lap. On a recent trip to Utah (via Las Vegas) I brought a paid of headphones with a very long cable. It was a pain to manage such a long cable, and it kept getting in the way.
Comfort is decent, although the headphone cups are a little on the small size. I can easily see that, for some people with larger ears (like Spock) they simply would be too small. For me, my ears JUST fit in the cups. And I don’t have big ears. (Do I? Let me check‚Ķ nope, no big ears here.)
The headphones themselves feel decently comfortable on your head, but there really is not enough padding at the top. Still, I would have to be wearing them for more than a couple hours before I really started to notice.

The crux of any headphone review, however, is audio quality. Because the QuietPoint’s is active noise cancellation, you have to turn it on, or these headphones simply sound awful. I have had other noise-cancelling headphones in the past that did not degrade the sound this badly when the battery dies on you.
When the noise-cancelling is active and everything is optimal, the QuietPoint’s sound quite nice. Nothing spectacular, however, and therein lies the problem. These headphones list for $220, and at that price-point, I really do expect better sound quality. Bass is decent, but nothing that will knock your socks off. Midrange is good, not a lot to complain about. And highs are good, unless played at higher volume, at which point they tend to get shriek. Bass, as well, starts to distort and drop off at high volume.
The QuietPoints also bleed sound at an unacceptable level. What good are headphones if your wife keeps giving you dirty looks while you are wearing them while she is trying to watch television on the same couch? "I can hear that," she kept saying. And she could, quite clearly. Not good.
After reading other reviews online for the Audio-Technica noise-cancelling QuietPoint ATH-ANC7b, I was frankly expecting much better. If you plan on spending this much money on headphones, continue reading.
Shure SRH840 Professional Monitoring Headphones
Company: Shure
Price: $199.99
www.shure.com

I actually did not have the Shure headphones when I first started evaluating headphones for this article. When they arrived, I originally thought I would simply save them for a separate review. Then I started using them. And what I discovered is a pair of headphones that rival much more expensive headphones (see the AKGs below) and blows away the Audio-Technica QuietPoint handily, and for $20 less!
There is no fancy noise-cancelling trickery employed here. The headphone cups just naturally close out ambient noise (to a point) and the audio quality… well, we will get to that in a moment.
The comfort of the SRH840′s is exceptional. The headphone cups themselves are large enough for even our Mr. Spock, and the headband itself is nice and easy on your head. And while the headphones feel heavy in your hand, they magically loose their weight on your head. They are balanced very well. (unless you have an uneven head, in which case you’re out of luck.)

The cable is detachable, and is very long with a twisted middle for even longer range. Because these are monitoring headphones, aimed at musicians and technicians, you have to have exceptional length and flexibility. The SRH840′s deliver on both accounts.
Okay, let’s get to the meat of the issue: the audio reproduction of the SRH840′s is exceptional. Bass is solid and punchy, never bottoming out even at extremely loud volume. (The kind that induces hearing loss with prolonged exposure.) The mid sat right where it should be with every type of music I could throw at them. The high was crisp and clean, like a bird chirping in a tree at the first hint of springs sunshine.
The difference between the Shure’s and the above Audio-Technica headphones are night and day. It’s like going from a decent iMac G4 to an MacPro. It’s real, it’s clear, and there is no going back once you experience the difference. True, these are not the headphones you will want to lug around in your carry-on at the airport, but only because they are large and heavy. But you will want to.
The soundstage produced by the Shure SRH840′s are matched only by the AKGs. They are wonderful in almost every respect.
AKG K 272 HD High Definition Headphones
Company: AKG
Price: $349.95
www.akg.com

Want bliss, of the audio variety? Sit back, relax, and put on the song "Trouble by Coldplay" while playing them on your AKG K 272 HD’s. Seriously. This is the sound you never knew you were missing until you hear it.
The AKG K 272 HD feature an ultra-soft velvet ear-pads and gimbal-suspended headband. Yeah, velvet. And almost perfect adjustments for any person. No expense, it seems, was spared by AKG to make these some of the finest headphones in the world. These are the headphones that have displaced the Sennheiser HD 650′s I mentioned at the beginning of this article, and yet they are $250 less expensive. They are exceptional in every single facet, from comfort to sound.
These headphones are in a very small, select class of audio products. And while I have not tested every single pair of headphones on the planet, I can honestly say that the AKG K 272 HD’s will give them a run for their money.

What else can I say about Bass, Treble, etc… that you can’t grasp from the above three paragraphs?
So we come down to a direct comparison between the AKG and Shure products. I gave them both a perfect 5 out of 5, so which do I prefer? Well, it depends. And while that may sound like a cop out, it’s really not. They both sound fantastic, reproducing audio unmatched by most other headphones. So it comes down to, for me, the type of music you are listening to.
For harder music, such as dance or rock, I think the Shure SRH840′s are a better fit. They just play louder. They get up in your face, smack you around a little bit to make sure you are paying attention, then feeds your need to rock out without compromise.
The AKG K 272 HD’s are more respectable to you. Kenny G, the soundtrack to Star Wars, or some soft rock. The AKGs will politely ask if you would like red or white wine with your meal, then deliver such an exceptional experience that you will drift, blissfully, off to sleep with a smile on your face. They are slightly coy, understated, and unpretentious, yet refined like a rare gem. They are what the SRH840′s aspire to be, but the Shure product is just having too much fun rocking out and watching the SuperBowl to care.
email – MyMac Magazine – Twitter – Advertise – Reviews Archive – Podcast
Download the show here, and subscribe in iTunes
MacAlly Ecofan contest winners announced! Then David, Guy, and Tim have a long and lively discussions on ethics, conflicts of interest, and integrity in the technology press. Be sure to send us feedback to feedback@mymac.com and review our podcast in iTunes here.
Check out the OWC On-The-Go Pro 64GB SSD Triple Interface here.
Links
MacAlly EcoFan
email – MyMac Magazine – Twitter – Advertise – Reviews Archive – Podcast
Wi-Fi in the sky
by Rich Lefko
Recently, I was flying home to New England from an Atlanta business trip. While I waited to board the plane, a young women came up to me and asked if I was interested in trying Delta Airlines’s new inflight wi-fi service for free. Naturally, I said yes. She gave me a card with some instructions on it to follow and I boarded the plane. I noticed an “This aircraft is equipped with Wi-Fi” sticker on the outside of the plane as I entered the cabin.
As usual, the stewardesses went through their safety ritual, but added that wi-fi was available after the plane had risen above 10,000 feet. Since I was stuck in the center seat, getting my MacBook out would have been a chore, so I decided to try this out with my iPod Touch, 2nd generation.
After we reached 10,000 feet, I clicked on my Touch and went to the “settings” tab, and turned wifi on. In the “Choose a Network” section, “gogoinflight” appeared. Following the instructions on the card, I clicked on this setting and then launched safari.
This took me to a “join or login” gogo wireless website. In a few minutes, I had set up an account and entered the coupon code (which I will give at the end of this article) which showed a charge of zero. Normally, the fee is $7.95 for the duration of the flight. There are more option if you fly a lot, sign up for the month, the year, etc..
What was it like? I would not say that is was super fast, but the speed was more than acceptable. In no time, I was sending and receiving emails and surfing the web on my Touch.
The fellow sitting on my right was sleeping most of the time, but the gentleman on my left, Reverend David Palmer of the Kenwood Baptist Church in Cincinnati, Ohio, was hard at work on a presentation he was delivering in the Boston area. I had remarked that the ability to connect via wifi at 30,000 feet was pretty cool and the pastor asked me if I had really connected? I confirmed that I had and he said he was having a hard time remembering a certain biblical passage for his presentation. I clicked on the google app on my touch and asked him what it was? I typed it in, and in seconds we had found the passage he was trying to remember in 2nd Corinthians 1:20. Very cool. A short time later, the good pastor wanted to know the etymology of the word “Gentile.” The online dictionary gave the reverend exactly what he needed.
I must say, having the ability to send email and surf the web was a great time killer. Before long my flight had arrived in New England and we were coming in for a landing, dropping below the 10,000 FT threshold for connection.
You’ll have to judge yourself if the $7.95 charge is worth it. I think on flights lasting two hours or more, it is a bargain. I really enjoyed the connection.
If you are on any Delta flight that is wifi equipped, try this coupon code “DELTATRYGOGO.”
Click buy after you login and type in the coupon code, then click “update total.” You should see a zero dollar charge. Not clear if this will work on international flights, but what have you got to lose? This code expires 12/31/2009.
If you connect up there, send me an email.
Bluepack S3
Company: Dexim
Price: $65.90
http://www.dexim.net
There are many options out there is you want an extra, or backup, battery for your iPod. Dexim’s Bluepack S3 is one of these options.
The Bluepack S3 looks like an iPod Nano and falls between a Touch and a Nano in size. It is simply an external rechargeable battery that connects to your iPod to charge it away from a power source. The battery is compatible with all recent iPods/iPhones with a dock connector. I was able to get 2 full charges in my second generation iPod Touch with one charge of the Bluepack.
The Bluepack is a little heavy, so I would not suggest it for carrying it in your pocket while charging your iPod. It would fit in your pocket, but it wouldn’t want to do it. However, it is a great option for charging your iPod without a power outlet (of course the battery itself has to be charged). It would be great for traveling and getting more life out of your iPod on a plane (for example).

The Bluepack comes with everything you need. You get the battery, the case, and the iPod connector. It even comes with a cable for charging a Blackberry.

One odd feature of the Bluepack is it has a built-in laser pointer. Maybe some people would find this useful, but to me it is not needed. I say get rid of the pointer and lower the price of the unit.
Speaking of price, the retail price of the Bluepack is $65.90. A little bit on the pricey side compared to other power options I have seen and reviewed.
Overall, the Bluepack is a nice external power source choice for your iPod/iPhone in what seems to becoming a crowded market. It is a little on the expensive end, but worth looking into. It is definitely a good option for those with an iPod and a Blackberry. You can get one battery for both units.
email – MyMac Magazine – Twitter – Advertise – Reviews Archive – Podcast

Mac OS X Snow Leopard for Dummies
Author: Bob LeVitus
Publisher: Wiley Publishing, Inc.
ISBN: 978-0-470-43543-4
Price: $24.99 US/$29.99 CAN
Page Count: 442
http://www.wiley.com
When they first began publishing the “Dummy” books, a lot of folks took the titles to be demeaning or designed to make fun of those who bought and read the books. Time has passed and there are simply dozens of titles appearing each year covering every topic imaginable. The Mac series of Dummy books goes back to the OS 7 time period and continues to this day. Amongst those leading the way in writing Mac Dummy books has been Bob “Dr. Mac” LeVitus.
Mr. LeVitus’s latest edition, Mac OS X Snow Leopard for Dummies, is primarily designed for the new user of a Mac or of Apple’s operating system, Mac OS 10.6, better known as Snow Leopard. Written with his normal sense of humor present throughout the book, LeVitus takes the new user through the steps of learning to use Snow Leopard.
LeVitus breaks Snow Leopard learning down into six separate sections for the reader. He starts with “Introducing Mac OS X Snow Leopard: The Basics”, covering starting up your Mac to explaining the Desktop, Windows and Menus. Simple things that experienced Mac users may skip over but that a new user may not be familiar with, such as desktop pictures, widgets, sound effects, the Dock and the Finder are covered within the first part of the book. In Part 2, LeVitus gets down to explaining how to organize files and folders, the use of disks and how to organize your life on your Mac. Part 3 delves into “Getting Things Done” by showing how to connect to the Internet, surfing the Web with Safari, using iChat, working with Address Book, using Mail, iTunes, TextEdit and Apple’s DVD Player.
Part 4 of the book explains printing, hooking up your printer of choice, networks, permissions and some of the items that even some seasoned Mac users are not into, such as Automator, AppleScript, Universal Access and Boot Camp. Part 5 goes into a very important part of being a Mac user, Backing Up what you have on your computer. LeVitus covers Time Machine, using the old drag and drop method to a CD, DVD and actually burning your important items to the disk, plus the use of available software, be it freeware or commercially available. During the course of the book, LeVitus covers the useful software that comes with your Mac; Disk Utility, Keychain Access, Airport Utility, you get the drift.
He continues and covers Troubleshooting when things go wrong for even though it is a Mac, things can still go wrong. This section examines using the OS X Installation Disk, starting up from a DVD, First Aid, Safe Boot, Zapping the PRAM, reinstalling OS X and what to do when your Mac crashes at startup. Part 6, the final section, explores ways to speed up your Mac experience- keyboard shortcuts, typing skills, monitor resolution, icons and preferences, RAM, a new hard drive, even an accelerated graphics card. More ideas flow when he suggests throwing money at your Mac; more RAM, software, a new monitor, faster internet, DVD burner, things that most Mac users do consider and follow up on during their use of their Mac.
All in all, in reading through the book, one notices the little subtle (and not so subtle) use of humor throughout, making things more interesting as one continues through each chapter. This book is designed to draw you in, make you want to continue to read on, and remember what you have read. Bob LeVitus succeeds on all counts there. The book is never boring, too technical nor does it bring down the level of information that it provides to such a low point that it would seem to be speaking down to the reader. LeVitus, after writing over 50 books, has it down to a science in how to explain things properly and to keep the readers’ interest going.
So to review:
Well written how-to book that explains the ins and outs of Snow Leopard, covering all the things that a new user should learn to make their Mac experience a more enjoyable one. Even if you are a seasoned Mac user, it never hurts to have some good information at your fingertips… just in case.
email – MyMac Magazine – Twitter – Advertise – Reviews Archive – Podcast
Fundamentals of Adobe Photoshop Elements 7 DVD
With Sue Jenkins
Company: Class on Demand
Price: $39.95
http://www.classondemand.net
Fundamentals of Adobe Photoshop Elements 7 is a comprehensive DVD tutorial that will provide most users with everything they’ll ever need to know about a complicated photo editing program. But take my advice: Before you plunk down $39.95, give some serious consideration to your own personality and think about how you learn.
Do you learn best by taking classes or are you more inclined to learn by trial and error? Are you patient or do you jump from one thing to another like a cricket?
How many hours a day are you willing to spend sitting in front of your computer? Consider, as one of my friends frequently reminds me, that every hour spent in Elements or any other photo editing program is an hour not spent outdoors learning to take better pictures that may not need any editing at all.
Or perhaps you’re one of those who is simply curious to know how things work. Many of them, and I include myself in this group, don’t have a pressing need to learn Photoshop Elements. Most of the time I can take halfway decent pictures and if some tweaking is needed, iPhoto is not only simpler to use but now comes with enough basic tools to make it useful.
However, Elements is far more sophisticated and offers a nearly bottomless array of possibilities for modifying pictures. Watch just one section of this Sue Jenkins’ Class on Demand, such as the one called "The Editor Overview," and you’ll see what I mean. Photoshop is feature-rich, but it’s also like a trail that gains 2,000 feet in elevation in just a half mile. It’s steep but some users will not rest until they know whether they can make the grade, so to speak.
Jenkins is a good teacher, which is to say she knows her subject thoroughly and has the ability to communicate clearly, but if you made a list of just the basic topics she covers on this one segment, you’d end up writing a short book. We can’t fault Jenkins for the fact that Photoshop Elements is so dense and complex (It even has its own arcane vocabulary). Nor can we complain that she talks fast. Her diction is excellent, and after all, she’s trying to provide in four hours what a community college class would probably cover in a whole semester.
If you’ve decided you’re serious about learning the program, get this DVD and plan on spending at least 60 to 90 minutes a day with it. You’ll probably want to have your copy of Elements open so that you can go back and forth between the class and your own photos. Although it may seem obvious, keep in mind that if you have Mac Elements 6 or any earlier version of the program, this class is still going to be useful.
Most of what Jenkins talks about in the "Workspace Overview" and "The Organizer Overview" would be more applicable (though not entirely) to the Bridge in Elements 6, which allows easy access to your iTunes library. Elements 6 for Mac is the latest version, and its Editor is essentially identical to that of Elements 7 for Windows, which is its current version.
One of the major benefits of having the Class on Demand DVD is that you can review chapters eternally. If you really didn’t get that explanation about using what is cryptically called "adjustment layers" the first time, you can watch it repeatedly. For some purchasers, this will not seem as useful as being able to ask the instructor questions.
Sadly, however, good teachers are hard to find, so for my money it’s better to watch Jenkins repeat her explanation three times than to ask questions of someone who may not be able to explain the topic well. And besides, attending a class in the comfort of my home is a lot more convenient than driving across town to sit on metal chairs designed by Luddites.
The DVD begins with 30 seconds of obnoxious music and kids jumping up and down at a rock concert. Mercifully, you can click in the upper right hand corner and abort that nonsense. On the next screen, Jenkins recites her resume, which bored me to tears. Again, you can click and bypass it. Those caveats out of the way, I can say the class content is well organized and Jenkins is a "let’s get down to business immediately" type of teacher. Other than the narrated resume, which is brief, you won’t have to stumble over her personality to get at useful information.
Fundamentals of Adobe Photoshop Elements 7 is divided into four parts, "Introduction to Photoshop Elements," "Working with the Organizer," "Working with the Editor" and "Special Techniques." The DVD comes with a file of stock photos so you don’t have to rely on your own image. In addition, each of the chapters is a hyperlink. If you feel you know enough about the basics, you can easily jump to the more advanced section.
email – MyMac Magazine – Twitter – Advertise – Reviews Archive – Podcast
Laptop Lift L1
Company: LUXA2 / Thermaltake
Price: $71 to $97 at online merchants
http://www.luxa2.com/products/laptoplift/l1/design.html
LUXA2 values style and ingenuity at least as much as form and function. After you place your MacBook Pro or other portable computer on the Laptop Lift L1, you physically adjust the height and pitch of the stand’s deck to suit your work environment. An impressive pressure spring keeps everything in place, although at first you expect it to catapult your precious computer across the room.

"How does the pressure spring work for height adjustment?" I asked the company representative. She replied:
Basically the hinge is connected to a spring which clicks into motion when pressure is applied. The spring can sustain up to three kilograms of weight, allowing your notebook/MacBook to be adjusted upward and/or downward until your desired viewing angle has been reached. You can also refer to an animated illustration of the mechanism in action here.
That video is slick and impressive, but it doesn’t tell us much about L1′s method of heat absorption. My next question was:
"How does the heat sink work, for temperature lowering?" Her reply is below.

The parallel dual heat-pipes spread from one side of the L1 all the way to the other side, providing a long enough surface distance for ideal internal heat dissipation through vaporization. The heat-pipes are ideally located at the back end of the notebook where usually the hottest components are installed. See illustrations at our web site.
An additional description on the LUXA2 site states:
With dual heat-pipe integrated, L1 enhances superior heat dissipation by providing direct heat conduction path between laptop’s bottom casing and L1’s aluminum surface. L1 is a silent thermal solution that offers users a very comfortable computing experience.
There is no fan, so all heat transfer is passive. MacBook Pros get hot, and Laptop Lift 1 does an admirable job of moderating a computer’s temperature. I have used it all day every day for three weeks, and it has earned a permanent spot on the dresser where I work for hours each day. Laptop elevation, angle, and temperature are now optimized for me.
One model of L1 is sized to accommodate any Mac laptop. I’m using a 15" MacBook Pro, with much success.

The brushed metal finish is splendid. I’m not sure about the significance of LUXA2 emphasizing that Swarovski crystals are used, or their location. With our without them, this is a gorgeous, versatile product that is easy to recommend for discriminating purchasers. Attractive photos are at the LUXA2 Gallery page.
email – MyMac Magazine – Twitter – Advertise – Reviews Archive – Podcast
The Macintosh iLife ’09
By Jim Heid
Peachpit Press
http://www.peachpit.com
416 pages
ISBN-13: 978-0321601346
US $39.00
Just like the swallows returning to Capistrano, Jim Heid produces another fine instructional book each time Apple revises its iLife suite.
Yet again, he succeeds in assembling what I think is the best instructional book on iLife for the average Mac user. Heid has developed a proven formula, and it works once again with The Macintosh iLife ’09.
As Apple crams more features into each iLife application, each edition of The Macintosh iLife keeps pace, and this one tips the scales at 2.4 lbs and 412 pages, including a thorough index. You get great material on each iLife application; iPhoto, iMovie, iDVD, GarageBand, and iWeb.
For me, the big new features in iLife 09 were iPhoto’s Faces and Places. Naturally, Apple left more unexplained than explained in its support documents and Help files. Authors like Heid have to take the program by the horns to figure out exactly how each feature works, and then how to best explain it.
The iPhoto chapter takes up 162 pages, and if you read through them all, you’ll come away with a firm grasp of all the basic and intermediate features of iPhoto, including Faces and Places. You don’t have to be a digital photography expert to learn what Heid has to teach, as the book is targeted at beginner to intermediate level Mac users and digital photographers.
Each iLife app gets its fair share of space and detail, although the iWeb chapter is a bit skimpy. In recent years, Apple has de-emphasized iDVD in favor of adding movie sharing capabilities to iMovie. Since iDVD enjoys few, if any, new features, this chapter is much the same as its predecessors. But if you have any interest in learning how take best advantage of iDVD’s hard-to-figure-out features, spend some time with pages 252 to 282.
IMovie 09 gets better and better. Like many, I was taken aback by the radical interface change introduced by iMovie 08. In spite of many complaints, Apple has stayed the course, and the new interface persists in the 09 version. But like others, I do have to say it’s been improved. Not being an iMovie expert, I found this chapter taught me the most new tips and tricks.
The chapter on GarageBand got little time from me, as I have less than zero interest in making music.
While The Macintosh iLife ’09 is a great book, it could stand with a few improvements. Since many people have acquired basic competence with the various iLife apps over the years, it would be helpful to have a few pages on the important new changes and features since the previous iLife version. Right now, there’s no easy way for an experienced iLife user to find out about the new features without wading through each application’s chapter page by page. This would be especially appealing to serial purchasers of Heid’s book.
Lastly, kudos to Heid and Peachpit for providing a 45 day trial subscription to Safari Books Online, which allows online access to The Macintosh iLife ’09 and a half-gazillion other e-books. If you’re intrigued by the idea of subscribing to an e-book library, check out my review of Safari Books Online.
Conclusion.
Pros: As expected, Jim Heid has another winner in The Macintosh iLife ’09. The basic and intermediate level user gets lots of information in a clear and easy to understand style. The book layout makes reading comprehension that much easier.
Cons: Not many! The book would benefit from a “What’s new in this version” chapter. iWeb gets the least space, so this is not the book for you if need excruciatingly detailed iWeb coverage.
email – MyMac Magazine – Twitter – Advertise – Reviews Archive – Podcast
NewerTech Voyager Q Hard Drive Dock
Company: Newer Technology
Price: $89.99
http://www.macsales.com
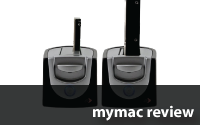
The ever falling price of hard drive storage means that we can now own and manage terabytes and terabytes of space if we wish. But the ongoing increase of capacity and fall in price leads to a new problem – if you are anything like me, you will have a shelf littered with external drives, surrounded by a detritus of data cables and multiple “wall wart” power supplies. Mine act like a series of time capsules – the further back in time you go (based on when I bought each one), the smaller they become and the more disparate the type of data we retain.
Of course, the downside with this approach is that each time you buy one of these devices, you are paying again and again for the overhead cost of the USB or Firewire interface, the cable and the external power supply (needless to say, every drive uses a slightly different output voltage on the power supply, so they are all incompatible) – and a quick scan of any online electronics store reveals that external enclosure drives are substantially more expensive than bare drives themselves. Bare drives do not need to be the exclusive domain of the Mac Pro and its easy access drive bays, however – and I am not proposing to crack open an iMac and change the drive in there either. But use a NewerTech Voyager Q device and you can swap in and out SATA drives to any Mac to your heart’s content without the need for a screwdriver.
Looking like a small digital toaster, the Voyager Q sits on your desk, with 3.5″ and 2.5″ sized dust flap protected slots in the top, and an ejection handle and status LED on the front. Around the back of the device are a full complement of ports – Firewire 400 and 800 ports, USB 2.0 and eSATA. In a refreshing fashion, you will find a matching set of connector cables for all of these ports in the box. You just insert the SATA drive vertically, data port down, into the Voyager Q, and once it is snugly connected it will appear on you Mac’s desktop like any other drive.
These devices will recognize SATA I and II devices up to 2 terabytes in size, and certainly coped with the five or six drives that I used with no problem. Performance was as you would expect from a SATA drive in an enclosure – I wasn’t able to try it on eSATA, but Firewire 800 was very close to the speed of my iMac’s internal drive. I was able to use it for specific tasks – formatting old 3.5″ drives upgraded from a Drobo prior to selling on eBay, migrating data over from an upgraded laptop drive etc. But where it really comes into its own is if you have a stack of SATA drives lying around. With these, you can use them like large capacity ZIP disks of old – swapping them in and out at will, and accessing the data on them at high speed. It’s a beautiful system, and for me works so much better than external housings – and it saves you money, as going for larger capacities will cost much less for bare drives then branded external devices. You can also retain and use your older drivers for longer. OWC can even supply rubber sleeves for the SATA drives for protecting them while they are stored away. If you don’t need the Firewire support, you can get a USB2/eSATA version for a fair bit less, though naturally you are trading some performance with that unit – USB relies on the CPU managing data transfer, so causes slow down when the machine is busy.
You will pay close to the price of a Voyager Q for a bare drive enclosure with four interfaces on it, and obviously an enclosure is much less flexible. This makes the device great value for money, and it is highly functional and well designed. I can’t fault the Voyager Q at all, and I highly recommend it.
email – MyMac Magazine – Twitter – Advertise – Reviews Archive – Podcast


Comments. Be heard!