

IDG announced NEW dates for the next Macworld Expo! Read all about it here!
Month: March 2009
MyMac Podcast 233 – Filemaker Pro – Migration – Verbatim

Download the show here, or via iTunes!
This week, Rick Kalman from Filemaker drops in to talk about all things FileMaker Pro 10. Then David Cohen and Tim Robertson are joined by John Nemo for a review of the Verbatim Speaker Keyboard. The final segment features Guy Serle and Owen Rubin talking about migrating to a new Macintosh.
Check out the new NewerTech Voyage at OWC!
Links:
FileMaker Pro
Verbatim
Take a moment and review our show in iTunes here!
Read MoreLiquid AUX and LiquidAUX Deluxe – Review

If you own an iPhone, iPod or iPod Touch and want to listen to your music while driving, here are two great solutions from Kensington that do not use the FM radio.
Drive Genius 2.1 – Review

Hard drive utilities are used to maintain, repair and configure hard drives. Since OS X already comes with a basic hard drive utility called Disk Utility, you might wonder what’s the point of buying a third-party program like Drive Genius. Read Neale Monks review and find out why Drive Genius 2 is worth the asking price!
Comply NR-10i High Tech Noise Reduction Earphone w/ Mic – Review

Kudos to Comply for their great engineering in making these one of the most comfortable sets of in-ear phones I’ve tried.
FastMac IV iPhone Extended Battery and Portable Charger – Review

FastMac’s entry in the iPhone battery pack enduro. Can it outlast the competition?
MyMac Podcast 232 – iPhone 3 – Shuffle – Profiler
Download the show here, or via iTunes.
This week, Guy Serle, Tim Robertson, and Mark Rudd look at iPhone 3.0, the system profiler application, and the all-new, button-less iPod Shuffle.
Check out the M-Audio MobilePre USB from Other World Computing!
Read MoreMXL Studio 1 Desktop Recording Kit – Review

Is there a budding podcaster lurking inside the deep dark recesses of your content saturated mind? Well here is your opportunity to let your inner Rock Star out to play for a while. The MXL Studio 1 Desktop Recording Kit provides you with the basic audio hardware for digitally recording those thoughts and opinions that have been aching to see the light of day.
Kensington SlimBlade trackball – Review

Kensington’s new SlimBlade trackball; it’s not your grandfather’s trackball.
G-DRIVE mini Portable External High-Speed Triple Interface Hard Drive – Review

Its squared-off brushed aluminum shock-resistant case is stylishly geeky. Short, white, FireWire 400, 800, and USB cables are provided, as is a supplementary USB bus power cable.
HP Color LaserJet CM2320n Multifunction Printer Copier Scanner – Review

PROS are speedy, high-volume printing of most documents with exceptional quality; plus excellent copying and scanning included.
MyMac Podcast 231 – Blu Ray – MobleMe – iPhone
Download the show here, or via iTunes
Tim, Guy, David, and Mark discuss: BluRay on the Mac, MobleMe, and a report that says iPhone Apps are deleted by their owners after 30 days.
This episode is sponsored by Other World Computing
Why not grab a great Dell monitor at a even better price?
Adobe InDesign CS4 – Review

Usually I feel very strongly one way or the other before I start the actual physical writing part of writing a product review. Not that InDesign CS4 isn’t a great upgrade; it is. I’m just not all that excited about an application for print publishing when we all know where that industry is headed.
TuneBuds Mobile for iPhone – Review

Do these forty-dollar iPhone earbuds sound as good as they look? Chad Perry takes an in-depth look at the TuneBuds from Griffin Technology.
Nemo Memo – MyMac interview with Aaron Vronko, Service Manager of Rapid Repair
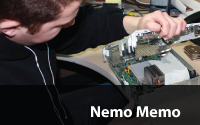
Our refurbished iPods are built from tested and certified parts from used iPods which makes them the most environmentally friendly option because they just re-use goods that were previously manufactured.
Fujitsu ScanSnap S300M – Review
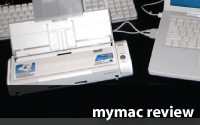
In this busy world of deadlines and expense accounts, more and more weary travelers are choosing to take mobile scanners on the road and get those business cards and receipts into their personal data management programs. The ScanSnap S300M was designed by Fujitsu for this very purpose. Read on and find out if this little dynamo is right for the road worrier in you.
iStik Hands-free 4th generation iPod Nano case and holder – Review

Ever not realize there’s a problem until someone comes up with a solution for it? If you own a 4th generation Apple iPod Nano and are physically active while using it, then you probably have some kind of case with a clip or a loop or some other less than convenient way of securing it. The iStik is a new way of doing just that. Does it work well? Read on!
ArtRage Deluxe – Review

A couple of years ago I had the chance to review ArtRage 2 by Ambient Design and it is one of my favorite, low priced, paint programs for the Mac. For $25 you get a fantastic Painter like program. Since that review came out, ArtRage 2.5 has been released, and many new features have been added. It was time for an updated review!
Read MoreMyMac Podcast 230 – New Macs – Safari Beta 4 – Windows 7

Download the show here, or subscribe via iTunes
This week, Guy, David, and Tim host a lively discussion on the latest newest Mac mini, iMac, and Mac Pro. Then we look at the controversial new Safari 4 beta having spent a week with the new version. And finally, we look at what Microsoft is doing with Windows 7, and compare that with what Apple has historically done with its Operating System releases.
This show is sponsored by Other World Computing
Check out the Dell 24" monitor for only $249!
A Review of ivideosongs Music Lessons – Review

ivideosongs had a great idea when they decided to enlist the aid of accomplished musicians to give their various perspectives on how to approach playing your instrument of choice. Who better to teach you than the players of the stars? Russ Kunkel and Liberty DeVitto are two of the most recorded and accomplished players in music today.