
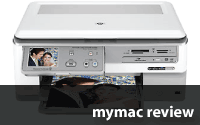
HP asked me to review the C8180, and here’s what I found after using on it for quite a while.
Read More
HP asked me to review the C8180, and here’s what I found after using on it for quite a while.
Read More
Even if you don’t think the whole suite will be useful I guarantee that you’ll find at least one feature that’ll be hard to live without.
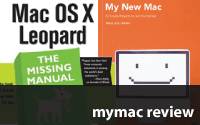
Recommending a good book for newcomers to the Mac platform is always tricky. You want to recommend something that doesn’t just cover all the basics but also has some depth as well. A book that only covers the simplest aspects of the Mac interface like how to copy files or connect to the Internet will quickly become obsolete as the user’s skills increase. So the best sort of beginner’s book is one that doesn’t just cover the interface and the operating system but also explains how to use the supplied programs to complete a variety of different projects.

I’m a pretty fast typist but the one thing I kept hearing while I was typing at home was “Why are you typing so loudly?†Hey, it wasn’t me, it was just the keyboard responding to my fingers flying over the keys. I’ve always, for the most part, used an Apple keyboard hooked up to my Macs. You know, the big, almost sounds like a typewriter, keyboards.

Ever since Steve Jobs got up in front of the World Wide Developer Conference and announced “yes – the rumours are true!” and thereby ushered in the Intel Macintosh age, many of us were tantalized by two diverse possibilities – running Windows natively on a Mac and running OS X on ordinary PCs.

With out wishing to stereotype the typical MyMac magazine reader, let me ask you a question. Have you ever shopped for a handbag? If not for yourself, perhaps accompanied a loved one or friend? It is a frankly bewildering experience. They come in so many different shapes, colors, sizes and prices that I had no idea how my wife was ever going to be able settle on just one.
![]()
Download the show here, or subscribe via iTunes
Tim, Guy, David, and Sam talk about the latest happenings in the Macintosh world. A great discussion about Microsoft wraps the show. Plus, Nemo chats with Jim Dicker.
Sponsored by Other World Computing. Check them out!
Links from the show:
Griffin PowerDock2
Posimotion Apps for iPhone
iPhone Developer Camp

As a long time user of iWeb I have become somewhat jaded with the themes that Apple supplies with their easy to use website creation program. So much so that I did a series of articles on how to use it and make your site look anything OTHER than yet another iWeb site. It’s relatively easy to do so, cut this piece there, add a little here, not entirely unlike gourmet cooking but with a Betty Crocker Easy-Bake oven.
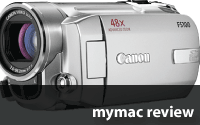
I’ve been avoiding buying a new camcorder to replace the 8 year old DVC tape unit for awhile now. There were plenty of tempting offerings, but none matched the feature set and price point that I was looking for until I happened upon Canon’s FS100 model at an Apple Store. While giving it a once over there, I liked the light weight, the responsive and variable zoom, the microphone input, and that at $399, it was still very much reasonable in price.

The SeV Essential Men’s Jacket has more pockets than any three ordinary jackets combined, and it’s the only jacket I’ve ever encountered that actually comes with instructions for using all those pockets. If you carry around a lot of gadgets, read on, because you’ve never seen the likes of this garment before.
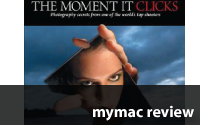
The Moment It Clicks has something to over all serious photographers.
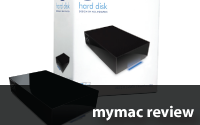
Designer hard drives. Has it really come to this? A hard drive should be utilitarian, be robust and have oodles of space for all the stuff we want to put on it. Considering that we rarely look at them except over whatever icon is assigned to them (or that we assign to them ourselves) on our desktops to access information and data, who cares what they look like and I’ll be damned, DAMNED I say if I’ll buy a drive based on looks alone. Except…
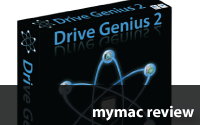
Prosoft bills Drive Genius as "THE industry standard disk utility for the Mac platform." That’s a big claim, so I thought I’d have a look at the latest Leopard-compatible version, Drive Genius 2, to see if I could improve the performance of my 1.83 GHz MacBook. Short answer? Yes! Long answer? Read on…
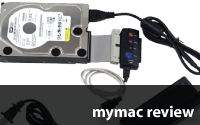
When I bought my MacBook it came with a “spacious†80GB hard drive that filled up quickly. Is your drive close to being full? If so, save a couple of bucks and learn how to replace it yourself by following these simple directions. You can do this.
![]()
Download the show here, or via iTunes
What went wrong? Apple’s launch of the iPhone 3G, Moble Me, iPhone 2.0, and the App Store were fraught with problems, and Tim, Guy, and David look into it. We also talk with Bill Dudney from GalaFacatory Software, an iPhone software developer. And Sam Levin drops in for a Cool Mac Picks.
OWC Deal of the week:
Asus/Addlogix WL-167g USB 2.0 Wireless
Links from the show:
GalaFactory Software
Kensington’s Mini Battery Pack and Charger for iPhone and iPod
Innovelis BudFits for Apple iPod/iPhone earbuds
Freeverse Moto Racer for iPhone
Example: My gas station down the road has gas priced at $4.00 per gallon. (I wish) It is reported on the news that the
Read More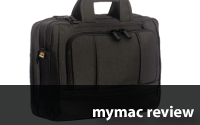
Are you still using the crummy free bag you got when you bought your MacBook? If you are, it’s time to retire that piece of junk and grab a real bag with the Brenthaven name on it.
The Unison i-XD is a multi-function dock for charging, syncing, connecting speaker systems to your iPod for audio, and playing video from your iPod to a TV (5th gen iPods only).
![]()
Download the show here, or subscribe via iTunes
Time to look at some of the iPhone / iPod Touch apps. David tries to sell his iPhone on ebay and runs into problems. Plus a GREAT deal we found on MacSales.com.
Other World Computing pick of the week:
Apple iBook G3/800MHz – $159!
We would love your feedback! Email us at MyMacPodcast@gmail.com or leave a voice message at 1-801-938-5559
Read More
I am a fan of the multi-function printing device. They take up less space than four machines combined (obviously) and I only need to buy supplies for one machine. Time was, however, when owning one meant compromise on all functions. However, about 8 years ago, the first of what I considered good devices in this class started showing up from companies like Cannon, Brother, and HP, and their abilities continue to grow.