
There I was, in the conference room setting up for a presentation. I needed sound for a clip within my Keynote presentation. They had one of those mounted overhead projectors all wired up with sound. I reached behind the Windows machine and unplugged the audio and video cables and plugged them into my MacBook. The video came up, but no sound. Beads of sweat formed on my brow as I tried in vain to get sound out of that system. The presentation was set to start in less than 10 minutes and some early birds had already arrived. Read on to find out what I did.
Month: March 2008
iFrogz Vibez Speaker System
MyMac Podcast 177
Dave Hamilton and Cool Mac Picks

Listen to MyMac 177 or subscribe via iTunes.
A big show this week, with Dave Hamilton of The Mac Observer and the Mac Geek Gab joining Tim, David, and Guy for a lively interview. Sam Levin joins us for a new Cool Mac Picks, while Nemo and David Weeks chat about the Macbook Air. Lee Givens also dials in for a chat about the AppleTV and other happenings around the Mac world. All that, plus a special report from Robert Hazelrigg fills us in after his meeting and demo of the new Adobe Photoshop Express site.

Links from the show:
The Mac Observer
Mac Geek Gab Podcast
Adobe Photoshop Express
i-Luv 1155 DVD and iPod player
Keyspan Presentation Remote Pro
Kensington Portable Power Pack
MCE Technologies QuickStream DV/HDV
Naja King Stand for iPod Touch
Review
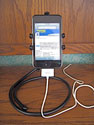
If you have an iPod Touch, you know that the little plastic stand that Apple includes in the box barely meets the needs of the average user. First, it looks like something broken off a plastic pants hanger from the local department store/superstore. Second, you can’t attach the data cable to your Touch unless you’ve got it lying on it’s side in the stand. Third, because it is so small and light, it’s easy to misplace, or for someone else to mistake for a piece of plastic from a pants hanger and file it in the circular drawer.
iPod Repair QuickSteps
Review
With the inexorable drops in price for all iPod models, they’ve certainly become ubiquitous. But have they become disposable? What if the battery gives out? What if it won’t start up? Toss it, or fix it? Jones and Campbell may have the answer. iPod Repair QuickSteps is a wide-format book of text and photos that leads you through most any iPod repair.
The Macintosh iLife 08
One thing is certain about Apple: each revision of their iApps (iPhoto, iTunes, iMovie, iDVD, and GarageBand) brings new features and new frustrations. It’s also a certainty that author Jim Heid will write a new edition of The Macintosh iLife to help Mac users learn what’s new with the iApps, ho
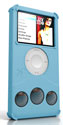
iPod Classic Case Roundup
Review
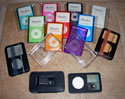
A Tuffwrap-encased iPod does not call attention to itself, which is a definite security feature. Cushioning is good, and port access is excellent, with (bravo!) a durable flap to cover an iPod’s dock port.
Microsoft Office 2008, Word 2008
Review and First impression
A first look at Microsoft Office 2008’s WORD application. Was it worth the four-year wait, or should you stick with what you have? I will take you through Word, the application I use the most to help you decide.
BodyGuardz for iPhone
Review

David’s Weeks and Cohen look at the BodyGuardz for iPhone.
AppleTV
Review
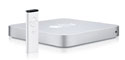
Take2 takes the AppleTV to the next level allowing you to rent movies, buy music and TV shows, and download podcasts on the device itself. These are features that should have been included since day one. The update makes the AppleTV feel like a much more complete device.
Two iPhone Books Reviewed
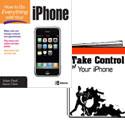
David Weeks looks at two new iPhone books, How to Do Everything with Your iPhone and Take Control of Your iPhone. Which one, if either, are best for you? Read the review to find out.
MyMac Podcast 176
Don McAllister
Play MyMac 176, or via iTunes.
Don McAllister of ScreenCastOnline and the Mac Roundtable Podcast joined Tim, Guy, and David this week for a great chat. We cover podcasting, how Don got started, and his switch from the PC to the Mac. We have Robert Hazelrigg chatting about his AppleCare ordeal, and then Tim, Guy, and David wrap up the show with some MyMac news, Apple news, and audio books worth buying on AudiblePodcast.com/mymac
Please visit our sponsor for this episode!
AudiblePodcast.com/mymac
We would love your feedback!
MyMacPodcast@Gmail.com or 1-801-938-5559
Links from the show
ScreenCastOnline.com
Mac Roundtable Podcast
ScreenFlow
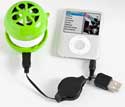
Thumpz Audiowrapz for iPod nano
Review
The Audiowrapz from iFrogz is an interesting case, in that it covers two functions most iPod nano owners might be looking for, iPod protection and integrated speakers.
The Impact of iPhone on Gaming

I’ve been thinking about the upcoming iPhone store, the openness of the iPhone software development, and the level playing field those two things bring. Combine that with the three video games that Apple showcased during the iPhone SDK event, and I feel that the iPhone and Apple, Inc. will have a significant impact on gaming.
Newer Technology miniStack NAS
Review

After my disappointing experience with a NAS I tested a few weeks ago, I was really looking forward to evaluating this unit. To recap, a network attached storage (NAS) device is a shared disk drive that uses your internal network, or in some cases the internet to share data with multiple computers. It’s a great place to store backups, large media files (such as for home theater systems), archived multimedia projects, or anything else that requires larger than average amounts of storage space.
Take Control of Permissions in Leopard
Review

Brian Tanaka’s Take Control of Permissions in Leopard (TCOP for short) is a recent addition to TidBIT’s Take Control library. I’ve reviewed numerous Take Control publications before; let’s see how this new ebook compares to its brethren.
The Apple Training Series: iWork ’08
Review
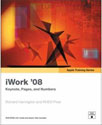
The applications in the iWork suite are designed to be easy to use from the get-go. Install, launch, poke around a little, do a little dragging and dropping, enter some text, and …Shazam!… get surprisingly good results. Working through the lessons in Harrington’s manual, The Apple Training Series: iWork ’08, will take users to the next level.
Sabre Femme and Homme iPod Speaker
Review
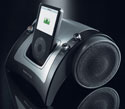
If you can pick one up (guy or gal model) for around $60, you’ll like its sound-per-dollar. Black is probably a better choice for most MyMac readers.
MyMac Podcast 175
Cool Mac Picks and Sheila Bender
Listen to MyMac 175, or subscribe via iTunes
Sam Levin returns with an all-new Cool Mac Picks. Tim has serious networking and computer hardware problems, so David, Lee, and Guy get a week off while Tim puts the show together. John Nemo has a retooled segment titled All Over The Mac, and kicks it off with guest Sheila Bender from WritingItReal.com
Support MyMac.com by visiting our Sponsor!
Audiblepodcast.com/mymac
Links from the show:
Writing It Real
Iomega eGo 250GB FireWire+USB 2.0 Portable Drive
Aliph Jawbone Bluetooth Headset
Thoughtout’s NAJA King – Flexible Rotating Stand for iPhone and iPod touch
Julia Roy Video Review – Sena Cases’s Elega Pouch for iPhone

Julia Roy reviews the Sena Cases via video after the jump. Or check out the QuickTime version here for MUCH better quality.
Harman Kardon Drive + Play 2
Review
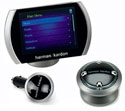
The Harman Kardon Drive + Play 2 is the most elegant solution for controlling the iPod (Original, Touch, Classic, and iPhone as well) while driving in a car. With a 3.5″ color screen, this new unit addresses almost every issue with the first generation Drive + Play, and even goes a step beyond. Read Tim’s full review here.