Sleevz and ScreenSavrz for MacBook and MacBook Pro
Radtech

http://www.radtech.us

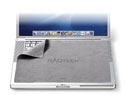
Keeping your MacBook or MacBook Pro looking shiny and new isn’t easy. As amazing as Apple’s laptops look when new, the speed with which they get marked and scratched can be equally amazing. Part of the problem is the materials used. The paint finish used on the Titanium-series PowerBooks simply didn’t stick to the underlying metal and plastic, with the inevitable result that paint would scratch or flake away remarkably quickly. Later PowerBooks were better, and the current MacBook Pro series is relatively scratch-resistant, but they can still get marked and dinged if carried about in a rucksack or briefcase. More serious perhaps is damage to the LCD. Again, design is a factor as much as misuse. The sheer thinness of the modern portable computer means that (when closed at least) the gap between the LCD and the keyboard is minimal. Accidental bumps cause the keys to touch the screen, at the least letting grease from your fingers get onto the LCD and at worst actually causing unsightly scratches. Apple is usually reticent about replacing screens that are scratched this way, regardless of whether or not the design of the machine is the cause of the problem, and unfortunately for the owner, removing the scratches is basically impossible short of replacing the screen itself.

Sleevz
Radtech’s Sleevz are strong, form-fitting sleeves that protect a Mac portable from scratches and minor impact damage. They are made from Optex, a material also used for lens-cleaning cloths; this means that while strong, Sleevz are very soft and will not mark plastic, paint, or metal in any way.

Sleevz are available in a variety of sizes suitable for MacBooks, MacBook Pros, G4 PowerBooks, and the dual-USB iBooks. The iBook Sleevz are $24.95 each, while the others are priced at £$24.95 to $29.95 depending on the size and model. The currently available colours in the US are grey or black, but in the UK some Sleevz come with the option of an embossed Union Jack logo. Being made from fabric, the Sleevz are very light and can be easily folded or rolled up for storage when not in use. They can also be machine-washed, something that Radtech recommend be done periodically to ensure that bits of dirt and grit don’t get embedded in the cloth itself.

There’s not much to explain with regard to use. Your laptop slides into the Sleevz and off you go. The fabric is easier to grip than the metal and plastic finish of a Mac portable, making carrying the machine a good deal safer, and the protection offered by the Sleevz means that you can feel more confident about stowing your laptop in a rucksack or briefcase. The Optex fabric is slightly elastic and fits the laptop very snugly, so there’s little chance of the machine sliding out accidentally. On the other hand, these are laptop protectors rather than carry cases, and so the full protection and utility offered by a proper laptop case is missing. There isn’t enough padding to protect the computer if its dropped, and there aren’t any pockets for things like mains adapters and remote controls.

The only real flaw to the product is the absence of any type of protection for the part of the laptop exposed by at the open side of the Sleevz. Obviously there needs to be an open side, but it’s a shame that there isn’t some sort of buckle-down flap or cover that keeps the exposed surface as safe as the rest of the machine.

Pros: Relatively inexpensive. Helps keep the computer clean and scratch-free.
Cons: One edge of the computer is exposed. Uninspiring range of colours.
Price: $24.95-29.95
MyMac.com Rating (out of 5): 4


Your laptop slides into the Sleevz and off you go. The protection offered means that you can feel more confident about stowing your laptop in a rucksack or briefcase.


ScreenSavrz

ScreenSavrz are screen protectors made from the same Optex fabric as the Sleevz. There are two types, the "full size" ones that cover the keyboard and trackpad and the "universal" ones that cover the keyboard only. Radtech actually make another product that helps keep screens in good condition, small plastic cushions called Wildeepz that stick to the fairing around the LCD. These are primarily of value for Mac portables that didn’t have such cushions built into the display already, such as the Titanium PowerBook series; they may be redundant on the more recent Mac portables like the MacBook Pro that have small rubber pads along the top edge of the display. Be that as it may, the job of the ScreenSavrz cloth is firstly to keep dirt from getting from the keyboard onto the screen, and secondly to stop the keys and the trackpad button from scratching the screen. While dirt can be relatively easily cleaned away using a variety of products, scratches are nigh-on impossible to shift; I know, because I’ve tried. Nothing is worse that having to spend all day staring at an LCD screen marred by scratches filled with grime.

The cloths themselves are pretty nondescript, and reviewing them is relatively easy. Yes, they do their job nicely. They don’t really have any extra features worth noting. though they can be used as screen wipes, especially when combined with an LCD-friendly cleaning solution. My review samples were grey and blue, but there are various other colours available including a rather jolly leopard-print "Shagwire" cloth. The cloths are very thin (less than a millimeter) and consequently don’t put any strain on the hinge between the chassis and the display, a common problem with home-made screen protectors. Like the Sleevz, the ScreenSavrz cloths can be machine washed as required.

ScreenSavrz are priced according to their size, the iBook and universal ones at $9.95 rising to $16.95 for the full-screen 17" ones for the biggest MacBook Pro and PowerBook models. Note that the full-screen ScreenSavrz don’t actually fill the entire screen in all cases, presumably because they are made to a set of sizes rather than to specific Mac portable models. The 15" ScreenSavrz snugly covers the screen on a 15" PowerBook but leaves about half an inch exposed down the left and right sides of the 15" MacBook Pro. To be fair, this shouldn’t actually cause any problems, but it is worth being aware of when shopping.

For a simple bit of cloth, the price of ScreenSavrz might seem a bit high, and there certainly are viable alternatives that can be made at home. But given the cost of replacement screens, the peace of mind obtained from having something with the quality and softness of ScreenSavrz probably makes the expense money well spent. For owners of Mac portables that don’t have built-in cushions to prevent screen damage in particular, these are almost essential purchases.

Pros: Does exactly what it promises to. Nice variety of colours and patterns. Doubles as a handy screen wipe.
Cons: A bit pricey for a bit of cloth. Doesn’t entirely cover the screen in all cases.
Price: $9.95-$16.95

MyMac.com Rating (out of 5): 4


The ScreenSavrz cloth fits neatly between the screen and keyboard, keeping the LCD clean and scratch-free.


Airplay Boost – Review

On March 30, 2007, in Uncategorized, by Donny Yankellow

Airplay Boost
Company: XtremeMac

Price: $49.95 (iPod Video model or 2nd Gen Nano Model)
www.xtrememac.com

"WOW!"

That was the first thing out of my mouth after I tried the XtremeMac Airplay Boost FM transmitter for the 5th generation iPods. I later tried the second generation Nano Airplay Boost. I was equally as impressed. Both models "hijacked" the radio station I had them tuned too, and gave a clear, static free sound.


Both the full sized iPod and Nano models look and work the same.

The iPod plugs directly into the dock connector, and fits perfectly on the Airplay base. The bottom of the base has a pass through connector for charging the iPod while in use. If you are going to use the Airplay for an extended period, this might be a good idea. I did experience noticeable battery drain on the iPod when using the transmitters (which are powered by the iPod).

Once you connect the Airplay to your iPod it takes over your iPod’s screen where you tune the device to your radio station of choice using the two buttons on the Airplay. Once chosen you hit the XtremeMac logo button, or wait for the iPod display to reappear, and press play on your iPod. Radio quality sound, or better, will start coming through your speakers. Of course, the radio needs to be tuned to the same station as the Airplay.

The Airplay also has a repositionable antenna, which help boost the signal even more.

Other features include 3 programmable stations and the ability to use stereo or mono playback. You can even dim or turn off the blue antenna light.

As I mentioned, I had the opportunity to test the iPod with video model, and the second generation Nano model. I did notice the signal strength of the Nano model to be a little weaker than the full sized model, but not enough to cause a problem. The difference became noticeable in the distance you could move away from the radio antenna and still get a strong signal.

My only complaint with the Airplay Boost is the directions. The directions are great, and easy to understand. The problem is that they are not included in the packaging. The packaging includes a note directing you to the company’s website for directions. While it is easy to find the directions on the website, there is no reason for them no to be in the packaging.

There are gobs of FM transmitters for you iPod out there. Some work. Some don’t. The Airplay Boost definitely works, and is well worth the money. The full sized model is available in black or white, and the Nano model comes in black or silver. If you use or need an FM transmitter for your iPod with video or your second generation Nano, this is the one you want to buy.

MyMac.com Rating 4.5 out of 5 (minus .5 for the directions not being packaged with the product)


MacChic in Europe

On March 30, 2007, in Uncategorized, by Knot Gullible


This is going to be the shortest column ever.

Traveling with your laptop and iPod in Europe is a non-issue.

The End.

———————————-

The rest of the article is HOW I made sure it would be a non-issue.


Power to the People!

There are two types of power plugs in the countries I would visit. The standard continental in Europe and the "GOST 7396" in Russia. Some are recessed so I bought the extended prongs. Although there are minor variations in Switzerland and Denmark, the standard continental plug fits.


Two little plugs.

I was briefly tempted to get the Apple branded world travel adapters, but I didn’t for two reasons,
1) the little wire is frequently too short and the plugs for the Apple adapters mean the white brick must reach the wall from wherever you sit. This way I get both the cord and the wire.
2) What about my hair dryer? It won’t plug into the Apple adapters.

All other electrical devices stayed home.

The laptop itself would charge overnight while simultaneously charging the iPod via USB.


To the Back of the Pack

Five years of karate has taught me not to act like a victim. But as much as I like kicking ass, I’d rather do it when I’m not burdened down with luggage, a purse, a laptop, an iPod, etc.

First of all, the leather, padded, over your shoulder, laptop bag stayed home. Second off the list were the white ear buds. Hey everyone! Looky here! I have a laptop and an ipod! Come and get ‘em!

Not by the hair of your chinny chin chin!

A trip to WalMart got me a pair of black-wired, honest-to-god earphones (which sound better than the earbuds and don’t fall out).

In my closet rests the backpack from school . . . not TOO beaten up but definitely used.

Glue some foam rubber on either side of a 14×11 piece of sturdy plastic and I have a padded pocket for for my laptop and something cushy for my back (Diagram on request). Lots of room left for the power adapter and the two power plugs, some granola bars and a bottle of water, a travel pack of Wet Ones®, an inflatable neck pillow, etc., etc., etc.

What could look less like a gullible tourist than a teenager with a backpack?

———————————-

Like I said . . . traveling in Europe with my Mac was a non-issue. Every hotel I stayed at had wireless (even Russia). I expected no less in Switzerland, but was pleasantly surprised in Moscow and St. Petersburg.

–Knotty


Manga Studio EX 3.0 – Review

On March 29, 2007, in Uncategorized, by Donny Yankellow


Manga Studio EX 3.0
Company: e frontier

Price: $299.99 (a slimmed down version called Debut is $49.99)
www.e-frontier.com

If you haven’t heard of Manga Studio before reading this review, you probably aren’t the only one. I hadn’t heard of it either, until I was asked to review it. Manga Studio is a program designed to help you make comic books or comic book pages on your computer from scratch. It basically takes all of the steps and tools of making a professional comic page (sketch, inking, shading, lettering, etc.) and combines it all into one program. Being an art teacher and an artist, it looked interesting. I’m always up for another art tool. Did it live up to my expectations? Read on.

One note: Manga Studio is marketed around the Anime art of Manga. Several of the tools are geared towards giving your art a Manga look and feel. However, this program can be used for Manga, Marvel/DC style comics, and even cute Disney style comics.

When I first opened Manga Studio and started a new project my brain went into overload. There were tons of palettes and tools and information windows opening on the screen at once. It looked like a complicated program without even doing anything, and it turned out I was right.

My initial action when I open a new art program is to start playing with the tools and see what it is capable of doing. I tried this with Manga Studio and found myself at a loss, at times. There is your basic pencil tool, and pen tool, and fill tools; but they didn’t act as natural and smooth as I have come to expect from other programs I use on a regular basis.

For example, there are tools to smoothen or thicken a line. I had to run the tool over my line numerous times before I could even notice the slightest change to it. I also had issues with the magnify tool. Instead of being able to use keyboard shortcuts to zoom in and out at any time, the magnify tool has to be selected even for the keyboard shortcuts. To me that is an annoyance that disrupts the workflow.

I was testing the program on an Intel iMac with 2gb of memory. This should be more than enough power. However, I found the tools lagging behind the cursor at times, especially with the eraser tool. To give the program the benefit of the doubt, it is not a universal binary. I have been told the next version will be, but perhaps some of my performance issues were due to working through Rosetta.

So, after I played a little I looked for a tutorial. There is no tutorial in the strictest sense of the word. There is a beginner’s guide, which walks you through the basics, but I even had troubles with that. I found the guide to be confusing at times, and it took me a while to figure out what I was suppose to do.

While I am on the subject of the beginners guide, there is no printed instruction book. The beginners guide and manual are pdf files. This drives me crazy. When a program, either Manga Studio or any other program, is as complicated and pricey as a Manga Studio or a Photoshop there should be a physical instructions book. I do not want to spend my time switching between a pdf file and the program while I figure out what I need to do, and I definitely don’t want to spend more money on ink and paper to print the guide myself.

Back to the program.
On a more positive note, Manga Studio is loaded with tools for the comic book artist. There are numerous types of pens, pencils, and markers to choose from. When you fill an item you can choose to fill it with different tones and tonal qualities to give that comic book feel. You can even set the drawing tools to draw in a gradation or tone.

There are even tools and filters to give that Manga look, like action lines. Once again, I found this very complicated to figure out.

One feature that is missing is the ability to add color. You can only do black, white, and grays in your projects. To add color you would have to export the project to another program.

Another nice feature is that you do not have to make a new file for every page of your comic book. If you are making a comic book, your single document can have numerous pages to it. Illustrator users have been asking for this feature for years. Manga Studio also supports drawing tablets, and is pressure sensitive. However, it does not support flipping the pen over and automatically having the eraser tool selected.

When I told one of my students I was reviewing this software he got really excited. He is really into Manga, and told me he was looking into buying the program. Unfortunately, I won’t be recommending this to him. Hopefully, the next version will improve on what has the potential of being a great tool for comic book artists.

If you want to check it out, there is a downloadable demo on the e frontier website. Maybe you’ll have an easier time with the program than I did.

MyMac.com rating: 3 out of 5


Macspiration 78 – Alternatives to Apple Mail

On March 28, 2007, in Uncategorized, by Donny Yankellow

Many Macspirations ago I wrote about alternatives to using Safari for surfing the web. In this Macspiration I’m going to discuss some alternative email programs you might want to try. All of these programs have their differences. Some are free, some are shareware.


Thunderbird

This is my favorite alternative to using Mail. Thunderbird is based on the email part of Mozilla, and could be considered the email partner to Firefox. I use Mail for my personal email and Thunderbird for all of my other accounts. I find it easier to organize these accounts in Thunderbird. It is free, so give it a try.


Correo

Correo is the new kid on the block, and is being called the email partner to Camino (my browser of choice). It is only at version .1, so consider yourself warned. I have tried it, and it looks promising. For my needs it is not at the point as a Mail replacement yet, but you might want to give it a try. As with Thunderbird, Correo is free.


GyazMail

GyazMail is a shareware program and costs $18. It looks a lot like Mail. I tried it before it became shareware, and I liked it a lot. It has a 40 day demo, so I’d recommend trying it out if you don’t like the free alternatives.


Eudora

Eudora has been a popular email program for the Mac for many years. There used to be a lite version which had ads, and a pay version which did not have ads. It is currently shareware, but it is about to become free and open source (sometime this Spring). If you pay the current $19.95 fee you are given 6 months of tech support. I don’t have too much experience with Eudora, but many people like it.


Mulberry

I heard Leo Laporte talk about Mulberry on one of his bazillion podcasts, so I decided to try it out. It use to be shareware, but it has recently become free. Personally, it was not for me, but you might want to give it a try and see how you like it.

Well, there you have it. Five alternatives to Apple’s Mail program that you might want to try out. If you know of a Mail alternative post it below.


Lifehacker: 88 tech tricks to turbocharge your day,
By Gina Trapani

ISBN 0-470-05065-9
300 pages
US $24.99 CAN $29.99 UK £15.99
http://wiley.com

If most of your productive day-to-day activities revolve around your Mac and related software, you probably keep current on as many strategies, tips, and ideas that help you not only be more productive at the keyboard, but also provide you ways to better organize your daily routines, projects, and – heck – your entire life if need be. And if you’re Mac power user, you no doubt seek out and learn numerous plug-ins, third-party applications, keyboard shortcuts, Applescripts and automations, and even some Unix command that boosts your productivity and technical wizardry.

Well, if you’re not quite as productive and organized as you would like to be, and you haven’t had the time to keep up with all the latest Getting Things Done (GTD) strategies and almost weekly published bata testing and updated applications available in cyberspace, you might consider checking out Gina Trapani’s Lifehacker: 88 tech tricks to turbocharge your day.

If you haven’t heard about or visited Lifehacker.com, you’re probably out of the loop in knowing about the latest computer productivity and personal management strategies produced and used by computer power users. Trapani is a staff member of the Lifehacker.com, an increasingly popular software and productivity Weblog that she helps update several times daily. One mention of your website or software on Lifehacker can mean serious bandwidth override from the thousands of hits your website will get as a result of being linked by Lifehacker.com. I’ve seen some sites literary close down for day after being mentioned on the site.

While I imagine that the site is most popular with college students, I RSS Lifehacker.com and check out its listings about one or two times a week. I always find some practical tips and links for third-party Mac software, D.I.Y. hacks for making your own camera lens hood, or a suggestion for using ChapStick to stop bloody shaving nicks. Most of the blog entries seem to be based on links discovered or passed along to the Lifehacker staff.


Lifehacker the Book

Trapani’s book is pretty much like the website, but it mainly focuses on cross-platform hacks for both Windows XP, Vista and Mac users. No doubt most of the book’s content comes straight from the Lifehacker blog. Chapter headings in the book include: "Free Up Mental RAM," "Firewall Your Attention," "Automate Repetitive Tasks," "Control Your Email," "Master the Web," and "Tune Your Computer."

You certainly don’t or shouldn’t set out to read the book cover to cover, but rather dip in and out of chapters to discover helpful suggestions for better organizing your computer workflow and day-to-day activities.

The first few hacks deal with setting various to-do list strategies that involve say using the free web-based Yahoo! Calendar or managing a todo.txt file at the Unix command line.

There are numerous hacks in the book about using various free and user friendly websites to store notes to yourself or to work collaboratively with others on a project. There are hacks that should be well known to most Mac users, such how to quickly organize and clean up your desktop, using third party applications like VisualDesktops (http://virtuedsktops.info), how to remotely control your home computer, how to use Gmail as an internet hard drive, how to use the power of the free keyboard interface program Quicksilver, which launches applications, websites, Address Book entries, and other types of documents.


Limited Mac Hacks

While the book has many cross-platform hacks, hacks specifically for Mac OS X users comes up short. Trapani tends to focus on Windows and Firefox (dhh…she writes extensions for this popular browser, not Safari) platforms. Her book includes hacks that clearly could be done on a Mac platform, such as one about putting portable applications on a USB flash drive. I have such a drive that includes a copy of Firefox, Thunderbird, several folders of my business related files, and backup copies of my Address Book and iCal calendars that I can access if need be. Or there are some very useful hacks, in my opinion, that could have been written up just for Mac users. For instance, because email can be such a powerful tool for getting things done, Trapani might of included an hack about using MailTags 1.2 (http://www.indev.ca/MailTags.html), an Apple Mail plug-in that helps you build smarter mailboxes, keyword searches, and iCal to-do items. Another Mac hack could have introduced Apple’s Automator application that can help users with repetitive tasks and workflow’s. But, hey, I guess I shouldn’t complain. The same type of hack book could easily be written for OS X users and related applications. There are literally hundreds of ways to save time using your Mac. Dan Frankes’s Mac OS X Power Tools (Sybex 2003) comes close to what I’m talking about.


Overall Rating

Overall, Lifehacker is good book to have have on your shelf or at your bedside. Getting an handle on better organizing our time, our career, and personal responsibilities is a never ending goal for most of us who want to be more productive, as well as make time for life beyond our computers and related projects. This book may not have all the answers to living and working more productively, but it does provide some very useful ideas and pointers to staying on track. After reading about and implementing the use of a simple label maker to re-create and re-organize my most accessed files, I can honestly say that I want to make better use of the type of tips and strategies the Lifehacker suggests. Files that I regularly use are now neatly organized, labeled, and best of all much easier to access. For me, that’s some serious hacking in my office routine.

MyMac.com rating: 4 our 5 (Not enough Mac related hacks. Will someone please write a book like this for Mac users only.)


Attendance was by invitation only at the top-secret Adobe Media Event held in an undisclosed location within San Francisco’s Moscone Center during January’s Macworld Expo. Select editors of online and print publications were given a high-energy preview of the comprehensive group of applications within Adobe’s new Creative Suite 3, or CS3.

Product managers for each software component had a brief time allotment to show and tell us what’s new and wonderful in powerful graphics, publishing, and audio applications that have undergone substantial upgrades since their prior versions. Adobe had purchased Macromedia, and the absorption of this former competitor into the family was impressive in both cohesion and compatibility with the Adobe look and feel.

INFO #1: Adobe GoLive will continue to be supported, but is no longer included as part of CS3. Dreamweaver now holds that spot in the CS3 "Web Edition" lineup.

Six different product suite bundles assembled from thirteen Adobe products, and fifteen individual software titles, bear the CS3 name. You are not alone if you’re perplexed as to which version of which suite is best. A three-tier pricing structure applies to each edition, with upgrade costs depending upon any Adobe or Macromedia products you already own, unless you are starting from scratch with a totally fresh purchase. From the $2499 Adobe Creative Suite CS3 Master Collection to the $79 Adobe Contribute CS3 upgrade, there is an enormous price spread. Please don’t rush to buy without carefully studying the pricing overview and asking for help, when necessary.

Adobe has added a new Product Selector tool on Adobe.com to help you identify which suite will fit your needs based on upon the work you are doing. It also includes an upgrade option that allows you to see how much it will cost to upgrade from the software you already own.

INFO #2: Many (if not most) graphics and web professionals will choose to save a little money and obtain Standard Editions instead of Premium Editions, when buying or upgrading from CS2 to CS3. Pay attention to the terms "extended" and "enhanced" in descriptions and pricing for CS3 apps and bundles. Remember that "Why is this software so affordable?!" is more accurate than "Why is this software so expensive?" when evaluating features and usability versus Adobe pricing.

Adobe is making a huge splash with the release announcement on March 27, 2007. Because this first look was written just before then, we don’t have URLs for the final information. Adobe.com will have prominent links for everything mentioned here, plus a ton more. MyMac.com is covering CS3 software in depth during the next months, with reviews written by several of our most experienced staff members.

* * * * *

MyMac.com was given an advance copy of CS3 Design Premium and Web Premium editions. I chose to install the former, because I’m most familiar with its components. When you install the final version, your procedure should be at least as easy as mine. There may be minor changes, but the following gives you a rough idea of what to expect:

1. Insert installation disk, double-click the Setup icon, wait a bit, and type in your OS X password to proceed.

2. Adobe’s installer initializes, and presents you with a green progress bar that takes a minute to complete.

3. The Setup screen appears. I needed to quit Safari, click Cancel, and go back to step one, but this may not happen to you.

4. I was told "Port 3703 is in use by another application," which sounded scary, but I clicked Next and hoped there wouldn’t be a problem. There wasn’t. I clicked Accept. This bug has been fixed, Adobe tells MyMac.com.

5. An "Installation Options" screen appeared, with all CS3 Design Premium applications checked, plus information that "one or more components that are already installed will be updated," which makes perfect sense. I clicked Next.

6. I was told 4.1 GB is required on my destination disk (not my primary hard drive) and 1.9 GB is required on my startup drive, which was fine, and everything was headed to the Applications folder on my destination (second) drive.

7. An "Installation Summary" screen confirmed the above, so at 2:34 p.m. I clicked Next and installation began, accompanied by two parallel green progress bars, finishing at 3:21 p.m. That’s a long time, but a LOT was installed onto my dual processor 1.8GHz G5 tower.

8. I double clicked Adobe Photoshop CS3 to open it from within the folder of the same name in the Applications folder of my second drive, and entered the serial number from my software sleeve.

9. I clicked Next, then chose "Activate Now," and was told my activation was successful.

10. Clicking Next again, I filled in my personal information on the Registration Screen, and clicked Done before Photoshop launched and I ejected my Adobe installer DVD.

11. Photoshop worked fine, so I tried opening InDesign, which also behaved itself.

12. I’m interested in the new features of InDesign, and Adobe’s HelpViewer 1.1 provides tutorial and other information for each application. You’ll be reading and hearing about the usefulness of HelpViewer throughout the CS3 product cycle.

* * * * *

I worked on some image files using new Photoshop CS3 Extended, which is the version included in the Design Premium Edition. I followed through a few tutorials provided by Adobe, plus some of Deke McClelland’s excellent video lessons at Lynda.com. Just like Deke, I’m very happy with the new releases of both Photoshop and Bridge. MacLife’s current April, 2007 issue features a sneak peek "Inside Photoshop CS3," and plenty more articles are being posted and published daily worldwide.

INFO #3: Much more will be presented by MyMac.com and a zillion other publications about how Bridge v.2 enhances workflow and interacts efficiently with each component Adobe CS3 app. You don’t hear the term "integrated software" much any more. Adobe is changing that, pronto.

Photoshop CS3 Extended includes, according to Adobe: "3D and motion support with the ability to edit 3D content and incorporate it into 2D compositions, paint and clone over multiple video frames," plus "comprehensive image analysis with new image measurement and counting tools."

Where the non-extended Photoshop is developed for the usual suspects in photography, web and graphic design, and print, the extended version is geared toward:

• Film, video, and multimedia professionals
• Graphic and web designers using 3D and motion
• Manufacturing professionals
• Medical professionals
• Architects and engineers (AEC professionals)
• Scientific researchers.

We’ll stop quoting from the company, and begin our own explorations of CS3 Design Premium for the readers of MyMac.com as soon as possible. Please send your questions and comments, and we’ll see if we can obtain answers. Weeks remain between today’s announcements and the retail release of CS3 software, and it will be interesting to observe how professional content creators respond to Adobe’s latest and greatest. Here at MyMac.com, we’re very excited, and we applaud Adobe for what we’ve had a chance to sample.

A 30-day fully-functional free trial of CS3 software is being offered. We don’t have all the details yet, so we’ll report them as soon as they are available. An Adobe representative tells MyMac.com that a single CS3 software license can be installed on two of the user’s computers, same as with CS2 products.

INFO #4: The year 2007 is going to be remembered for some great developments in technology. Advance hype and fervor already surround the not-yet-released Leopard (Mac OS 10.5), iLife ’07 (or whatever it’s called), AppleTV, and iPhone, all from the wizards of Cupertino. Adobe hasn’t been sleeping. Intel Mac native CS3 promises to be a huge success for any one of a hundred reasons. Adobe + Macromedia = One Potent Platform. For creative pros it may tower over the more high-profile products from Apple, Inc.


Pocket Card Reader for Micro SD and Trans-Flash Cards
Company: IOGEAR

Price: $14.95
iogear.com

If you’ve ever had the “pleasure” of using the new micro SD cards, then you know just how small these cards are, and also how difficult they can be to handle.

You can buy these micro cards with a regular size SD card “shell” that has a little door on them, that once opened, allows you to stick the micro card inside the larger card, which you can stick in any USB port.
These Micro SD card slots are popping up in all of the latest cell phones and in some cameras, and they have a surprising amount of memory. For instance, the card in the picture was a 1GB card.

Pulling these tiny cards out of a phone is not easy. You really have to use your thumbnail, and hopefully you are not vision impaired in any way.

Sticking these into the regular sized SD card shell is fairly easy, but the problem going that route is you also need a card reader to stick the SD card into so you can access the micro card.

Better idea: The Pocket Card Reader/Writer (PCRW) from IOGEAR.

Once you pull the micro card out of your phone, you open the little door on the PCRW and slide the card into the slot. Then you simply close the door and you can just use the PCRW like any other USB flash drive. The PCRW is USB 2.0 compatible and writing to, as well as reading from, the card is fast and painless. I like this solution better than the SD card to Reader to USB port hassle.

The IOGEAR PCRW is very small and lightweight. It worked flawlessly during my testing, and has a small LED on the top of the body that let’s you know when it’s actively reading or writing. Most other flash drives have a lanyard…except this one. Would be nice to at least have one on the body since the unit is so small.

MyMac.com Rating: 4.5 out of 5

Tagged with:  

Moshi Codex Macbook Shellcase – Review

On March 27, 2007, in Uncategorized, by Artie Alinikoff


Moshi Codex Macbook Shellcase
Designed by Aevoe

Price: $65 US (MacBook); $70 US (MacBook Pro)
aevoe.com

The very first thing I noticed about the Codex MacBook Protective Shellcase – you can call it a cover or a carrying case but the name given it by Moshi is appropriate – was the packaging. The box’s silver color tells of advanced technology, and the design is as sleek as it is practical. The embossed "moshi" name along with the built-in handles say it all. "You’ve just spent your money on something worth having."

The shellcases comes in 13" and 15" sizes for the MacBook or the MacBook Pro inclusively. They offer two colors: black and silver. I opted for the black one.

The packaging was almost as protective of its product as the product is for its intended target. There was a properly sized foam board zipped inside the case which kept the proper shape through shipping and handling. Not that it really needed it. Here’s why.

With the inside dimensions of 360mm (W) X 250mm (H) X 28mm (D) moshi uses the most advanced material available, Viscotex, which is sewn into the shellcase as inserts, giving the whole case a feeling of integrity and strength while keeping the weight to a bare minimum. Viscotex is an advanced shock absorbing material (visco-elastic foam) that "effectively dampens shock due to impact." I pinched the material, hard, with my fingers. It’s stiff, but pliant enough to give. It may feel like foam board to the casual observer, but foam board does not "remember" its shape like Viscotex does, and foam board does not have the same shock absorbing characteristics as Viscotex.

The case consists of three layers, and is hand sewn. The inside is made of Terahedron microfiber, which, the company says, will "constantly clean and buff the MacBook’s delicate surface." It certainly feels soft. I like the beefy straps in the inside top corner which attach to the display half of the computer. They hold firmly whether the shellcase is open or closed. So when you unzip your shellcase and lift the top half, even if you’re just holding on the shellcase itself, and not the computer, the MacBook opens wide and the screen stays put, where you want it. The position of the computer is already layered out for you by the practical little rubber discs which are on the bottom half of the shellcase, and align perfectly with the little rubber feet on the bottom of the MacBook. That feature, simple as it is, is important because it keeps the computer from moving around while in use. Stable and steady, like it should be. When you transport the computer in the shellcase it may shift a little. The corner straps may need to be reattached, but that takes a second or two.

The outside material consists of brushed poly-urethane. It is touted to be durable, lightweight, and splash proof. I’ve had my MacBook in the shellcase for about a week. I’ve used it all over the house. The black cover does show any schmootz that touches it. I took a damp paper towel and wiped the case a few times. The schmootz was gone.

When the Codex is closed and zipped up, or down in this case (no pun intended) the unit looks vaguely like a attache case. It is not. If you try to stand it up on what appears to be the bottom you will soon find out that the zippers are in the way and the shellcase will fall over. Actually, there are two zippers acting independently so you could zip them to one side or the other, and not the bottom. But the natural move to "zip it up" is to zip from the top, around the case, to the bottom. Obviously, it was not intended as a brief case, in spite of the way it looks.

I do like the attachable handle included with the unit. It’s feel is tight to the shellcase when I grasp it, and it feels substantial. For all the thought and great engineering that went into the creation of this unit I was surprised that a shoulder strap was not included. It would be a cinch (again, no pun intended) to attach it where the handle attaches, and it would allow those who would rather "shoulder" their MacBook to do so.

An included accessory with the shellcase is a little leather holster which holds the MacBook remote. It has a spring loaded clip so you can keep your remote on a keychain or clipped to the shellcase itself. Very handy, and it could keep you from losing the remote. The remote works while it’s in its protective holster, so no need to remove it.

The moshi comes with another accessory called a SheildPad. It’s a swatch of optical-grade microfibre which fits perfectly across the keyboard, thus shielding the screen from dirt and oils collecting on the keyboard and possibly transferring onto the display when the computer is closed. It can also be used to wipe of smears and dust from the display. It doubles as a mouse pad, if you are so inclined.

The cases are stylish and a little formal. They are practical to a point, but I must say that access to all the ports can be made only while the case is unzipped and the zipper binding moved away when hooking up, say, a USB wire. While I had my AC chord plugged in it was hard to tell if my MacBook was still being charged when the case was closed because the zipper assembly covers the green light at the magnetic connector head. There is also no port in the rear for air exchange to keep the notebook from overheating. I think I would keep my MacBook out of this case while in use, at least while I’m home, until it’s time to cart it somewhere. Under normal use the Shellcase should last for years. For my money, and from seeing some similar products on the market, this is one of the best looking protective cases I’ve seen, and certainly worth your consideration.

MyMac.com Rating: 4 out of 5


MyMac Podcast 122 – AppleTV and Mr. X

On March 26, 2007, in Uncategorized, by MyMac PodCast


MyMac Audio powered by ODEO
Download the show here
The AppleTV is finally here, and you just know Tim and the gang want one. Who is Mr. X, and what does he have to say? Answers in BookBytes Live. David C. talks about VisualBasic, or the lack thereof, on this weeks Fenestration. Finally, Robert H. reviews the AltecLansing iM7 iPod speaker system.

Be sure to Digg our podcast. (If Digg ever gets the feed working right.)

We would love to hear from you. Please email any comments to mymacpodcast@gmail.com, or better still, call us at 801-938-5559 and leave your feedback there so we can share your thoughts on a future episode.

Links
inMotion iM7
Google Groups
Sibelius 4
MacOS X Hints
MacPAR deLuxe
Edmunds
Unison – Panic


Problem Solved Using Soundslides – Review

On March 23, 2007, in Uncategorized, by Bakari Chavanu


Soundslides
Company: Soundslides, LLC.

Price: $39.95 USD
soundslides.com

For the last several months I’ve been looking for a slide show application that would enable me to quickly post Flash Player slide shows to my website. Yes, Apple provides Quicktime slide show features in iPhoto and iDVD, but I’ve found Flash Player formats to be seriously smoother and easier to download than Quicktime movies.

After searching and trying out three or four different solutions that would work with my .mac website/account, someone recommended Soundslides. I downloaded the trial version and immediately liked the the layout and simplicity of the application.

With a folder of my photos already prepared in jpeg format and a selected mp3-formatted song on my desktop, I was able to a create flash-based slide show with Soundslides in under five minutes. Testing it out and making changes to the order of the slides was very easy and straight forward as well.

The biggest problem, however, was how to publish the slide show to my .mac account. It doesn’t appear as though you can embed Flash files into iWeb pages. I thought I could simply drop my Soundslide Flash project folder into my iDisk folder and link to the html page from there, but that didn’t work.

Well, a simple question about my problem to the developer of Soundslides was answered over night. He directed me to support page where they had already published steps to how to set up and link to a Soundslides slide show posted on your iDisk account. Again, within a few minutes I was able to update one of my iWeb pages and link to the Flash file. Problem solved.

Soundslides Features
Soundslides is seriously simple and straightforward. It’s not bogged down with bells and whistles, and it does come with basic and advance custom features that enable you to change and personalize the design of the Flash Player web pages. If you have some skills with Macromedia Flash you can do even more customization.

The length of Soundslides slide show are basically determined by the length of the music you’re using. So if you want say a short one minute slide show, you need to find a song that is one minute long, or at least be prepared to edit the length of your selected song to the duration you want.

Since producing my first slide show, I’ve opened up Garageband and edited a couple of songs to the duration of the time I might use, also adding appropriate fade-in and fade-out markers for better listening. I also created in Photoshop a solid black jpeg file for my opening slide and another black clip with my business logo for the closing slide. With the opening black clip, the first photo doesn’t just pop up in the slide show, but instead black slide dissolves into the first photo slide.

You can adjust the individual length of each slide or you can tell Soundslides to make all photo slides the same length in line, with the duration of the music. After you’ve completed and tested your project, you simply upload to your server and you’re good to go. There are some features I wish Soundslides had, but I can wait for what I know will be useful updates in the future. It seems as though the developer or developers of this program have already worked hard to make a much needed and intuitive program that solves the problem of posting Flash-based slide shows on the web. Downloading my project on a couple of different computers and web browsers resulted in a very smooth presentation of both the Flash content and the sound.

Lastly, one of the best compliments I can make about Soundslides is its price: just $39.95. An affordable price for a very useful program. Soundslides in my opinion should be a part of all Apple’s iLife and professional image presentation applications.


powered by ODEO

Meet Guy Serle of MyMac.com at the Luther Jackson Middle School, 3030 Gallows Road, Falls Church, Virginia. 9:30 a.m. to 12:30 p.m. Directions here.


I use iPhoto as my primary photo editing program. Most of the photos I take just need some minor adjustments and cropping. However, there are those occasions when the editing tools in iPhoto don’t cut it. That is when I call in the big guns, i.e.. Photoshop. There is the quick method for doing this, and one that is a little longer. I’ll cover both in this article.


The Quick Method

You need Photoshop (or another image editor) in your dock for this method to work. It does not have to be open, but if it is not in your dock the easiest way to get it there is to open it. Of course, you need iPhoto open, too.

From iPhoto locate the image you want to export to Photoshop. Drag the thumbnail of the photo to the Photoshop icon in your dock. If Photoshop is not open, this will open it. The image will now open in Photoshop where you can do all of your advanced edits.

When you are finished in Photoshop choose Save from the File menu, or press Apple+S on your keyboard. This will save the edited image as the iPhoto file. DO NOT RENAME THE FILE OR CHOOSE SAVE AS.

Quit iPhoto. Reopen iPhoto. If all went well, the edited image will now take the place of the unedited image in your library.

The Longer Method
If you do not want to use the method above, or you image editor does not support drag and drop, you can use this next method.

From iPhoto select the image you want to export. Go to the File menu and choose "Export." Follow the export procedure and save the image in a place you can locate it.

Open your image editor, and open the file you just exported. Make your changes, and save.

Open iPhoto, and choose "Import to Library" from the File menu. Find the file you just saved and choose it to be imported. It will now be added to your iPhoto Library. You can now add it to an album, or do whatever you normally would do with an image in iPhoto.


In The Middle

Of course, you could also combine the two methods I mentioned above. If you don’t want to change the original in iPhoto, you can always save a file to your desktop with a different name by using the quick method, and import it back into iPhoto via the longer method procedure.

If you have any iPhoto editing tips leave them below.


Torq Computer Backpack plus Boot and Dart Laptop Sleeves
Company: Spire USA

Price: $160, $30, and $50, respectively (US)

http://www.spireusa.com

SpireUSA had a substantial booth at January’s Macworld Expo in San Francisco. This company was new to the staff of MyMac.com. I was mostly interested in rolling computer backpacks, so I didn’t do a detailed examination of Spire’s computer cases. Their newest high-end model, Torq, recently delivered to our ultra-tech testing facility (Nemo’s shoulders and back), is spacious, expensive, and designed for every possible carrying condition.

Torq includes a Boot sleeve, in any of nine sizes, depending upon which laptop computer you’ll be inserting. Spire’s Boots with oversized velcro cover flaps are always black, and Torq comes in your choice of blue, grey, black, or red. The latter was provided for our colorful evaluation. Dart sleeve is more spacious than Boot. Dart is available in grey or black, and black is the color we received.

Getting ready for a day in the life of John Nemo, Computer Tutor, I slid my 15″ AluPowerBook into the rugged, form-fitting Boot, and positioned the sleeve within its designated compartment. I placed as many accessories into Dart as I could safely fit, and put it into Torq’s other large compartment. My power cable and brick fit easily into a small, weatherproof, zippered front section, and my calendar, working notes, phone, iPod, headphones, and pens all occupied Torq’s portable-office-equipment fourth space. Zippers and flaps enclose and protect everything. Except for that small front zone, the other three are top-loading and oversized. I placed water bottles in each of the pack’s two mesh receptacles along the bottom sides. The case was heavy!

It will be tricky to describe the multitude of buckles, snaps, handles, straps, pads, clips, and doodads affixed and dangling from every possible surface and corner of Torq. I won’t bother to detail or photograph them, because there are so many. The result is that whatever you want to attach and however you want to carry this case you can do it. Convenient storage sections allow you to tuck in danglers that are not being used, or are getting on your nerves.

Make sure you look at the Specs tab on the Torq web page for itemization of its many features. My personal favorite it the large frontward zone, mentioned above, that has enough space and mini-enclosures for the office and personal supplies of a veteran road warrior.

Is it worth $160? That depends. Backpacks, computer or other, are very personal. I’ve been using them since 1960, and I’ve rejected many more than I’ve accepted. Torq is terrific, except for its primary padded right/left shoulder straps. They fit fine, but are not padded enough for my bony shoulders when I’m trekking more than a modest distance. Aside from that grumble, this case + sleeve will contain a computer, accessories, clothing, food, and other gear with sufficient capacity, safety, and access for our recommendation. The inclusion of a $30 Boot with every Torq is a grand asset.

Balance and stability are good when fully-loaded, either on your back, in your hand, or standing on the ground. I didn’t try the included padded shoulder strap, because Torq-when-full is too massive for a sensible person to use it as a shoulder bag, except in emergency. When loaded with gear, this case will not fit under an airline seat unless you really cram it in, and it will fit into most overhead bins of commercial airlines except for the dreaded short-distance pip-squeak regional jets.

Our red Torq evaluation model is stylish, and very well-constructed. Its topside carrying handle is seamless (bravo!) and sturdy. Weatherproofing protects its precious cargo in all storm conditions except a prolonged downpour.

We have reviewed many laptop sleeves here at MyMac.com. Dart is not exceptional, except for being more capacious and flexible than most. Dart has three clever full-length sections, and one for your iPod or similar gizmo. Pricing is reasonable at $50. MyMac.com especially likes the expanding front pocket that will hold a power supply, which many sleeves reviewed previously do not have. Dart also has a nifty removable key fob. This sleeve can be Velcroed into Spire’s packs as can their Boot.

You can read customer raves for other Spire products by navigating to their web pages and clicking on the “Reviews” tab, center right, for different packs. A chart comparing the entire lineup of backpacks is here. A generous warranty policy is here.

A year from now I’ll have plenty more to comment on these durable, practical, attractive laptop cases from Spire USA. During our initial evaluation period, MyMac.com is comfortable with rating Torq, Boot, and Dart each with a favorable 4 out of 5.


iPod Video Aluminum Hardcase – Review

On March 22, 2007, in Uncategorized, by Donny Yankellow


iPod Video Aluminum Hardcase
Company: RhinkSkin

Price: $34.95

www.rhinoskin.com

I have never been a fan of hard shell iPod cases until I got my hands on the iPod Video Aluminum Hardcase by RhinoSkin. This has to be one of the nicest iPod cases I have had the opportunity to try.

The case itself has a brushed metal aluminum back and a clear plastic front. The area of the iPod screen is raised a little, making it stand out on the case. I don’t see any protection benefit to this, but it is a nice look. As a matter of fact the entire case looks great, especially when the iPod is inserted. The sides have black rubberized grips to help you hold onto the case. My only complaint about the look of the case is the RhinoSkin logo is plastered under the screen in a white application. This is something that should be on the back of the case, or smaller and out of the way on the front.

Speaking of inserting the iPod. My iPod slipped into the case with a snug, but not too snug, fit. The inside of the aluminum back has a rubberized coating, which keeps the iPod in place. I was easily able to push the iPod out of the case thanks to the curved slot on the back of the case.

As for protection, the RhinoSkin gives coverage to the front, back, and sides of the iPod. The top of the case is open, while the bottom has a nice sized opening at the dock connector. This allows for easy access. The click wheel is also left unprotected. Many cases are now coming with a plastic adhesive cover for the click wheel, and that would have been a nice touch to the RhinoSkin case.

I’ve been using the case for a couple of weeks now and carrying it around in pockets, bags, etc. It seems to hold up great. There are no cracks or scratches anywhere on the case. The front of the case is shatter and heat resistant, according to RhinoSkin.

One of my pet peeves for iPod cases is that it must have a belt clip. This one does. It is one of the universal style clip on clips that attaches to the back of the case.

While this has not worked for other cases I have tried, it works perfectly on the hard shell aluminum back of this case. The case comes with a lanyard also, but I prefer the belt clip.

Another nice touch by RhinoSkin is that the case comes with "Stuffbak Loss Protection Service." This how the service works. You register your iPod with the protection service, and place the included sticker on your iPod. If you lose the iPod and someone finds it, they are suppose to call the number on the sticker and eventually the iPod gets returned to you. A great idea in principal. I don’t know how many people would return a found iPod.

One thing to keep in mind with this case is that it does add extra weight to your iPod. Of course, every case would, but this is more noticeable with this case. Not a big deal, but something to be aware of.

At $34.95 the RhinoSkin iPod Video Aluminum Hardcase is a great case that is well worth the money. It protects your iPod and makes it look great.

The case is available in a 30gb, and 60gb/80gb size. There is also a Nano model, but I did not have the opportunity to test that. Check out the RhinoSkin website for more details on the nano model.


MyMac.com rating 4.5 out of 5


bbp Hamptons Collection – Review

On March 21, 2007, in Uncategorized, by Owen Rubin

Back2Pak Carrying System
Company: bbp (formally BumBakPacks)

Price: $95.00 in several sizes and colors
http://www.bbpbags.com

Many of you may still recall my search for the perfect shoulder or messenger style bag for my PowerBook. As I reported in the past, I kept trying bag after bag looking for the one that had the right combination of features, fit, comfort, and protected my PowerBook as well as possible. I finally chose two clear winners, the Timbuk2 Commute XL bag, and the Brenthaven Professional. These two bags did a great job in almost every category.

But, to my surprise, Timbuk2 was nowhere to be seen at this year’s Macworld, and I do not recall seeing Brenthaven either. And neither company returned calls to meet and discuss their new products for the Mac market. In fact, a quick look at Timbuk2’s website shows no mention of Macintosh at all now. Seems these companies have chosen to ignore the Mac market, so perhaps, we can ignore them too because there are some great new bags taking their place. The bbp bag discussed here easily takes their place, and will save you some cash too.


Shown here in Obsidian Black

bbp (yes, all lower case) was showing some amazing bags with something they call their “Bak2Pak carrying system”. I tired the bbp Hamptons™ Collection case, which, in my view, wears like a cross between a shoulder bag, a backpack, and a messenger bag all in one. This new system hangs low on the back to reduce back strain and employs a dual strap system that evenly distributes the weight. The innovative dual strap system can convert (see below for more on this) from the dual backpack mode, to a single strap system for messenger style carrying. There are also sternum and waist straps to secure the bag when biking. Lumbar pads on the back of the bag fit nicely into the lower back area, and make this bag very easy to carry, and quite comfortable too.

There are several versions of this bag, and they come not only in your standard black, but a great many colors as well, including a pink and white bag, and a very bright ruby and white bag as well. I received the “Titanium Tango” color combination, more on that below. Bags are available in small (up to 12” Mac), medium (up to 15” Mac), large (up to 17” Mac), and extra large (for the 17” and lots more) sizes, so there is sure to be one in the right color and size for you. And with a retail price of $95, this bag is not only very functional, but an amazingly good buy when compared to bags costing as much as twice the price from other companies.

But the real question, how did it perform?

The Good: This bag is strong and lightweight made of ballistic nylon, and after taking a short time getting use to how low it hangs compared to other bags, was quite comfortable as well. I noticed considerably less shoulder and back stress when using this bag over both the other bags.

Unlike other messenger bags, the computer can be easily removed from this one without having to open the flap. On this bag, the computer goes into a reinforced back slot, protected by a waterproof zipper along the top, making placing and removing the laptop a snap without having to open the flap and expose the rest of the contents. I tested this waterproof zipper as I got caught (again!) in the rain in San Francisco, and my PowerBook was completely dry inside, as were all the internal contents in the other pockets as well. In addition, although my case could hold up to a 15” PowerBook, my smaller 12” PowerBook was held snuggly inside and did not slide around when carrying the bag. There was sufficient room for my charger right along side as well.

Also to my delight were two external web pockets on one side, and a solid external pocket on the other, both along the edge. My sunglasses and water bottle fit easily into these pockets, and were quickly accessible without having to open the case, something I require in any bag I carry. Thank you bbp, you would be surprised how many companies leave off these pockets on the outside.

On my trials, I filled this thing up fairly full, and it was still rather easy to carry. Inside went my 12” PowerBook, power adapter, Treo, Treo cables, water bottle, reading glasses, a book, a number of file folders full of papers, many cables and accessories for both the Treo and PowerBook, car and office keys, wallet, business cards, memory sticks, pens, paper pad, small first aid kit, and a dozen other smaller items as well. All these things fit well inside my medium pack with room to spare, and the great array of internal and external pockets kept all my junk well organized too. And even after all that, it was easy and comfortable to carry.


Shown here in Choco Tango

Inside, there is one large pocket under the flap and next to the computer slot, and a mesh pouch along the back wall of this larger pocket. In front of that large pocket is a full width zipper pocket, with one smaller pocket in front of that one. On this smaller pocket are locations for pens (4) and yet another even smaller pocket great for holding your wallet or business cards. Along the back just behind the computer slot is another open top storage area that can hold magazines or file folders. Along the bottom of that area is a zipper, which, if the pocket is empty, allows this pocket to double as a strap to hold the case to a roller bag (see picture.) On the front of the flap are two more solid pockets and one more web pocket, almost the right size for holding a wallet, phone, or cards.

The Bad: I said almost above, because obviously no one at bbp owns a Treo. While a small Razor might fit, with the exception of the largest front pocket, the Treo does not easily fit into a front pocket, and the larger one is a bit too big. One more inch on the front left pocket would have solved this problem. Same size issue for the horizontal zipper pocket on the front right. I have a fairly small wallet, and even it did not fit into either small front pocket. I assume the goal is to make a wallet and phone easily accessible, and neither worked for me at all.

While I find this bag extremely easy to carry and very comfortable, it has a few more annoying design issues. First, in the single strap mode, the straps lack reasonable strap adjustments. If you wanted to carry this over your shoulder you are out of luck. The bag hangs so low this way it hits you in the thigh! A simple strap adjuster would have fixed that and made the bag a lot more universal. Even in messenger mode, more adjustment would be nice to help position the bag. I even tried putting it back into backpack mode, a suggestion of the bbp representative, and then carrying it over one shoulder, but that was really no help.

While I am on the strap’s issue, the ability to change strap modes causes them to be a bit daunting and confusing in configuration with many fasteners, straps and connectors. It took time to figure how to make the changes properly. I am still not sure if I got them back to the correct backpack configuration. I also did not know about the luggage mode “pocket” on the back until I looked at the bbp website and saw a picture of it used that way. I wonder what else I missed on this bag? A small user’s booklet would be very helpful here.

I loved all the pockets, but they are organized and placed in such a way that if you fill them all, the bag becomes quite bulgy in the middle. All the pockets in front of the larger open pocket inside, and the mesh pocket in the back inside are aligned right with the middle center of the bag, thus causing a large bulge. Not terribly bad if you simply do not fill them all with bulky items, but I can’t help but wonder if they could have been spaced differently.

I am please to see a place to store keys, but the strap is WAY too small and the location is poor. On my Timbuk2 bag, I can unlock my car or front door without having to remove the keys from the strap, as I can reach it under the flap without opening the bag, and the strap is very long. bbp should have moved their strap closer to the top, just inside the main flap (so it can be reached from outside), and made it much longer. Right now, you have to take off the bag, open the flap, open the zipper pocket, and then remove the keys to use them. They did all that design work to make the computer easier to remove, and then they made the key holder impossible to use.

As for balance, it works well when carrying it in either backpack or messenger mode, but unless you fill the larger inside pocket with sufficient weight, the bag does not stand well on its own when set down. A more rigid inside pocket bottom might help here. And I would really like to see a bit more padding at the bottom of the computer slot. There is more here than on the inside pocket, but it is too narrow. If you set your bag down a little hard (which I have done on occasion), it should protect the computer well. I did not try that with this bag, but it seems a bit thin to me.

The ugly: Actually, I like the looks of this bag even though it is a much different style from the typical messenger bag or backpack I am use too. And even with the few small negatives above, I enjoyed using this bag a lot. But I must be getting old, because with the exception of the all black bag (which I did not test), I just do not understand these colors. As I said above, I had the “Titanium Tango” color which looked like this:

First off, when did this orange color become so popular? Sorry, but that orange is so obnoxious. Perhaps younger people in school love this color, but for me, it was not so great. To be fair, I told bbp I would test any color bag because it was the bag function I was really testing, and of course the color does not effect the way the bag functions. And, the black sells out all the time, so I obviously did not get black. Unfortunately for me, I work in a professional office, and I took a great deal of ribbing over the color of this bag. One person even walked up and said, “You must have gotten that bag free at a conference…” Others told me to hide it in a cabinet as they were blinded by the color. And this was, in my opinion, one of the tamer colors. It also comes in two brighter colors, pink and red:

Ok, red for the right person might just work, maybe, but the pink is obviously aimed at younger women, who I would not expect to be the target audience for this bag. Maybe they are on to something here, computer bags for women? Two additional less bright colors were also available, but again, they had that damn orange:

Colors aside, this is truly one excellent bag, and I would highly recommend it. If you work in an office, the black bag is very professional looking. And if hip is what you are going for, some great color choices there as well. And with a price much lower than other bags in the same class, this bag is a serious bargain as well. Of course, if they could get to a system like Timbuk2’s “design your own bag” ability where one can select any combination of colors they offer, this just might become the best bag on the market. Nice job bbp.

You can read more about this bag and other products by bbp on their website at http://bbpbags.com


MyMac rating: 4.5 out of 5


EZGear EZL and ezView – Review

On March 20, 2007, in Uncategorized, by Donny Yankellow


ezView
Company : ezGear

Price: 39.98
http://www.ezgear.com

I recently had the chance two try out two similar, yet different products by EZGear. One is an iPod stand, and the other is an iPod case that doubles as a stand. I’ll start with the stand.

The EZL is basically an easel for you iPod. It is designed to work with the iPod with Video so that you can rest your iPod on the stand and watch something on the display. It will work will other iPods and devices, as well.

The unit is made of heavy duty plastic, and it has rubberized feet and padding to hold the iPod in place. I was really surprised at how well the padding keeps the iPod from moving on the EZL. It really does a good job.

When closed, the EZL is only about 1/4 of an inch at its thickest points. This makes it great for travel.

I did some traveling this past December, and I would have loved something like the EZL to rest my iPod on while watching videos on the plane. Yes, I said plane. You might think the turbulence of a plane would be too much for the EZL. Well, I did some simulated airplane testing by shaking my desk. The EZL remained standing, and the iPod did not budge.

While, the iPod and EZL passed my test, I did notice that the added weight of an iPod case did make the EZL more sturdy.

At $14.99 the EZL is a little over priced. A price of $9.99 would make this a no brainer. However, it is still a nice product. It is available in pink, black, and white.


MyMac.com rating 4.5 out of 5

If you like the idea of an easel for your iPod, but don’t want another accessory to carry around, the ezGear ezView might be for you. The ezView takes the idea of the EZL and combines it with a black leather case.

The first thing I noticed when I held the ezView was the leather. It is a nice, soft leather iPod case. Definitely, a nice choice in material.

As an iPod case, the ezView has a nice set of features. It has a nice sized opening for connecting a docking cable. There is a soft plastic screen protector built into the case. However, there is no click wheel protection when the case is open. The top of the case allows easy access to the top of the iPod when the cover flap is open. When closed, the only exposed parts of the iPod are the fours corners.

Speaking of the cover flap, this piece becomes the iPod stand. When open, the flap can velcro to what ezGear calls a belt clip (it is more of a belt strap to me), and the case becomes a stand. Another nice feature of the flap is that it has three credit card slots on the side that face the iPod when closed. It also stays closed via a hidden magnet closure.

I tested the 30GB model of the ezView, and my iPod fit REALLY snug in the case. For me, as a person that constantly takes my iPod out of the case, it was too snug. I imagine over time this would loosen up as the leather stretches. If you need to remove your iPod from a case on a regular basis, this may not be for you.

When in the stand position, the case does seem to be sturdy. It did pass my airplane simulation test. The weight of the iPod helps with this, and I imagine the larger iPods would fair even better. However, if you don’t attach the belt clip in just the right position, the back corners of the stand might not touch the surface it is on.

If you are in the market for a new case with a lot of features, the ezView is worth checking out. At $39.99 you are getting a leather case, with a lot of great features. While it has some minor flaws, it is still a good value. It is available in a 30GB and 60B model.

MyMac.com rating 4 out of 5


Download the show here

This week, Nemo interviews author Mitch Ratcliffe, while David Cohen returns with Fenestration. Robert reviews Gelaskins, The Laptop Desk, and the Slanket. And Tim, Guy, and Chad are joined by Larry for a fun chat.

Be sure to Digg our podcast. (If Digg ever gets the feed working right.)

We would love to hear from you. Please email any comments to mymacpodcast@gmail.com, or better still, call us at 801-938-5559 and leave your feedback there so we can share your thoughts on a future episode.

Links
Mitch Ratcliffe
Gelaskins
The Laptop Desk
Slanket


Office 08 is coming – Should you really care?

On March 16, 2007, in Uncategorized, by Tim Robertson


I am no (longer a) Microsoft basher. Sure, there was a time when I was very anti-Microsoft. This was mostly during the very dark days of Apple and the Macintosh, from around 1996 – 2000. I saw some of the business practices that Microsoft was using to stifle competition, both legally and otherwise. I was also in the forefront of decrying their computer operating system in favor of the more easy-to-use Macintosh… but no longer.

First, I think the computing population is well aware of what Microsoft does, both good and bad. Besides which, I’ve actually come to use a few Microsoft applications and hardware over the years, and business practices aside, some of their offerings are first-class products. (Office 2004, XBOX 360, and XBOX Live Marketplace)

Microsoft is set to release the latest version of Office for the Mac this year. This is the first major upgrade to the popular office suite in three years, and is on the radar of a lot of Macintosh users. Should it be?

Back in MyMac Podcast 119, David Cohen talked in depth about the differences between the Windows version of Office 07 and the upcoming Macintosh 08 version. Sad to say, much of what he described makes it sound as if the Macintosh platform is getting the short end of the stick this time around. While the Windows version sports the different, some say superior, Ribbon interface, the Mac version does not. David even goes so far as to name possible reasons for the scaled down Macintosh version, the most compelling being that the Mac Business Unit (Mac BU) inside Microsoft is simply understaffed or under-funded.

I don’t work at Microsoft, so I can’t talk about any truth to that speculation. But there does seem to be some logic behind that argument. Here’s another: For the past seven years or so, it seemed that Microsoft and Apple were all chummy with each other. Microsoft was even on stage during a few Macworld Expo keynotes, talking up their latest Macintosh offerings. All seemed well in the lands of Redmond and Cupertino. But were they?

Last year Apple came out with the new "Buy a Mac" ads. They were, and still are, all over the television exhorting the virtues of buying a Mac over a PC. While I don’t know if the ads are really helping Apple convert PC users over to Macintosh buyers, I do know that even the subject of said ads seem to cause Bill Gates to blow a gasket in interviews.

Steve Jobs himself has been much more anti-Microsoft in public the last few years. Remember those "Redmond, start your photocopiers" banners at WWDC in 2004?

So Apple and Microsoft really don’t seem to like each other. Big revelation. But is this dislike of each other one reason the Macintosh version of Office is starting to look like a watered down version of the better PC program by the same name?

One question every Macintosh user has to ask themselves is "Should I upgrade?" We ask ourselves this about any new application, especially one that will cost as much as Office 08 will. If history is a lesson, it will probably fetch upwards of $399 at retail.

While not supporting the ribbon interface, the Mac version of Office will have some Mac-only features, according to a ZDNet story from January. The list of new features, quite frankly, doesn’t make me any more excited to rush out and buy the software any time soon.

Speed is the one big factor those already using an Intel Macintosh will crave. While the PowerPC version is by no means slow on an Intel Mac, a Universal Binary version would run much more quickly. But for most work, will that really be a big reason to upgrade? Is anyone really complaining about the speed of Word, Excel, and Entourage now? I use Word (Office 2004) almost every day, and it runs super smooth on my Intel machine. It does take longer to launch than the copy on my G5 does, but those three extra dock icon bounces are not worth an extra $399 to me.

Compatibility with Office for Windows will be the biggest reason to upgrade. Microsoft introduced a new file format for Office, and Mac users need to be able to open and save in this format to be able to share documents with PC users. While this may not affect you, I can guarantee this is a major issue for many Mac users who have to share Office documents with the outside world. This alone will be reason enough for many people to upgrade.

Still, as a whole, should Macintosh users be eager for Office 08? Are there enough compelling reasons for a Macintosh user to switch? A Microsoft-imposed file format change may sound unfair to some users, but many other software makers do that same thing in the name of progress. (Especially Apple).

Are you looking forward to the upgrade, or do you plan on sticking with Office 04?


ill-Logitech

On March 16, 2007, in Uncategorized, by Knot Gullible


I feel like I’m saying goodbye to an old friend.

Logitech makes the best mice. My very first multi-button rodent was the bald, wired Logitech. I love(d) my MX1000. The bluetooth mouse works flawlessly on my laptop. The battery in their wireless keyboard has never been replaced (in two years). My tunes play through Logitech speakers. Their Logitech Control Center (LCC) sucks great big rocks through tiny straws.

To begin with, my Logitech wireless keyboard’s neat programmable buttons stop responding . . . including volume control. I pull down the blue apple to system preferences and the Logitech Control Center.

And wait.

Beachball.

Force quit System Preferences and try again.

Beachball.

Thus begins an odyssey worthy of Jason. The fleece has already occurred.

For over two months, I’m playing email ping pong with the Logitech Customer Support. They claim mystification. Now I know better. They knew of the issue long ago and have done nothing (tangible).

It turns out that OS X 10.4.8 broke the LCC . . . sometimes. Meanwhile they’re having me install, reinstall, re-reinstall an older version, de-install Kensington, trash files, install the newer version, wait for the next release and install that, dance widdershins around the grave of a Jamaican voodoo priest whilst sprinkling powdered tana leaves from a Pharaohs tomb . . .

My point is?

They knew all this. They knew they were making me perform useless tasks knowing in advance they wouldn’t work.

At this point I’m taking matters into my own hands. Doing research online with Google is a step we all should start taking. Just be aware that not all info is reliable and unbiased.

Here is what I found:
• LCC is incompatible with 10.4.8
• LCC uses APE (Unsanity’s Application Enhancer) Once I trashed those APE files, my volume control buttons started working again. (But LCC’s still broke)
• 10.4.9 didn’t solve the problem.

Meanwhile, I need to replace my MX 1000 due to a stuttering left clicker. The Logitech wireless mouse that came with the keyboard loses its clicker and I have to unplug the USB cable and re-insert so it will.

Bye Bye Logitech. The penalty for wasting my time? Banishment.

Any suggestions?


Looking for something?

Use the form below to search the site:

Still not finding what you're looking for? Drop a comment on a post or contact us so we can take care of it!