

Creating your own computer program in REALbasic 2006 is straightforward and remarkably good fun. With a little practise, you can craft all kinds of neat applications tailor-made to your business or hobbies. In this tutorial, we’ll make a program that access the Meteorological Office web site and then downloads the latest cloud cover satellite image. Definitely useful, the British summer being what it is. In the process, we’ll look at how REALbasic programming works, and how to create a logical interface and add all the little extras like menu items and tool-tips.
Programming in REALbasic involves three main stages. The first is formulating what you want the application to do. This may be as simple as performing a calculation on some number entered by the user, through to more complex tasks that involve graphics, connections to the Internet, multimedia files, and more. Once you have outlined what you want your application to do, you need to create an interface. REALbasic provides lots of tools for this, and for many newbie programmers, this is the most immediately fun and rewarding part of the process. Because the Mac has a clearly defined “toolbox†of buttons and other interface components, almost anything you create in REALbasic will have that Macintosh look and feel you like so much. The last stage in the process is adding the code, the part of the project that tells the computer what to do when a certain command is issued, such as when a button is pressed.
Returning to our project, let’s think about what we want our program to do. It’s a good idea to sketch out your ideas on a piece of paper first, thinking about how the user will interact with the program, and how the program will present the results. In this case, at the very least we will want a button to tell the program to go and fetch the cloud cover image, and then a viewer of some kind that will display the image. Once you have the core functionality established, you can think about the niceties. The Met Office offer two different versions of the cloud cover image, one in visible light and the other infrared, so why not provide an option to view one or the other? A progress bar would be nice, too, as that gives the user feedback, letting them know the application is working properly, something that is valuable when using a slow connection to the Internet, such as a modem. Keyboard shortcuts, menu items, and tool-tips can all be added as well, to make the application easier to use. Thinking about these things before building the application is a very good idea; you’ve probably used more than one application over the years where the user interface was very obviously an afterthought, and hated that program because of it!
The REALbasic interface has had a substantial makeover since its last incarnation, and it’s worth quickly reviewing how it is laid out. All the development of the program takes place in a single big window known as the Integrated Development Environment or IDE. When you start a new project, using New Blank Document (Command+[N]) from the File menu, the IDE contains a toolbar with various buttons along the top, and a set of tabbed windows below. To begin with, there is only a single tabbed window, the Project window. As you add things to the program, additional tabbed windows will appear.
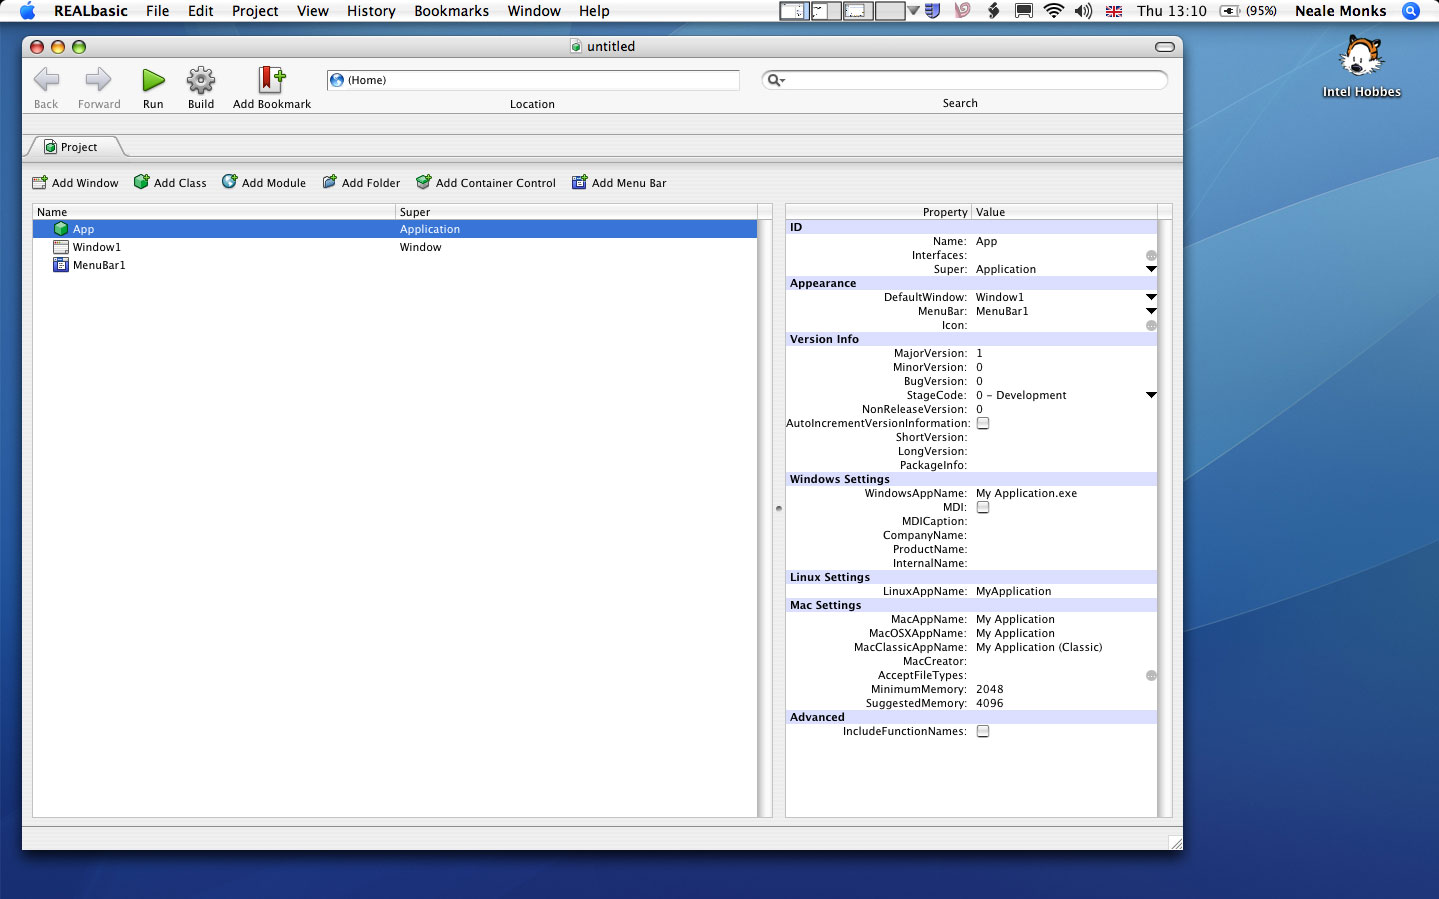
The Project window contains the overall settings, such as what platforms the program will be built for and what the application will be named. Within the Project window you will see three items running down the left hand side, App, Window1, and MenuBar1. Each of these contains different pieces of the application. The App window will contain things used by the entire application; Window1 just those things used in the main application window and nowhere else; and MenuBar1 things slotted into the main menu bar at the top of the screen.
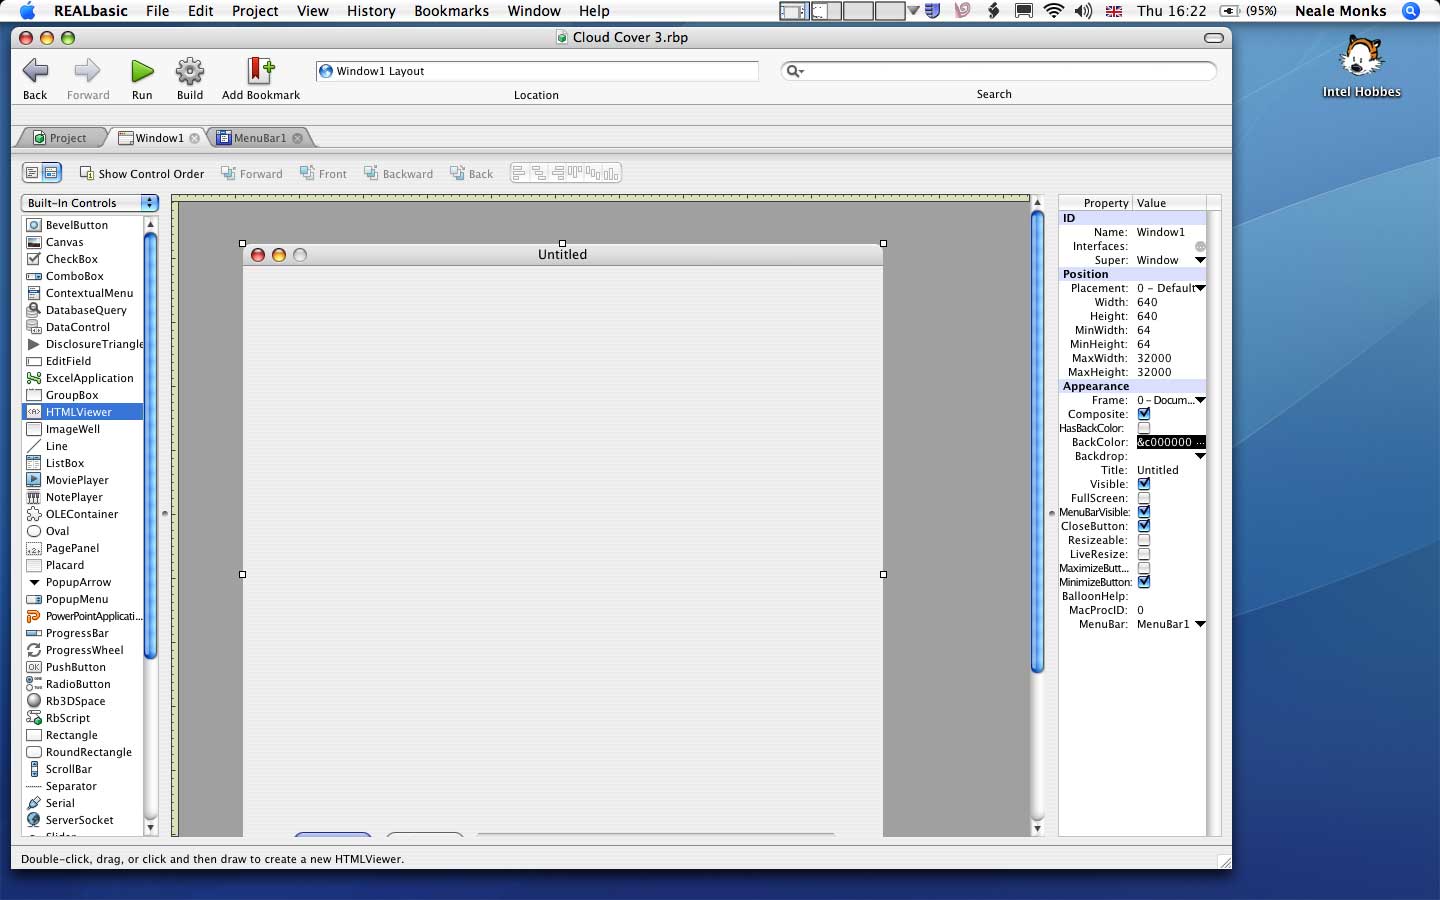
REALbasic comes with a large variety of objects called Controls, each of which performs specific functions. Incorporating them in an application requires nothing more than dragging them onto the application interface. There are several Controls that will display images, but one of the most versatile is the HTMLViewer. This Control is, in effect, a miniature Web browser, and is perfect for what we want. It will fetch and display an image from a web site with very little additional coding. To access these Controls, double click on Window1. Note that a new tabbed window appears, also called Window1, and the Controls are along the left hand side of this window. By default, only a limited selection are on display, but if you click on the pull down menu at the top, and switch it from Favorites to Built-In Controls, lots more will appear, including HTMLViewer.
STEP BY STEP: Create the REALbasic document
Launch REALbasic and then select Desktop Application from the options presented. Quickly look over the IDE and familiarise yourself with where everything is. The toolbar at the top contains important commands, such as Run, which runs a prototype version of the program; and Build, which exports the project as a completed application.
Let’s give out application a name. Click on App once, and on the right hand side a table will appear with two columns, entitled Property and Value. If you look down the list, you’ll find entries for the application name, one for each platform it might be exported to. For this program, type in “Cloud Coverâ€, and then go to the File menu and Save your application.
Double click on Window1 in the left hand column. A new tabbed window, also called Window1, will appear, within which you will find the application interface onto which you can insert buttons, text boxes, etc. At the top left, just underneath the Project tab, you will see an unlabelled pair of graphical buttons. Clicking on these toggles between the coding view (the left button) and the interface design view (the right button). For now, we want the interface view. On the right hand side you will see some more properties and values. Find the Width and Height entries. Because of the size of the images we will be using, you want to create an application interface 640 by 640 pixels in size.
STEP BY STEP: Adding Controls
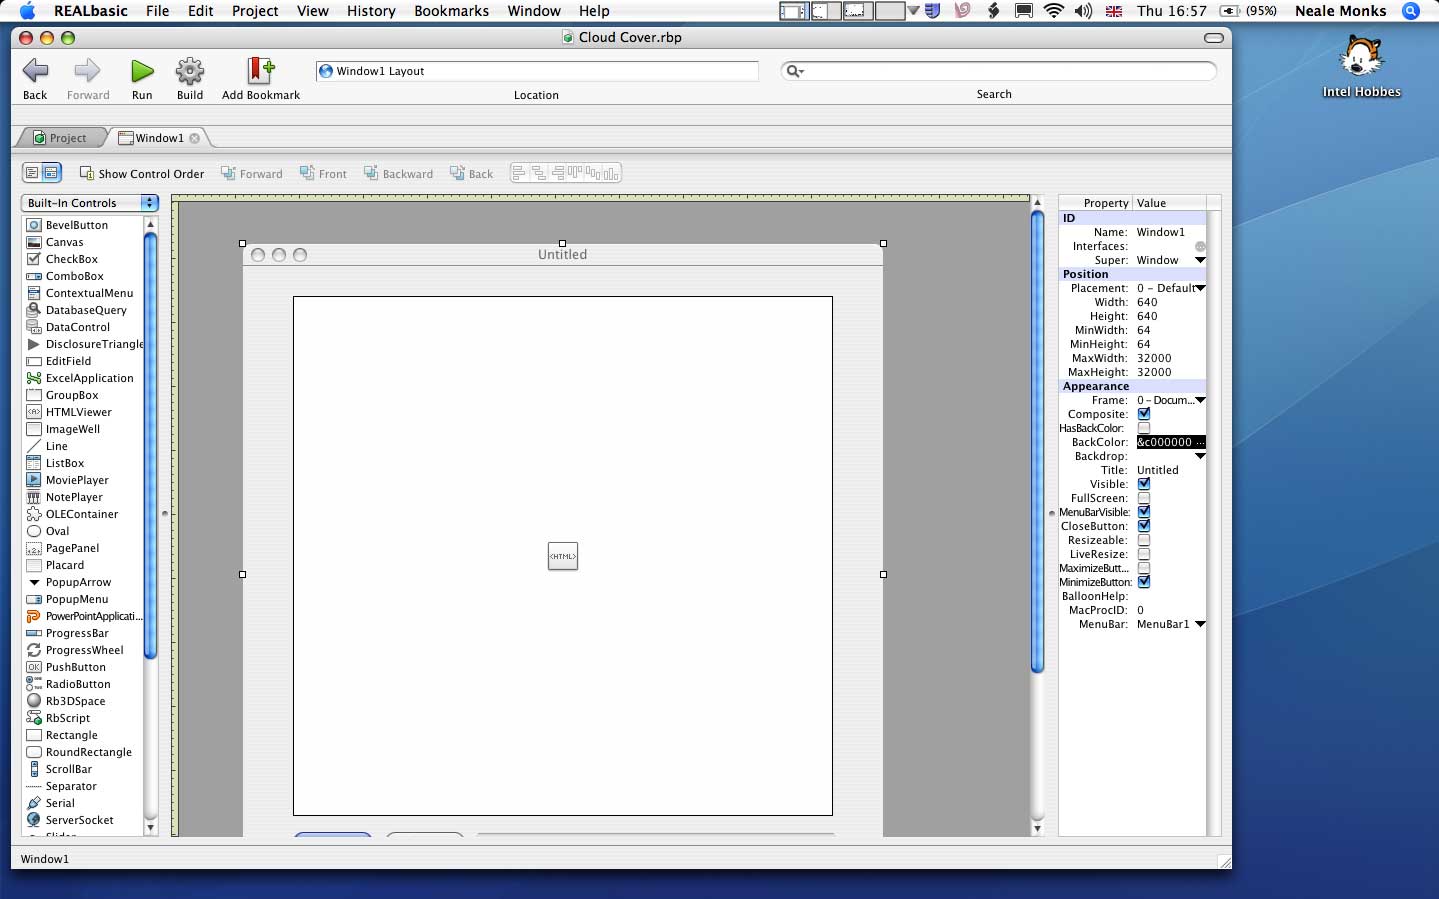
We now need to add the viewer. From the selection of Controls on the left hand side, drag the HTML Viewer icon to the application interface. You will now need to resize the HTML Viewer object to an appropriate size. Click on the object, and using its Width and Height properties, set it to 540 by 520 pixels. Give the HTMLViewer object a memorable name, such as “MyHTMLViewerâ€.
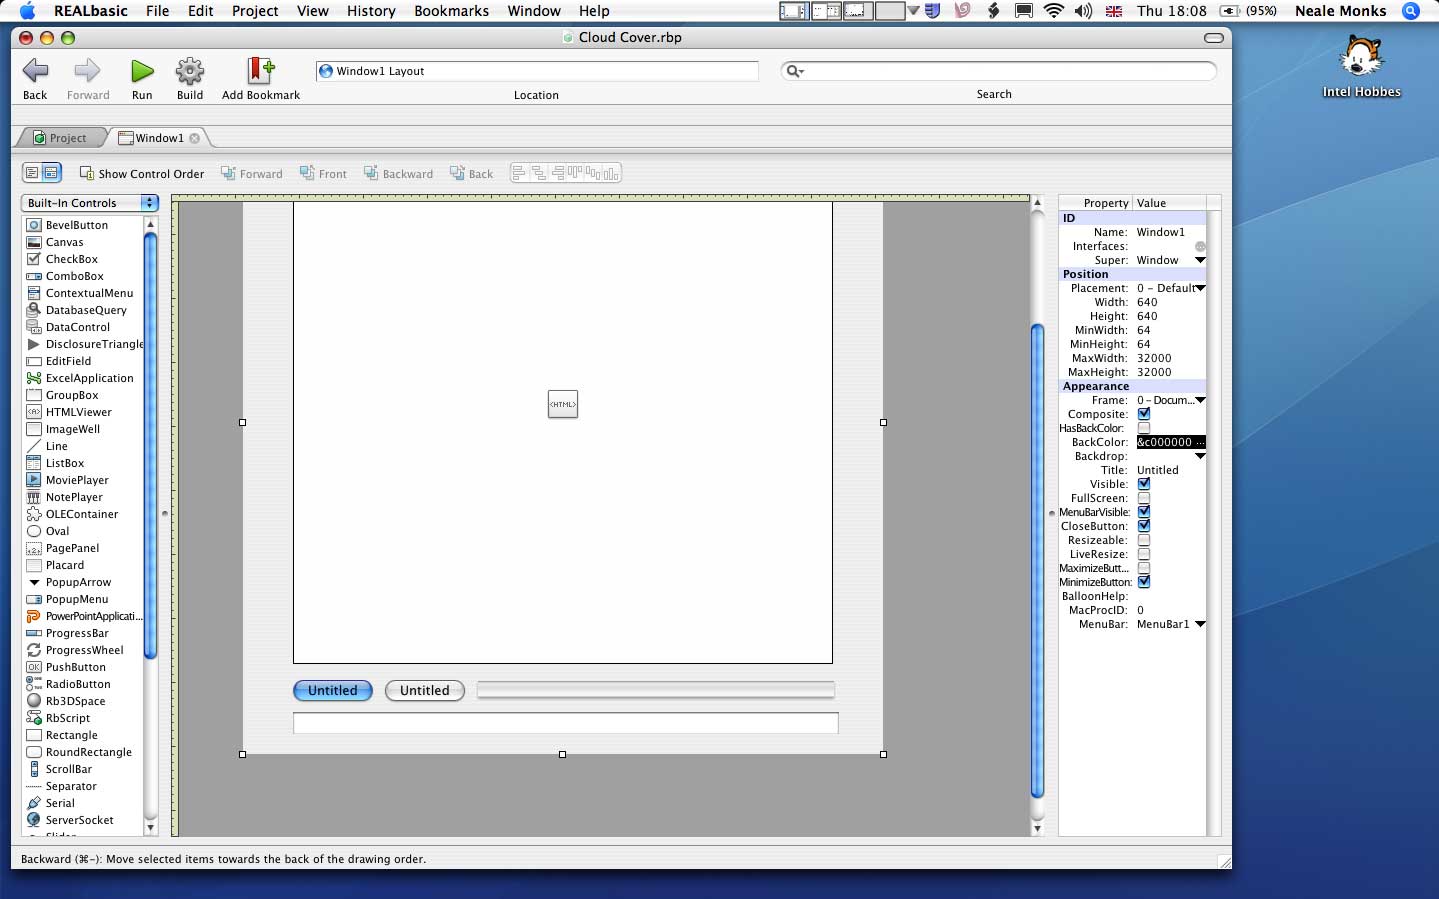
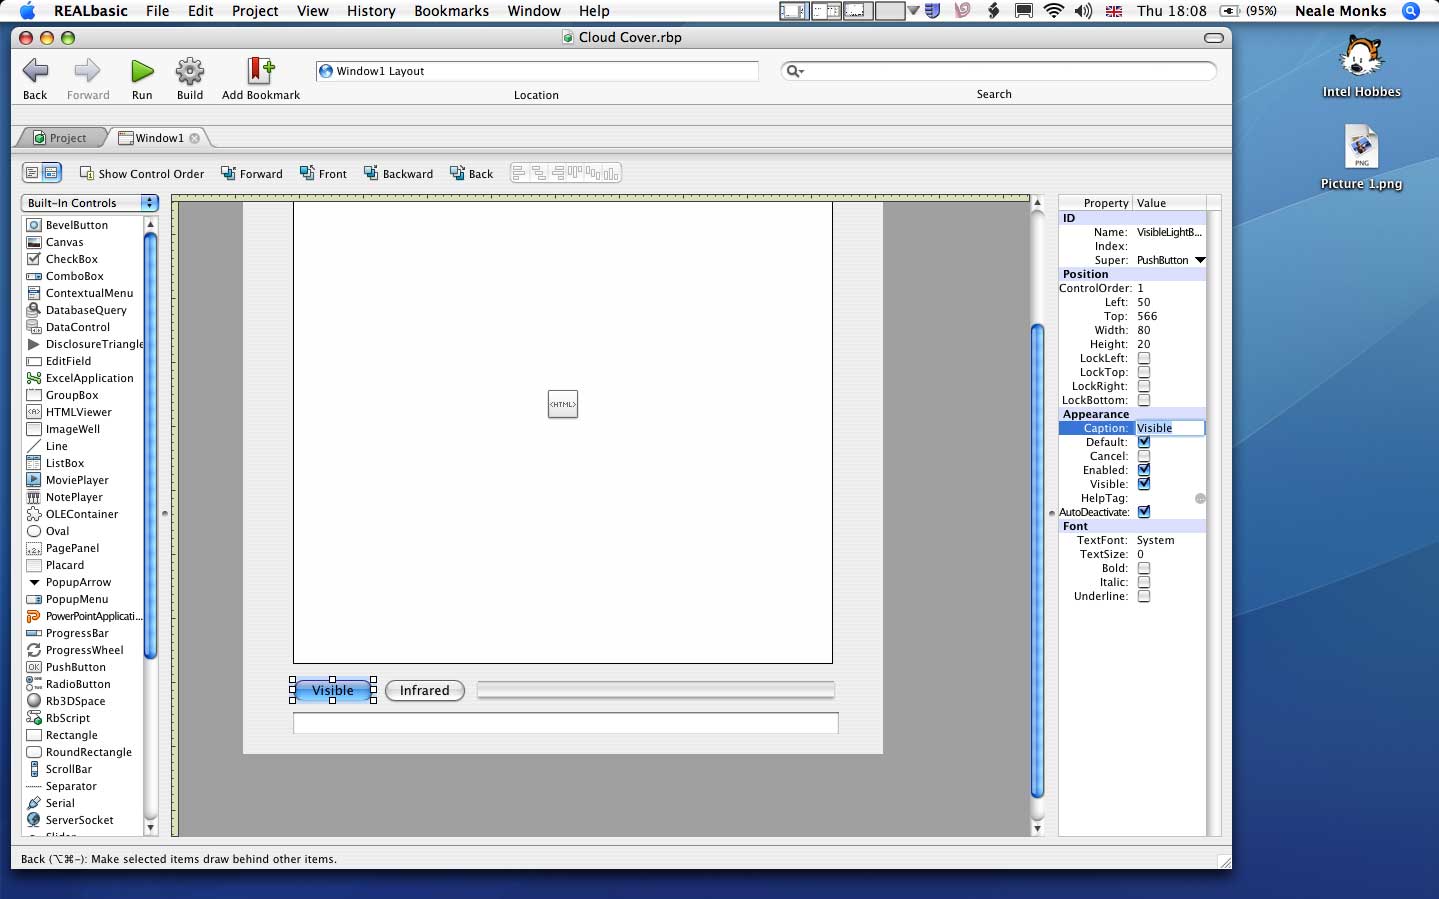
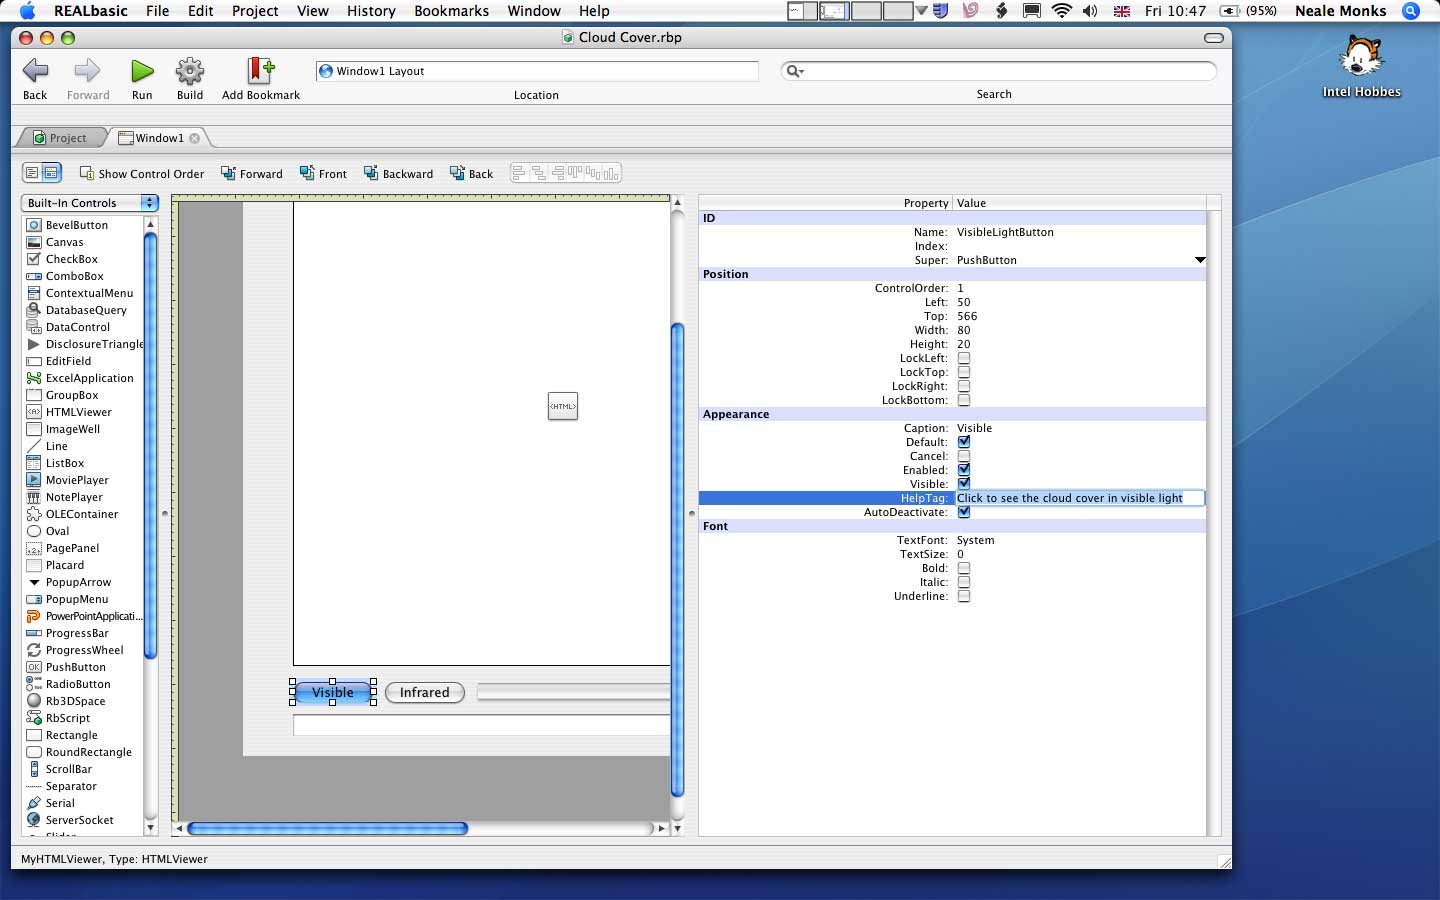
Drag some more Controls to the interface window, two Push Buttons, one Progress Bar, and an Edit Field. Arrange these on the interface so that things are neat and ordered. REALbasic provides automatic alignment aids that appear when objects are brought together, helping you to keep things aligned and evenly spaced. Click once on the first button, and on the properties section, tick the check box next to Default; this turns the button blue and makes it the default button.
Using the properties on the right hand side, give the new Controls memorable names, and in the case of the Buttons, put something relevant into the Caption field as well. Here, these items have been called “VisibleLightButtonâ€, “IRLightButtonâ€, “MyProgressBarâ€, and “URLField†respectively. The Progress Bar shows the user the application is working, and the Edit Field will display the URL being used.
STEP BY STEP: Adding Code
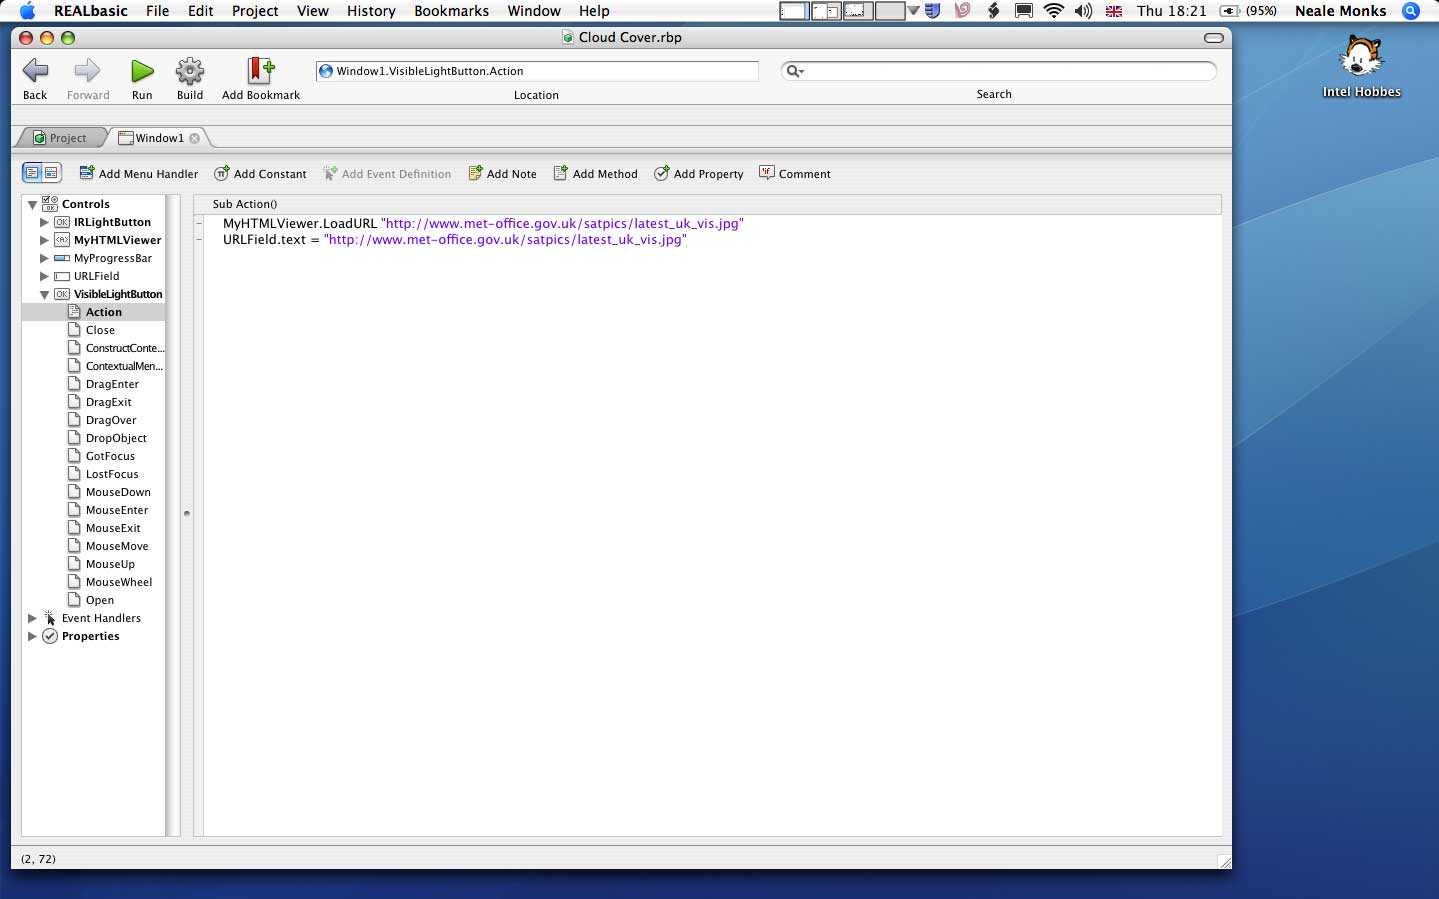
The first button will download the visible light image from the Met Office. Double click on it, and the IDE will change from the interface design view to the coding view. On the left hand side you will see a listing of all the different items we’ve added to the project, alongside disclosure triangles which, when flipped, reveal an array of different events. Coding is essentially saying that when a certain object experiences a specific event, then it should run a certain command. In this case, when we press one of the two buttons, the HTML Viewer object (“MyHTMLViewerâ€) will display one of the graphics we’re interested in, and then pass along that address to an Edit Field (“URLFieldâ€).
MyHTMLViewer.LoadURL “http://www.met-office.gov.uk/satpics/latest_uk_vis.jpg”
URLField.text = “http://www.met-office.gov.uk/satpics/latest_uk_vis.jpg”
MyHTMLViewer.LoadURL “http://www.met-office.gov.uk/satpics/latest_uk_ir.jpg”
URLField.text = “http://www.met-office.gov.uk/satpics/latest_uk_ir.jpg”
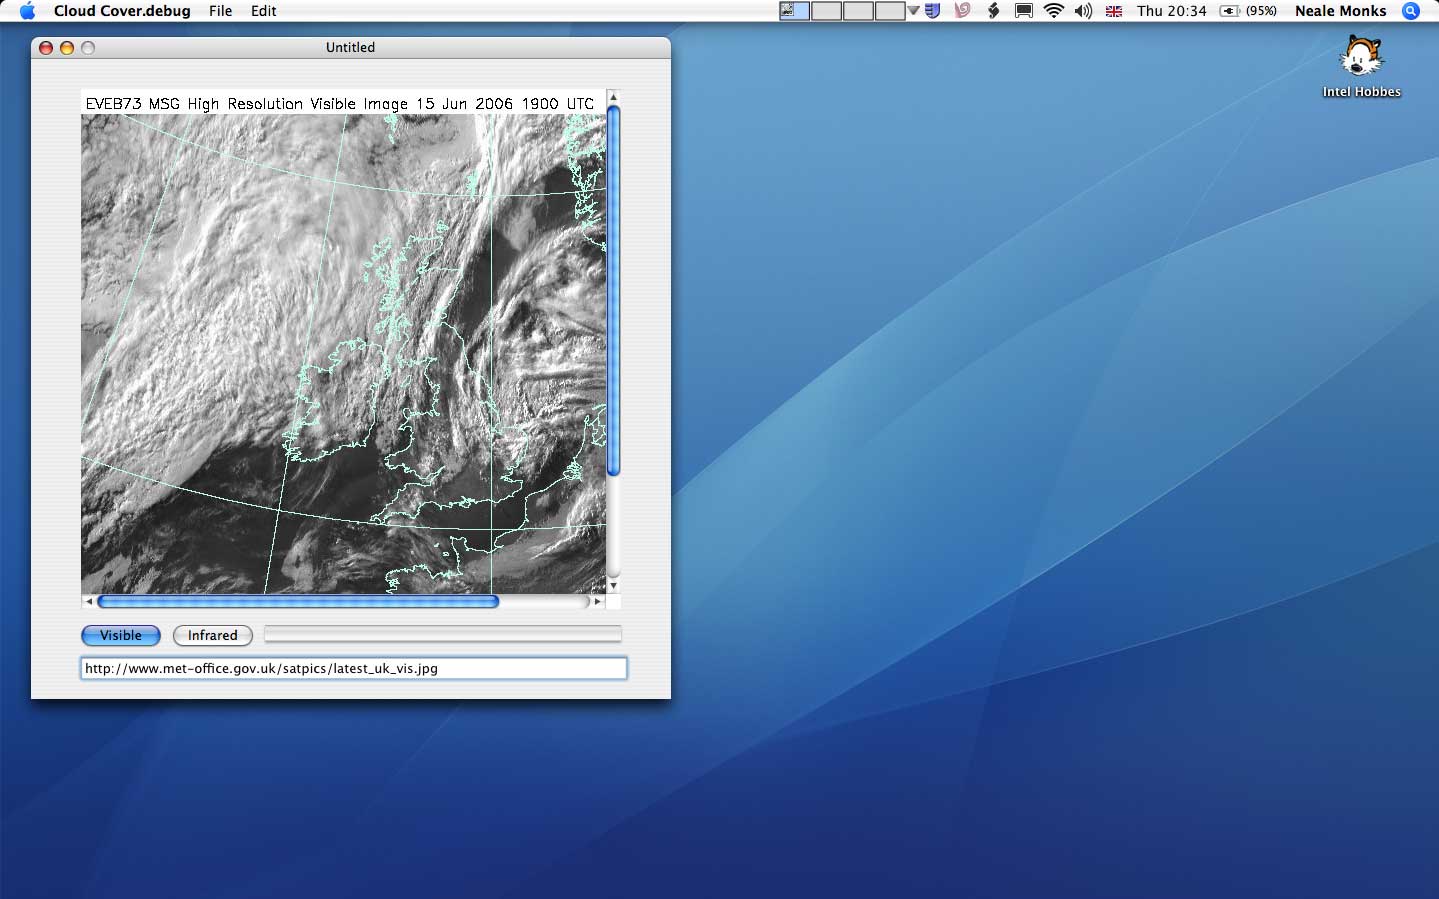
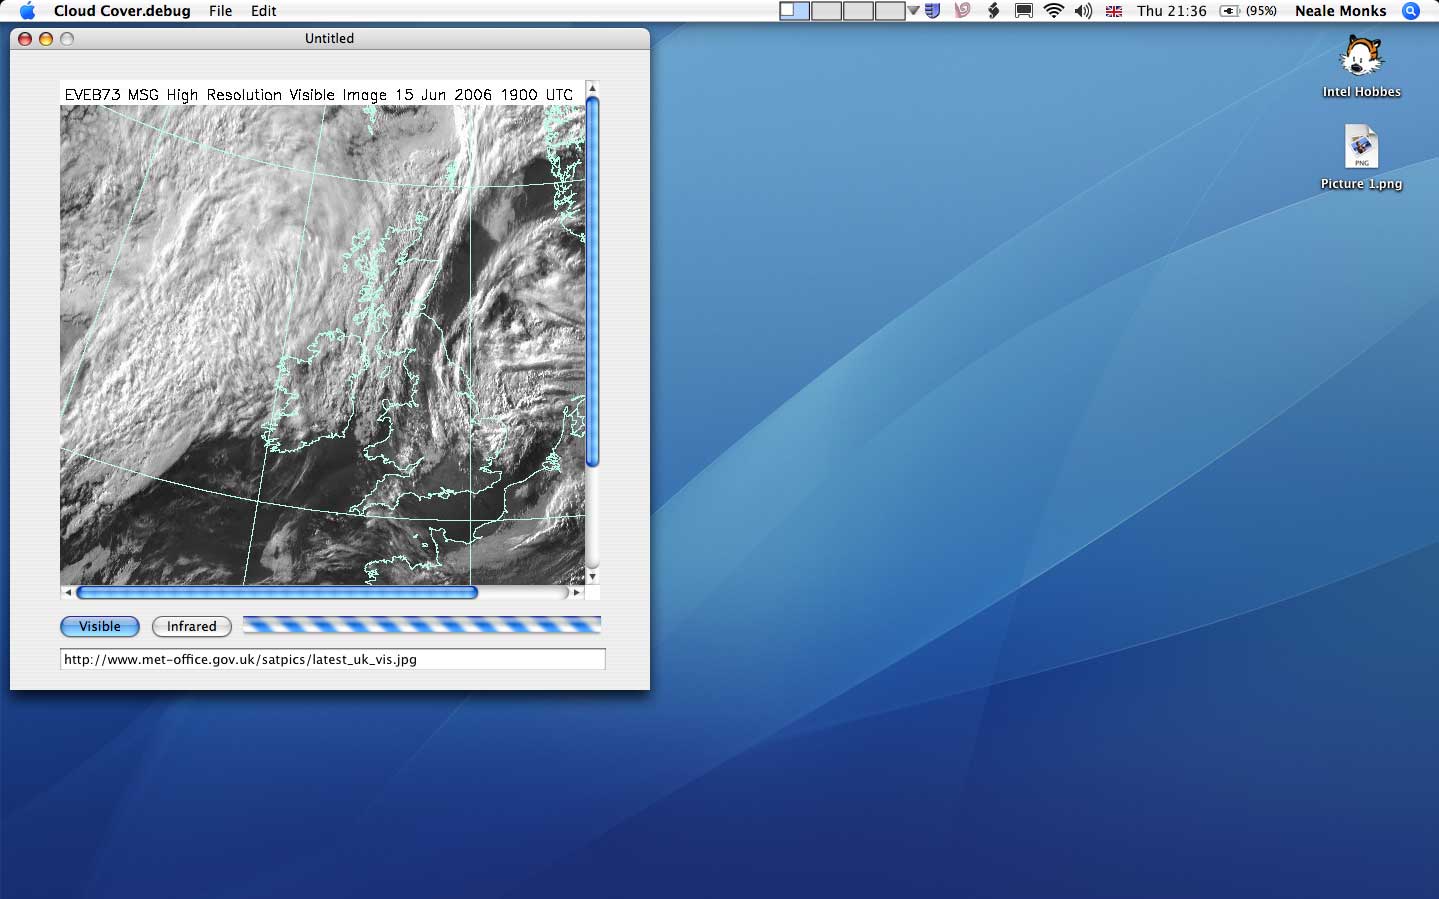
If you haven’t saved your work for a while, do so now. Then test out the application by pressing the Run button in the toolbar. REALbasic will compile the project, and after a moment you will get to see your program in action! When you press either of the two buttons, the program will download the pictures from the Met Office and display them in the HTML Viewer.
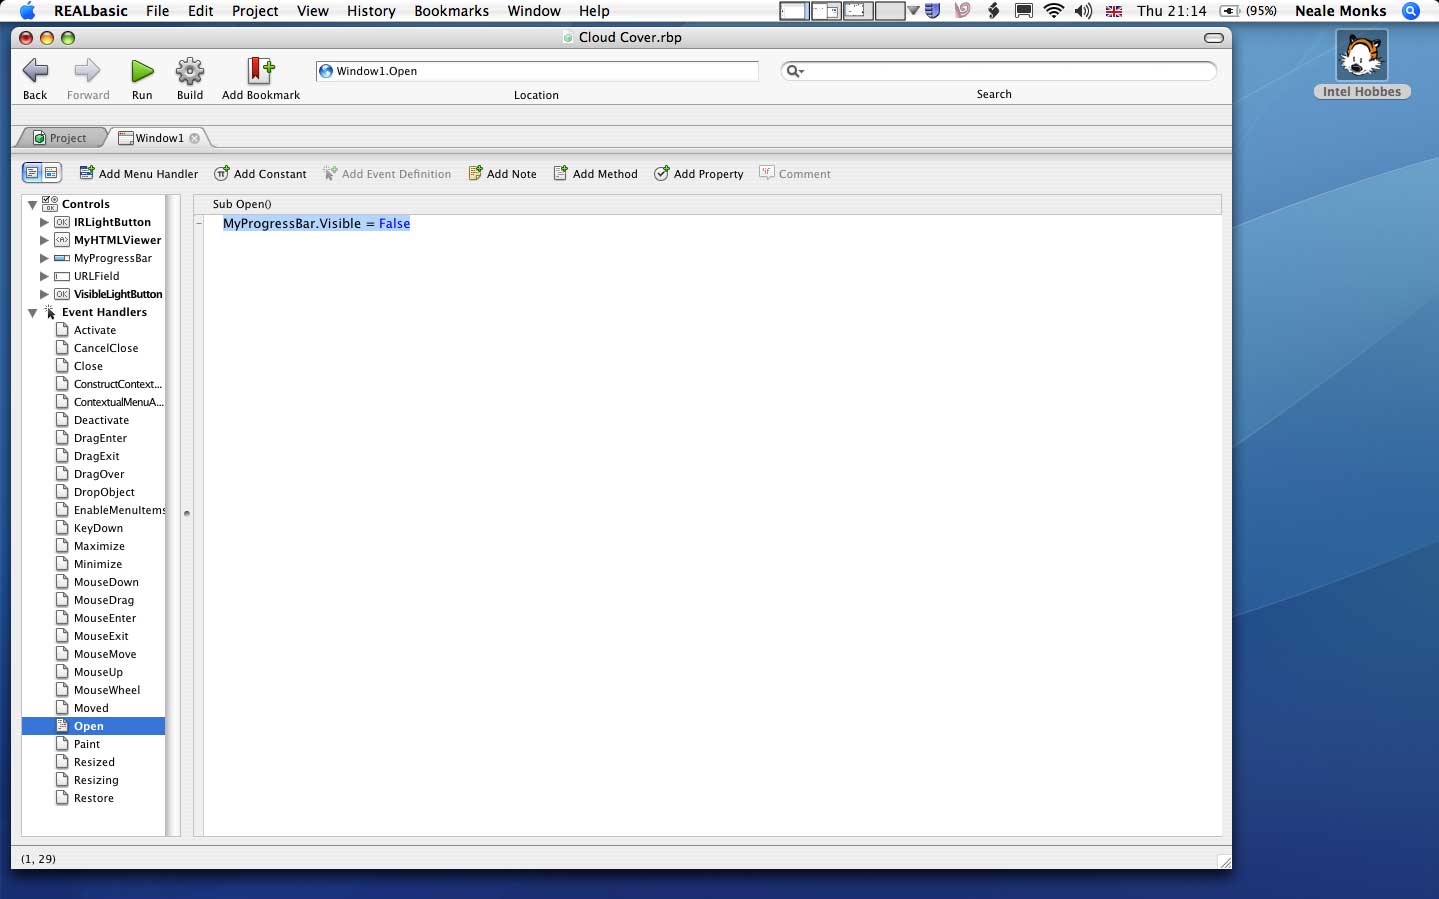
We still need to get the progress bar working, and that involves understanding Events. These are things that trigger commands of various kinds. In this case, we want the progress bar to appear, activate while the image is downloading, and then disappear. Still in the coding view, the first thing is to hide the progress bar when the application launches. We do this by choosing Event Handlers in the left hand column, flipping its disclosure triangle, choosing Open, and entering the code below. Now, when the application opens (i.e., launches) the progress bar will be hidden.
MyProgressBar.Visible = False
STEP BY STEP: Understanding Events
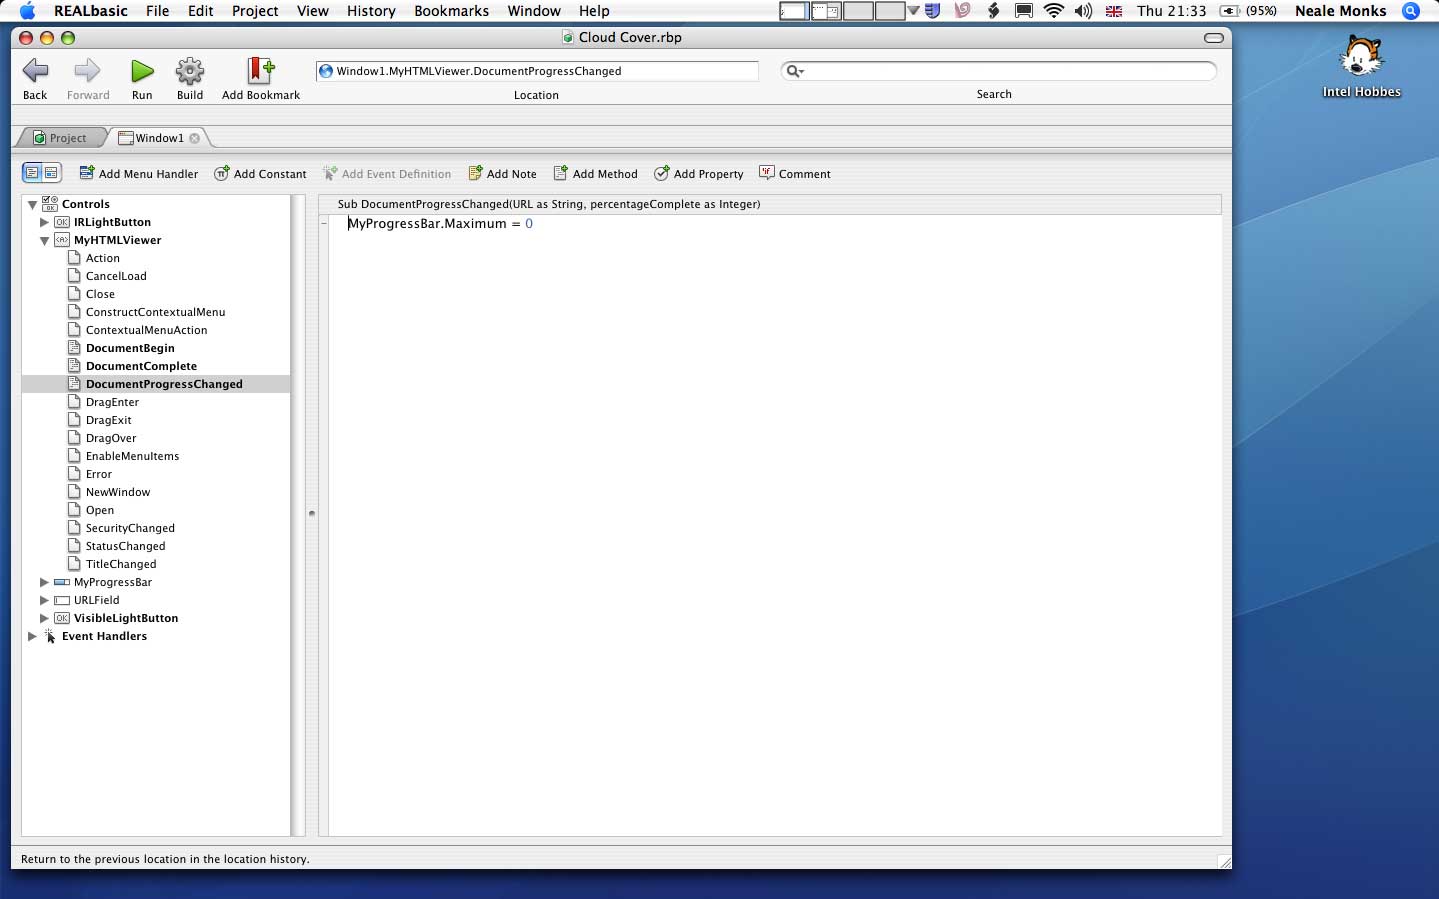
Controls can have events, too. We are going to set the HTML Viewer to respond to three events, beginning the download, proceeding with the download, and then finishing the download. In REALbasic-speak, these are called DocumentBegin, DocumentProcessChanged, and DocumentComplete. Flip the disclosure triangle for our HTML Viewer, MyHTMLViewer, and enter these commands for these three events in turn:
MyProgressBar.Visible = True
MyProgressBar.Maximum = 0
MyProgressBar.Visible = False
Save again, and then Run the application to see how things look. This time, you should find the progress bar working while the image is downloading, and then stop when it’s done. The heart of the project is basically done now, and all that remains are the finishing touches!
Return to the interface view by clicking on the second of two buttons to the left of the Show Control Order toolbar button. Click on one of the Controls on the application, such as the Visible button. In the properties pane on the right hand side, enter a suitable phrase into the HelpTag field. Repeat for the other Controls as required. These will be the tool-tips (OS X and Windows) or balloon help captions (Mac OS 9).
STEP BY STEP: Add menu bar items
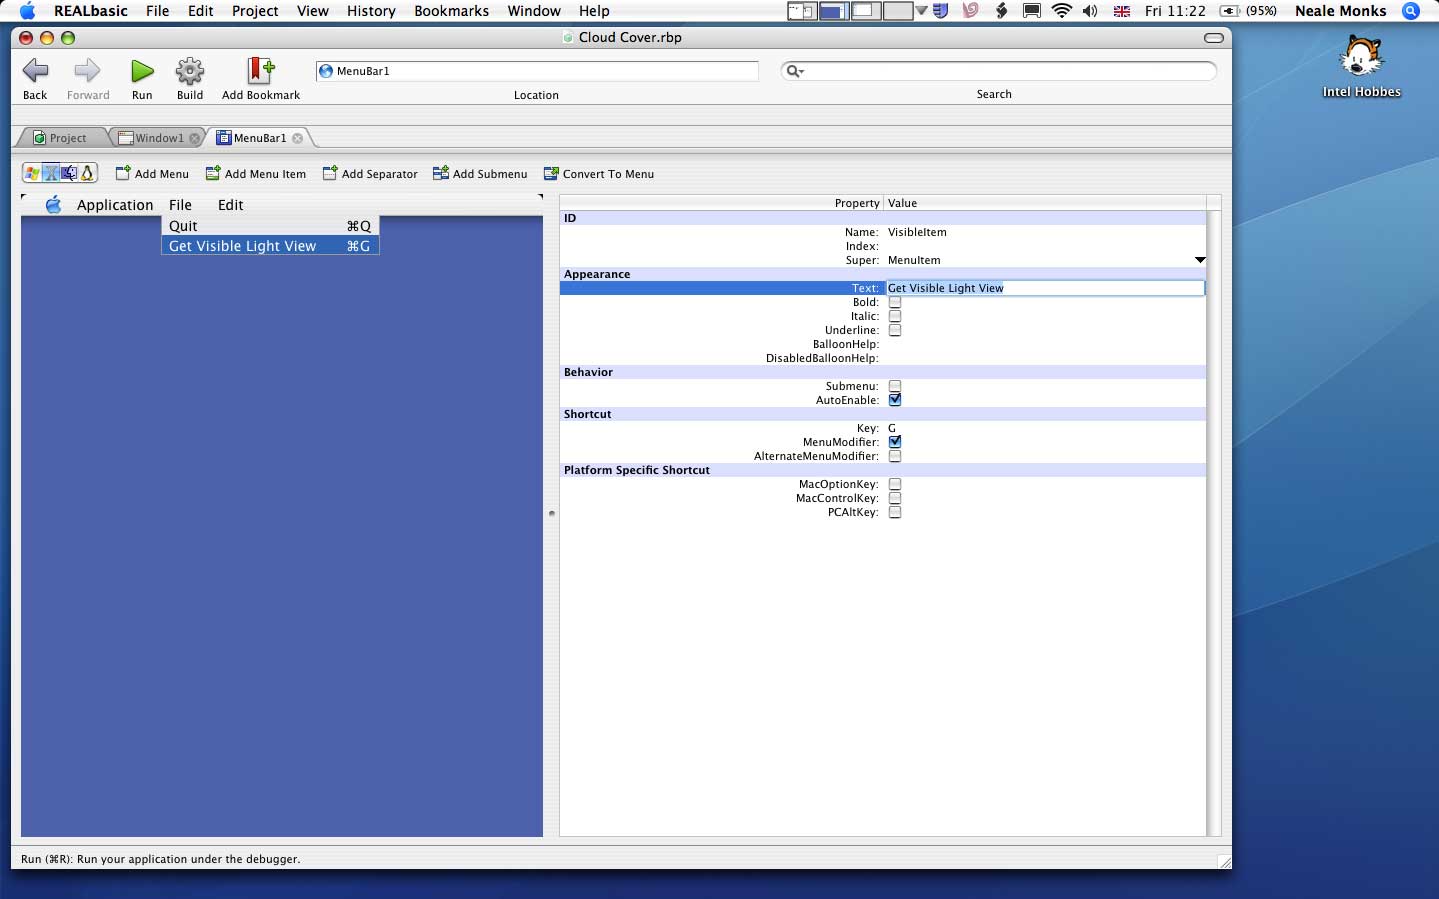
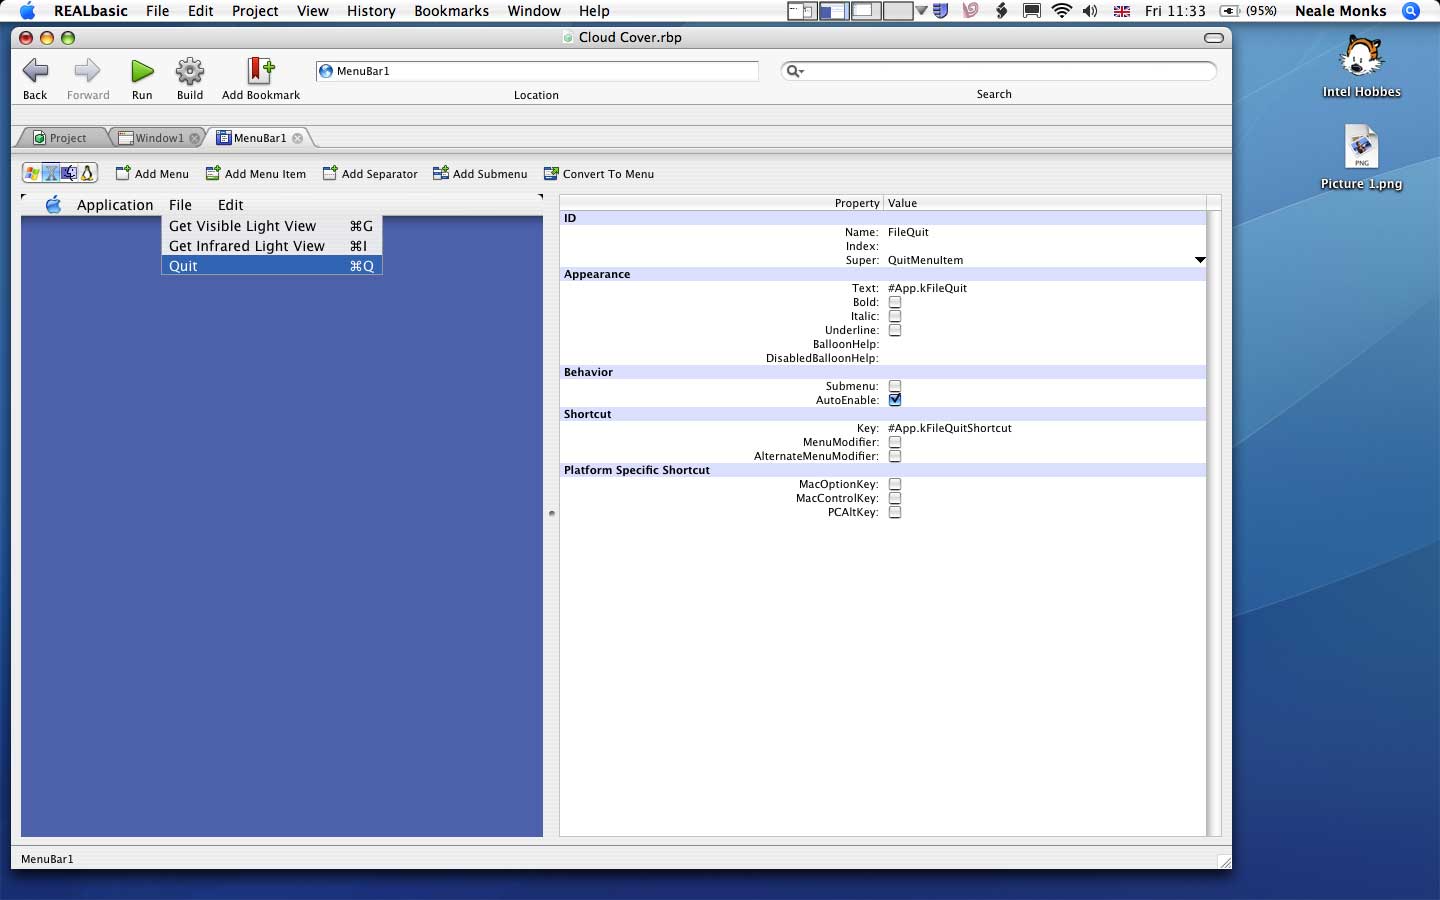
Return to the Project tabbed window, and then double click on the MenuBar1 item; you will now see the menu bar view. Start by adding some options to the File menu for getting the visible light and infrared cloud cover images. Select the File menu in the menu bar view and then click Add Menu Item toolbar button. A new entry will be added to the File menu. Select it, and then use the properties pane to configure it. Specifically, give it a Name (“GetVisibleMenuâ€), Text (“Get Visible Light Viewâ€), and Key (“Gâ€). Then click in the Menu Modifier box. The last two steps make +[G] its keyboard shortcut.
Repeat for getting the infrared image, making sure you use a different name, text, and key. Make sure you don’t use a key used by another function (such as C for Copy, or V for Paste). Menu items can be arranged by dragging them. Move the Quit item to the bottom of the File menu, or, if you prefer, to the Application menu for a more orthodox Mac OS X arrangement. Don’t move the Quit item if you plan to export the application to the Windows or Linux platforms.
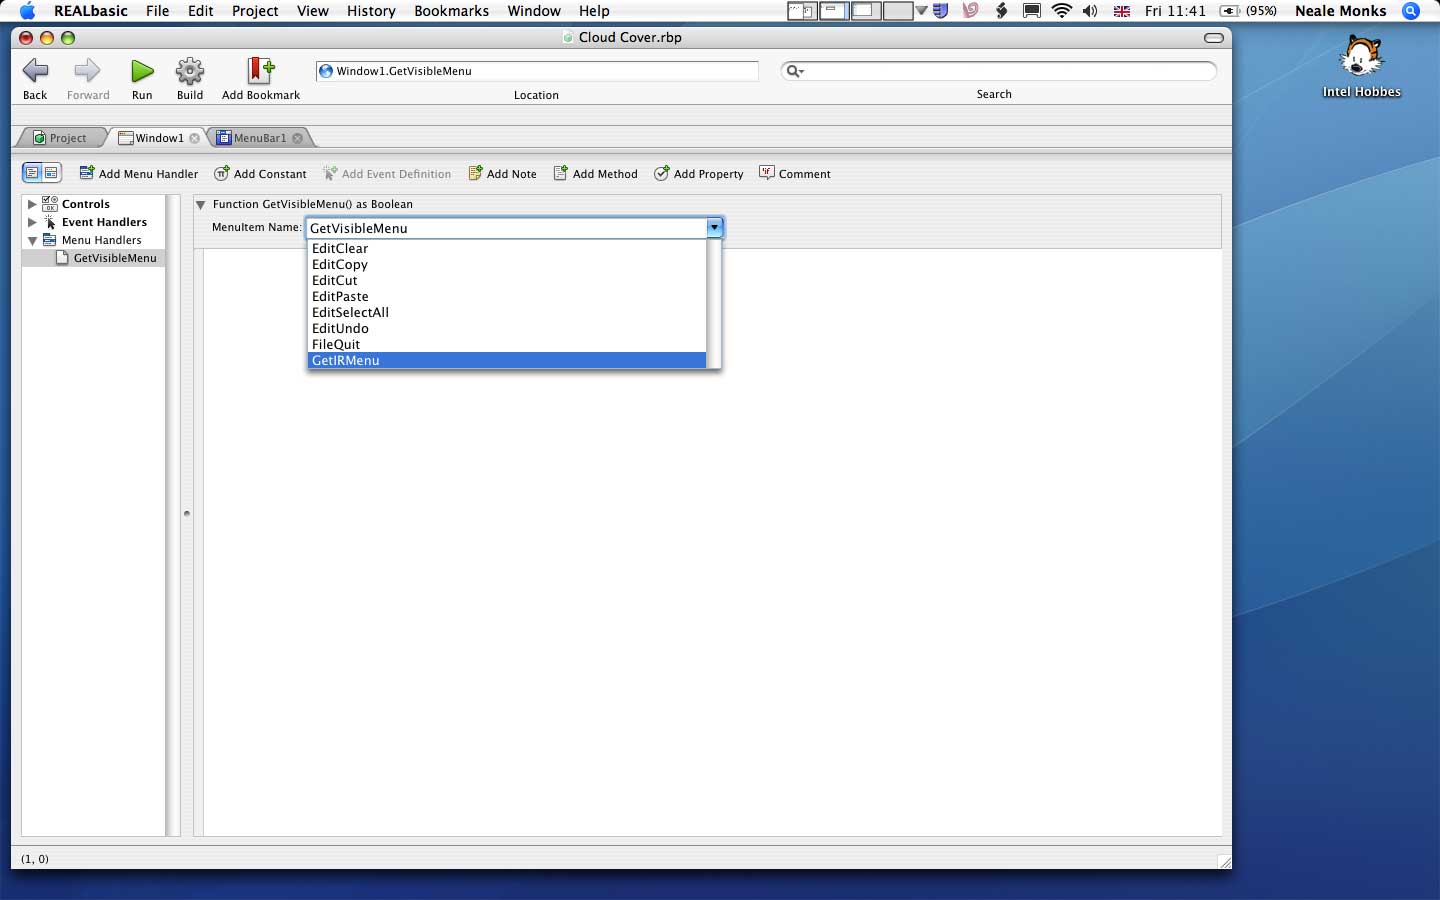
You now need to add Menu Handlers that will contain the code that is triggered when a menu item is selected. Return to Window1 and go to the coding view by clicking on the first of those two buttons to the left of the Show Control Order toolbar button. Then click the Add Menu Handler toolbar button, and from the pull-down menu that appears, choose one of the new menu items, in this case “GetVisibleMenuâ€. Add the same code used for the button created earlier for getting the visible light button. Now create a menu handler for the other menu item, this time using the code from the infrared button. It’s finished! Save your work, and then click Build. If you have the Standard Edition of REALbasic, you will only be able to export the program as a Macintosh program, but the Professional Edition will let you export to Windows and Linux as well.
Extra coding tips
Putting something in an HTMLViewer Control, where HTMLViewer is the name of that Control, and URL is a web address (beginning with http://):
HTMLViewer.LoadURL “URL”
Putting something in an EditField Control, where EditField is the name of that Control and Text is a text string:
EditField.text = “Text”
To hide a Control, such as a Progress Bar:
ProgressBar.Visible = False
To reveal a Control, such as a Progress Bar:
ProgressBar.Visible = True
To set a Progress Bar to activate continuously (useful when the completion time for an event cannot be predicted):
ProgressBar.Maximum = 0
Leave a Reply
You must be logged in to post a comment.