
1. Label Your Photos: When you import digital photos to iPhoto, be sure to name each roll before you import. Including a description might also come in handy when you’re searching photos six months down the road.
2. Moving Photos: You can move digital photos from one roll to another. If you say have roll of scenic shots and a few of your children, you can move the children shots to a roll that contains similar shots. Click on Library and select the photo files you want to move to another roll where they should be placed. Moving files from one album to another does not change where they are placed in their original roll.
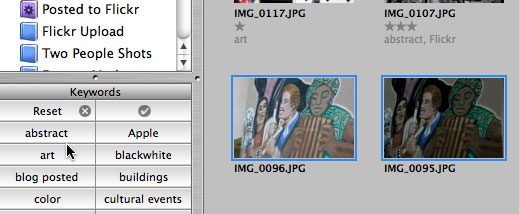
3. Keyword Photos: You can quickly key word photos by selecting particular thumbnail shots and dragging them to and over a particular keyword. When you release the mouse, your keyword appears under the photos.
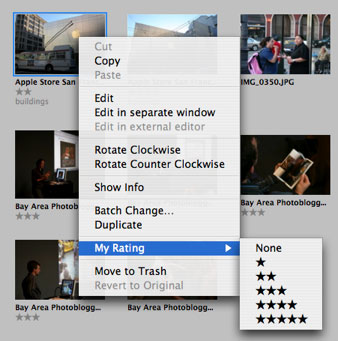
4. Rate Your Photos. You can select several photos at once and then Control or Right click them for the contextual menu that enables you to rate your photos. You can also view selected photos as a slide show and rate them one at a time. Rating photos will help you set up very useful smart albums.
5. Unrated Smart Album: Create a smart album of unrated photos. You can either use this smart album to access photos that need to be rated or trash photos that are taking up space in your library.
6. Saturation Adjument: From my experience as a student photographer, the Saturation adjustment is one of the best ways to enhance and enrich your photos. After making Exposure adjustments, pull the Saturation button to the right to enrich the colors or pull it the left to decolorize your the photo. Pulling to the right provides you better control of how much sepia or monochrome you would like your photo to be.
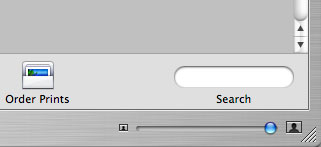
7. Faster Viewing: When you select a thumbnail photo and push the number 1 key, it give you a full widow size view of the photo. Pushing the number 2 key will return to the photo to thumbnail view. This approach is a lot faster than opening the photo in edit view. You can also select a photo and use the Zoom In/Zoom Out slider at the bottom of iPhoto to increase or decrease the size of a selected thumbnail photo.
8. Calendar: Use the Calendar feature of iPhoto to help you find photos. It’s located at the bottom of the left pain.
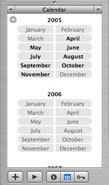
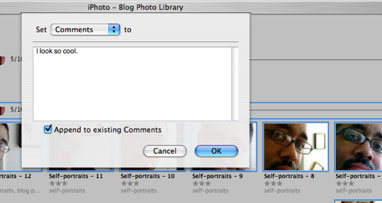
9. Clicking the “i” bottom right next to the Calendar button will enable you to change the name of a selected photo and also write comments. You can also change the date and time of the photo, and rate it there.
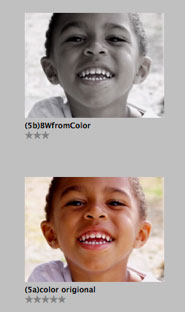
10. Two Versions of the Same Photo: So often, if you want to say turn a color photo into black and white, create a duplicate of the original photo first, and then make changes. That way, you will also have a copy of your original photo.
11. Quickly Select Photos: You can quickly select/highlight a row of a photos by simply clicking and holding down the mouse and dragging it over the photos you want to select.

12. “Best of” Smart Folder: Create a Smart Folder of your top rated photos. There’s no quicker way to get your hands on your best photos than to have a folder that is automatically updated when you rate your photos with 4 or 5 stars. Simply click File>New Smart Photo. In the fist pull down button, select My Rating. In the second button, pull down and select “is greater than” or “is.” You will be presented with a window to select the number of stars you want your highest rating to be, which will probably be greater than 3 or simply 5 start for the top best.
13. Batch Process Photos: Pushing Command+Shift+B (also under Photos>Batch Change) will bring up window where you can batch process selected photos for the type of title and comments you want to append to them.
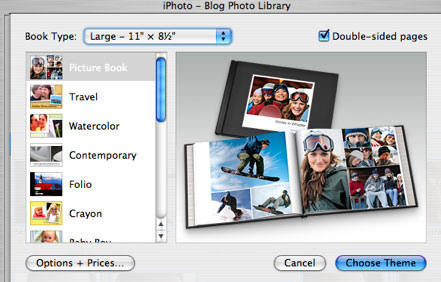
14. Share Your Photos: Far to often, digital photos either never get out of the camera for a long period of time or they remain archived in iPhoto without being shared. Get in the habit creating projects using your photos. Create book of your favorite shots. Email photos to your family and friends. Post an album on the web. Make a scrapbook layout using Photoshop or Pages. Make a greeting card. Change your desktop image or create a screen saver using one or more of your photos. Create a slide show or well designed DVD as gifts. Post your photos on Flickr.com or some other similar site. Post photos on your blog. And best of all, just simply print out photos you would like to share.
15. Clean up iPhoto: Use the little great application called iPhoto Diet to rid your hard drive of bits and pieces unwanted photos. If you use iPhoto on a regular basis, this little gem will get you back some hard drive space. The website for iPhoto Diet explainsit all.

Leave a Reply
You must be logged in to post a comment.