
Apple retail stores no longer sell or promote Epson printers, from my personal observation. Instead, HP and Canon are stocked. This change took place in May, I think, and was a wise, quiet decision by Apple. Read the article HERE.
Month: August 2005
Ending spam by Jonathan A. Zdziarski
Book Review
MyMac Podcast
#40
![]()
MyMac Podcast 40
Download the MP3 from THIS LINK. Or simply go to our iTunes Music Store listing HERE. (Link will open iTunes)
This week, we reveal the winner of our Adobe Creative Suite Professional 2 contest. Many thanks to Adobe Systems Inc. for sponsoring this contest.
We go into the latest happenings in the Macworld thanks to our news partners at MacMinute.com to start the show off.
Tim goes into detail about his new car audio system and how he connects his iPod. No more FM Transmitters for Tim!
Want to make your own DVD Extras disc? Tim goes into detail on how he made just such a thing for movies not even out, the new King King and Superman Returns movie. Wha? Hey, listen to the Podcast for all the details!
Click HERE for all the SHOW NOTE
Read MoreiPod and the Price of Success

It’s the killer combination of iTunes and the iPod that makes Apple number one throughout most of the world. You want an FM radio with your music player? Go buy a Creative Zen or any of the competing products. Most people have voted with their wallets and Apple has the best overall solution.
Miglia AlchemyTV/ DVR
Review
Total Training for Adobe Photoshop CS2
DVD Review
Nemo reviews the latest Total Training DVD, hosted by Deke McClelland.
Apple Training Series: iLife ’05
Book Review
Mac OS X Tiger Killer Tips
Book Review

Scott Kelby updates his Killer Tips book. Is Killer Tips not so killer? How does David Weeks feel about the new edition? Read the review to find out.
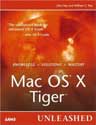
Mac OS X Tiger Unleashed
Book Review
MyMac Podcast
#39
![]()
Download the show at this address, or subscribe to the show via the iTMS from THIS link. (Link will open iTunes.)
This podcast is sponsored by
SmallDog.com
RamJet.com
Last week to enter the Adobe CS2 contest! This is your chance to win the $1,299 premier graphics suite in the world. All it takes is listening to this or last week’s show and following a few simple instructions. All entries should be emailed to contest@mymac.com. One entry per person, please.
This week, Tim and Chad do a live review of Pzizz, the Power Napping Software. Seriously! Of course, if the software really works, Tim and Chad may just end up falling asleep during the show.
Also, we look at the fiasco of the The Henrico County school system $50 Apple iBook sale.
Read MoreTwo Keynote Book Reviews

Photo to Movie
Review

Logitech USB Headset 350
Review

Logitech is trying to do a lot of different things with this headset and on the whole it works nicely. If you want to use them in a telephony environment, you might find them a bit heavy for long-term use. Using it for Podcasting or recording audio works well in a single-user mode.
MyMac Podcast
#38
![]()
You can download the MP3 audio file from THIS link, or tune to our iTunes Music Store listing and subscribe to get each weekly edition of the show downloaded to your computer, and automatically updated on your iPod.
Huge contest news! Working with Adobe System Incorporated, MyMac.com is proud to announce our latest contest: your chance to win a copy of Adobe Creative Suite 2 (CS2), a retail value of $1,299! This is an unheard of chance to win THE premier software package! Don’t miss this chance, download our latest edition of the podcast today!
Tim and Chad look at a bit of Adobe Photoshop history, the big new features, and recap the story of the creation of Adobe Photoshop. The Derrick Story article we read from can be found online at this URL.
News from MacMinute.com
Chris Seibold returns with the Not Mac News segment.
The Dashboard Minute by Guy Serle looks at a few new Dashboard Widgets.
Links for the Dashboard Minute:
Unity Software
Bedrock Biorhythms
Aviation Weather
This podcast is sponsored by:
SmallDog.com
RamJet.com’s 1GB RAM deal
Adobe Creative Suite 2
The Boom Box from Roxio
Review
Owen takes a look at the five applications that make up the new Roxio software suite.
Mighty Mouse
Review
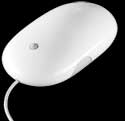
Here I come to save the day. Or not. David Every looks at the new Apple mouse.
MyMac Podcast
#37
![]()
The download link to the show in MP3 format can be found HERE.
You can also subscribe to the show via Apple’s iTunes Music Store at THIS LINK.
Podcast sponsored by SmallDog.com and RamJet.com
This week, Tim and Chad look at the latest news headlines from MacMinute.com. Also on the show, the future predicting power of Chris Seibold’s Not Mac News, and some cool stuff for Dashboard in Guy Serle’s The Dashboard Minute.
Read MoreMacintosh Paradise in Boise, Idaho?
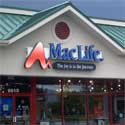
For vacation, some people go to the beach, some go to the mountains, Europe, or the islands of the Caribbean. Guy finds Apple resellers worth visiting. Check out his write up of MacLife, a fantastic Apple reseller in Boise, Idaho.
Read MoreDiskStudio
Review

Want to partition on demand your hard drive? Without formatting the drive first? Is it possible? Click here to read the Nemo review of DiskStudio.