TiPaint Touch-up Kit and iKlear iPod Cleaning Kit

On October 29, 2004, in Uncategorized, by Neale Monks
  • Product Name: TiPaint
    Professional Touch-up Kit
  • Company: TiPaint.com
  • URL: http://www.tipaint.com
  • Category: Hardware repair
  • Price:
    $19.95
  • Requirements: Any Titanium
    PowerBook (i.e., all G4 models prior to
    the Aluminium PowerBooks)
  • Rating: 2 bounces

    Lack-Luster
    • Product Name: iKlear
      iPod Cleaning Kit
    • Company: Meridrew Enterprises
    • URL: http://www.iklear.com
    • Category: Hardware repair
    • Price: $19.95
    • Requirements: Any iPod,
      iBook, or PowerBook, also any desktop Mac
      with an LCD screen
    • Rating: 3 bounces – Lustworthy

    There is no question that iPods, iBooks,
    and PowerBooks are among the most beautiful
    machines that Apple has produced, but why
    do they have to scratch so easily? The Titanium
    series of G4 PowerBooks were painted using
    some sort of metallic enamel that doesn’t
    stick to the underlying metal and plastic
    at all well, and practically every example
    I have seen, including my own, has had some
    paint abraded from the corners simply by being
    transported in a laptop case. Much more annoying
    is the lack of clearance between the keyboard
    and screen. Take a look at any of this generation
    of PowerBook and you’ll see grease and dirt
    that lifts off the keys and onto the screen.
    In the most severe cases, the keyboard even
    scratches the screen, permanently damaging
    it and leaving behind unsightly blemishes
    as grease and dirt seeps into these scratches.
    Many PowerBook owners use leather or fabric
    inserts to prevent the keyboard from touching
    the screen, despite the fact the PowerBook
    manual specifically advises against this (in
    the 1 GHz G4 PowerBook Manual, this statement
    is on page 94 if you want to see for yourself).

    The iBooks and iPods present a different
    set of problems. Both feature a soft translucent
    plastic that scratches easily. The small size
    of the iPods makes any superficial scratches
    to the plastic much more noticeable, and a
    huge market has developed to provide iPod
    owners with wallets and containers to keep
    their iPods safe. These vary from simple fabric
    ones through to jellylike plastic and even
    metal ones, and cost upwards of twenty dollars.
    If you have $250 to spend, you can even get
    a Louis Vuitton one fashioned from leather
    and brass. But many people don’t get these
    accessories until after they have bought the
    iPod and used if for a few weeks, assuming
    that it is not less durable that the average
    Walkman. It is only once its been rattling
    around inside a coat pocket for a while that
    they notice the scratches on the screen and
    the shiny metal at the back of the device.
    The iPod may well be the heavyweight champion
    in the portable music player market, but when
    it comes to surviving the rigours of real
    life, the iPod has a glass jaw.

    The TiPaint Touch-Up Kit

    The TiPaint Professional Touch-up Kit consists
    of two small bottles of enamel paint, one
    that matches the titanium paint that covers
    the main body of the PowerBook and the other
    for use on the light silver PowerBook trim.
    Each contains 0.5 fluid ounces and comes with
    its own brush, built into the cap (so the
    whole thing looks like a bottle of nail polish).
    Minimal instructions are supplied on a small
    card insert that comes with the bottles of
    paint. Disregarding logos and titles, there
    are only 85 words of instructions and advice
    on the card, and you will not find anything
    more detailed at the TiPaint web site.

    Applying the paint is easy enough. The instructions
    do mention that you need to shake the paint
    well, in the case of the light silver bottle,
    for up to three minutes for even colour. The
    next thing to look out for is that you do
    not apply too much paint. Actually, this is
    very difficult to avoid with the included
    brushes, which are about 4 mm wide, much wider
    than the average scratch and so practically
    guaranteeing that you will end up putting
    on more paint that you need to. It is a good
    idea to wipe down the brush against a clean
    cloth or paper towel to remove some of the
    paint before you use it, but there is always
    a risk that doing this will put some lint
    in the pain that will transfer to the patch
    you are painting on the PowerBook.

    Once applied, the paint takes about 4 hours
    to dry, though if the PowerBook is running
    and warm to the touch, it seems to go dry
    much more rapidly. Either way it isn’t a good
    idea to handle the computer while the paint
    is drying. If you do make a mistake, the paint
    is fluid for long enough that a clean lint-free
    cloth can be used to wipe away the paint without
    much problem if you do so within a minute
    of applying it. As with enamel paints generally,
    even before it is fully dried it becomes sticky
    and impossible to cleanly remove after a few
    minutes. But how well does the paint match
    the original finish of the PowerBook?


    Light silver paint
    The light silver paint is reasonably
    close to the original finish, but not
    exactly the same, so while it diminishes
    any blemishes, it doesn’t remove them
    completely.
    Titanium Paint
    The
    titanium paint works best if brushed
    on in miniscule amounts at a time, a
    sort of “dry brush” technique where
    most of the paint is removed using a clean
    cloth. When the paint is slapped straight
    on using a “wet brush” approach,
    the paint doesn’t go on uniformly, and
    replaces the original scratch with a
    not-too-subtle blob of paint.

    I tested the TiPaint kit on my PowerBook,
    and found the results to be rather mixed.
    With the supplied brushes it is impossible
    to exactly cover only the scratch while leaving
    the original paint job untouched. Instead,
    you’re going to wind up with some sort of
    patch covering the scratch plus a few millimeters
    of original paintwork in each direction. The
    colours are close but not exactly the same
    as the originals, and even with the recommended
    one minute of shaking for the titanium paint,
    and three minutes of shaking for the light
    silver paint, the finish didn’t seem to be
    very uniform at all.

    It’s difficult to say whether the small but
    dark original scratches are preferably to
    the larger if more subtle blotches you get
    once you’ve used the TiPaint Professional
    Touch-up Kit. For what you are getting, twenty
    dollars is a lot of money for tiny amounts
    of paint that may or may not improve the look
    of your PowerBook, but if used correctly and
    you apply the paint carefully and work slowly,
    it is possible to make some modest repairs
    to your PowerBook’s paint job. But it is all
    too easy not to do a good job, and that has
    to be partly down to the wrong sized brushes
    supplied with the paint and very limited instructions.
    Bottom line: possibly useful, but approach
    with caution.

    The iKlear Screen Cleaners

    It is possible to pick up computer screen
    cleaners at Office Depot for a few dollars,
    so why spend 20 bucks on the iKlear kit? Simply
    put, it does a really good job and comes with
    a variety of tools to clean all sorts of different
    things, from your iPod and iBook through to
    DVDs and camera lenses. Included in the iKlear
    iPod Cleaning Kit is a 2 oz bottle of the
    iKlear spray, one large and one small “micro-chamois” cleaning
    cloth, and three packs of disposable wet-and-dry
    cloths. These disposable clothes most closely
    mimic the computer and LCD cleaners that you’ll
    find at Target and Office Depot, at least
    to look at, that is, they come with one cloth
    impregnated with the cleaning agent (the wet
    cloth) and one soft cloth for drying the screen
    down afterwards (the dry cloth).

    The main advantage to the iKlear kit, according
    to its manufacturers, is that the solvent
    used in the cloths and contained in the spray
    bottle will not harm the plastics used in
    liquid crystal displays and other computer
    components. This is a bit difficult to test:
    like screen burn-in, various stories are told
    and retold about things like Windex and alcohol
    making LCD screens brittle and discoloured,
    but I’ve never seen this happen or spoken
    to someone who has. I’ve used dilute alcohol
    on computer screens including those of PowerBooks
    for years and never seen a problem either.
    Similarly, paper towels and clean cotton handkerchiefs
    have always worked for me, but people do say
    they are rough enough to scratch the screen,
    and for that reason laptop owners should use
    optical-quality cloths instead. So “better
    safe than sorry” rather than experience
    ends up being the justification for buying
    specialised cleaning products like the iKlear
    kit.

    Fortunately, this is one time where if not
    an essential purchase, the iKlear kit is at
    least a useful one. It does work well, and
    will clean off grease and other superficial
    marks from just about anything, and not just
    the screen. It does a nice job on the metallic
    finish of my PowerBook, which can get rather
    grubby around the trackpad, as well as the
    back of the iPod. The clothes are very soft
    indeed, and this makes them a sensible choice
    for use with the iPod and iBook, both of which
    scratch very easily. Being optical-grade in
    quality, they can also be used on glass components
    (like flatbed scanner screens) where even
    the smallest scratches can cause degrade performance.

    The manufacturers also say that apart from
    being a safe way to clean your iPod or whatever,
    the iKlear liquid can also help to protect
    it by adding an anti-static finish. This is
    a bit difficult to test, but in theory at
    least should reduce the amount of dust that
    sticks to the device. Having said this, it
    won’t do anything about grease from your fingers
    or physical abrasions; so don’t think of this
    anti-static coating as in some way an alternative
    to protecting your iPod or computer with a
    proper carrying case.

    The iKlear iPod Cleaning Kit comes with a
    detailed instruction leaflet that lays out
    the best cleaning methods for various types
    of Apple hardware (iPods, iMacs, PowerBooks,
    and so on). It also explains how to clean
    the cloths when required, a nice touch, and
    obviously something that can help save the
    user money over the long term. The iKlear
    web site is also very nice; in contrast to
    the TiPaint one it has lots of information
    on how to use their products for best results.


    PowerBook Scratches
    A close-up view of the scratches on
    a PowerBook screen caused by the keyboard
    abrading the screen when the computer
    is closed. The iKlear cleaning kit was
    unable to repair this damage.

    However, the iKlear iPod Cleaning Kit does
    not work miracles. It does not remove scratches
    from the soft plastic shell of iPods and iBooks,
    and neither does it remove any damage caused
    by the keyboard on the LCD screens of PowerBooks.
    It wasn’t able to clean the grease that had
    bonded with the scratches in the screen of
    my PowerBook either. Overall, a good purchase
    for the cautious Macintosh or iPod owner wanting
    to take no chances when it comes to cleaning
    their equipment, but if you want a PowerBook,
    iPod, or iBook without scratches, prevention
    rather than cure remains the only solution.

    - Dr.
    Neale Monks


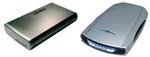
    Drivin’ around with SmartDisk and Wiebe

    On October 29, 2004, in Uncategorized, by David Weeks

    MyMac Labs reviews two very different hard drives

    SmartDisk FireFly 20 GB
    SmartDisk Corp.
    http://www.smartdisk.com
    US $ 179.99

    Wiebe ToughTech 800
    Wiebe Tech
    http://www.Wiebetech.com
    US $ 119.00 (case only)
    US $ 309.95 (250 GB)

    Kia or Escalade?

    Mini Cooper or Dodge Ram dual-wheel V12 pickup truck?

    If you are in the market for a hard drive, you need to make some decisions. You’ll need to decide how much capacity do you want or need? Portable? Internal? External but not portable? What kind of performance trade-offs must you make?

    SmartDisk and Wiebe Tech have taken two radically different approaches to hard drive enclosures.

    SmartDisk has recently introduced one of the most compact external hard drives available. The 20GB FireFly is smaller than an iPod, or a deck of playing cards. I’ve got small hands, and the FireFly fits in the palm of my hand with room to spare. You’d be well advised to put a label with your name and address on the FireFly, as it’s small enough that you could overlook it while packing.

    Even thought the drive weighs only 3.3 ounces, the FireFly’s no powderpuff; the case is magnesium, and appears to be plenty strong to withstand the rough and tumble of life in a computer bag. Two rubberized grips that run along each side make it easy to handle without slipping.

    The FireFly uses a small USB 2 connector, located on the rear side of the case to keep size down. Choosing USB 2 has some performance penalties, but this tiny connector keeps the case thickness as low as possible. Even though USB 2 allows theoretical transfer speeds up to 480 Mbps, most implementations don’t get anywhere near those speeds. Of course, the same is true for FireWire, but most Macs have better FireWire transfer rates than USB 2 transfer rates. If SmartDisk had chosen FireWire 400 or 800 instead of USB 2, the power requirements would have gone up, and the larger connector size would have increased the minimum case thickness. The little FireFly needs no external power supply, as it’s bus powered. This clean and simple approach trades some speed for convenience, which is important when competing against the ever-cheaper and smaller USB flash drives. The main caveat for a bus-powered hard drive is that you should attach it to either a powered USB hub, or to a USB port on the computer itself. USB ports on a monitor or keyboard may not provide enough power.

    How does the 20 GB FireFly perform?

    The Weeks division of MyMac labs tested the loaner FireFly on a dual 2.0 GHz PowerMac, with 2 gigs of RAM. The drive was connected to one of the high-speed USB ports on the Power Mac case. We used Xbench 1.1.3 for testing.


    Results 27.27
    System Info
    Xbench Version 1.1.3
    System Version 10.3.5 (7M34)
    Physical RAM 2048 MB
    Model PowerMac7,2
    Processor PowerPC 970×2 @ 2.00 GHz
    L1 Cache 64K (instruction), 32K (data)
    L2 Cache 512K @ 2.00 GHz
    Bus Frequency 1 GHz
    Video Card ATY,RV350
    Drive Type TOSHIBA MK2004GAL


    Disk Test 27.27

    Sequential 20.23
    Uncached Write 38.39 16.00 MB/sec [4K blocks]
    Uncached Write 37.17 15.22 MB/sec [256K blocks]
    Uncached Read 8.24 1.30 MB/sec [4K blocks]
    Uncached Read 42.67 17.24 MB/sec [256K blocks]
    Random 41.83
    Uncached Write 42.23 0.63 MB/sec [4K blocks]
    Uncached Write 37.03 8.35 MB/sec [256K blocks]
    Uncached Read 44.54 0.29 MB/sec [4K blocks]
    Uncached Read 44.47 9.15 MB/sec [256K blocks]

    Clearly, the small FireFly shows the inherent limitations in small drives and USB 2 connections. The FireFly uses a 1.8” mechanism made by Toshiba. While it’s very quiet and compact, a (physically) small drive doesn’t have the ability to pump data at the same rate as do larger drives.

    SmartDisk’s product literature positions the FireFly as the smart alternative to USB flash drives. These little gadgets are becoming more and more common, being used transferring small numbers of files (less than CD capacity) between computers. I just bought one for myself last week, at a CompUSA weekend special.

    I paid $24.95 (after rebates) for a 256 MB Lexar JumpDrive Secure flash drive that retails for $55.99. How does the Lexar JumpDrive compare with the FireFly’s performance?

    Disk Test 10.86
    Sequential 9.95
    Uncached Write 8.85 3.69 MB/sec [4K blocks]
    Uncached Write 8.81 3.61 MB/sec [256K blocks]
    Uncached Read 8.24 1.30 MB/sec [4K blocks]
    Uncached Read 18.40 7.43 MB/sec [256K blocks]
    Random 11.96
    Uncached Write 5.01 0.08 MB/sec [4K blocks]
    Uncached Write 9.96 2.25 MB/sec [256K blocks]
    Uncached Read 159.71 1.05 MB/sec [4K blocks]
    Uncached Read 35.18 7.24 MB/sec [256K blocks]

    This is obviously quite a bit slower than the hard-drive based FireFly. I wouldn’t want to use the Lexar for moving gigabytes of files around. For the odd couple o’ dozen megabytes, the little Lexar is quite handy. You just plug it into an open USB port; no cable needed.

    SmartDisk is right about the lower bang for the buck for flash drives compared to the FireFly. I paid $25 (after rebates!) for a 256 meg (1/4 gig) flash drive. That comes to $100 dollar per gigabyte!

    The FireFly retails for $180, and the lowest prices I was able to find was $169. That prices out at $8.45 per gigabyte.

    Clearly, if you need access to more than a few hundred megs of files while on the road, the hard drive based FireFly is a better deal, both for economics and performance, if not convenience. Its performance could be better, but FireWire would raise the size and cost of the unit. From the standpoint of portability, the FireFly is about as small as you can get.

    At the opposite end of the spectrum is the Wiebe Tech ToughTech 800. This is the Dodge Ram of hard drive enclosures. Wiebe has pulled out the stops to make this external drive case the most rugged you can find. The main selling point of this drive is the tough case, and the FlexMount rubber doughnut shock mounting of the hard drive itself. Has Jim Wiebe talked to the Army about supplying this case to soldiers in the field…?

    I own a Wiebe DuoGB external case (full disclosure here), and it’s fairly well constructed. But the ToughTech puts the DuoGB enclosure to shame; the ToughTech case is far more rigid, and the drive itself is better mounted. I really wanted to drive my car back and forth over the ToughTech while transferring data, but didn’t want to have to try to explain the Michelin tread marks on the case when I returned the review unit. I’ll bet it would have worked flawlessly even with my BMW sitting on top of it…

    As with most other Wiebe enclosures, you can purchase the ToughTech as an empty case, and supply your own 3.5” ATA drive. The review unit supplied to MyMac Labs came with a Hitachi 250 GB mechanism, retailing for $309.95. With bare hard drive price running around $1 per gig, you may be able to save a few dollars by buying the bare case from Wiebe and finding a drive separately.

    I opened the case to check out the so-called FlexMount shock mounting, and came away impressed. The build quality is great, and the four big blue rubber doughnuts are very visible. Push, press and bump on the ends of the drive, and watch the doughnuts absorb any shock. Again, I reluctantly did not abuse the drive, but the mounting arrangements and case appear able to take a lot of hard use. To be sure, the usual caveats about not jostling the drive when in actual operation still apply. Don’t plan to use the ToughTech while perched on the turret of a moving Abrams M-60 battle tank. Anti-tank rounds may penetrate the ToughTech case. Simply wait until the tank come to a stop!

    The review unit had dual FireWire 800 connectors. While FireWire 800 is not twice as fast as FireWire 400, it’s noticeably faster. Here are the X Bench results:

    Disk Test 101.56
    Sequential 89.63
    Uncached Write 102.77 42.84 MB/sec [4K blocks]
    Uncached Write 101.00 41.36 MB/sec [256K blocks]
    Uncached Read 55.38 8.77 MB/sec [4K blocks]
    Uncached Read 144.16 58.25 MB/sec [256K blocks]
    Random 117.14
    Uncached Write 125.73 1.89 MB/sec [4K blocks]
    Uncached Write 120.06 27.08 MB/sec [256K blocks]
    Uncached Read 101.77 0.67 MB/sec [4K blocks]
    Uncached Read 124.41 25.60 MB/sec [256K blocks]

    That’s solid performance! Wiebe incorporated the latest Oxford OXUF 922 FireWire 800 bridge chip. For comparison, MyMac Labs’ test of the LaCie FireWire 800 Big Disk showed X Bench Disk Test results of 88.6, tested on a dual 1.4 Power Mac.

    You’re not going to cart this drive around to swap files between home and work. The ToughTech is heavy, no doubt about it. Wiebe’s spec sheet doesn’t list the weight, but it’s heavier than you’d expect from simply looking at it. The old Burger King slogan “It takes two hands to handle a Whopper…” came to mind the first time I picked up this unit!

    Do you need this much protection in a drive? Only you can decide. Rest assured this unit won’t blow over if the wind comes up! Don’t bounce ANY drive around while in use! But, if you do, the ToughTech will protect you better than any other drive enclosure I’ve seen. The ToughTech is a quality unit; it’s at least the equal of the LaCie Big Disk. The performance is superior, as well.

    The SmartDisk FireFly and the Wiebe ToughTech serve different market niches. Not everyone needs a tiny transportable hard drive that costs more than a USB flash drive but performs much better. Not everyone needs an industrial-strength shock mounted drive case. But for their market segments, the SmartDisk FireFly and the Wiebe ToughTech are highly recommended.

    ToughTech MyMac rating 5 out of 5
    SmartDisk MyMac rating 5 out of 5


    Mac OS X Help Line, Panther Edition – Book Review

    On October 28, 2004, in Uncategorized, by David Weeks

    Mac OS X Help Line, Panther Edition
    Ted Landau
    Peachpit Press
    www.peachpit.com
    ISBN 0321193873
    US $39.99

    MacFixit web site founder and author Ted Landau’s newest book, Mac OS X Help Line, Panther Edition, has joined the ranks of David Weeks’ favorite OS X books. Until now, I’ve recommended David Pogue’s OS X The Missing Manual for beginners and intermediate Mac users. The nod for best advanced/expert level book has gone to Mac OS X Unleashed, penned by John and William Ray.

    I’ve got to add Mac OS X Help Line (Help Line for short) to the canon of best OS X books. The Ray brothers’ Unleashed is geared more toward the Unix-oriented sysadmin/expert user. In contrast, Landau’s Help Line is written for the sophisticated OS X end user; someone who doesn’t need the plumb the Uniy depths of OS X, yet needs detailed information on complex topics.

    Landau has found the right balance: he provides 1144 pages of OS X depth and detail that “normal” people can use. Help Line does sit firmly in the “boat anchor” category (try holding it out at arm’s length for a minute or so), but if there’s an OS X question that you or I could pose, it’ll most probably have the answer.

    I could easily list the sections I found most interesting, but this review would swell to three or four pages. Suffice to say that you can find
    detailed information on fonts (one of OS X’s least intuitive areas), printing, permissions, and the OS X startup sequence. Each section has plenty of “Technically Speaking” or “Take Note” sidebars to add even more detail to particular topics.

    Like almost all OS X books, Help Line covers the basics on the iApps that ship with OS X. Don’t buy Help Line for the cursory coverage it provides on Safari, for example. Buy it for the detailed background information and troubleshooting tips for networking, instead.

    Help Line’s production values are very good: the screen shots are clear and legible. Sidebars are set off with background colors that don’t get in the way of legibility. The binding has to hold 1144 pages together; I hope it lasts more than a year or two!

    Now, Ted may object to my characterization of Help Line not being a newbie book, saying that he’s written a book accessible to all. I beg to differ. The Mac newbie will probably be scared off by the pages of detail on complex subjects, as she pages through Help Line trying to find out how to just rename a file. Pogue’s Missing Manual will better serve the beginner.

    Even so, I can’t speak highly enough of this book. If you want the best work for advanced/expert Mac users who seek to learn more about the guts of OS X, but not from a systems administrator’s standpoint, buy Landau’s Mac OS X Help Line Panther Edition.

    MyMac rating 5 out of 5


    Old Macs Never Die

    On October 28, 2004, in Uncategorized, by Roger Born


    Its true. You can find a lot of them out here in Southern California.


    Out here, where we are in the Mojave Desert, there are numerous small
    towns and villages among the mesas and foothills of the Sierra Nevada
    mountains. All of them congratulate themselves for their fortunate
    position, in the middle of the most beautiful land there is, and for
    being part of an economy that is far less expensive than down South in
    LALA land, or indeed, all the rest of California.


    Older folks, and folks that can’t afford to live elsewhere, make the
    most of the inexpensive living conditions out here. Some even buy homes,
    which are priced way below the rest of the market in Southern California.


    Many of these people have been here for a long time. A lot of these
    folks bought Apple computers a long time ago. Most of them are still
    using them. Of course, some of them bought Windows PCs, but you know
    those old things are not around any more.


    Besides these long time denizens, there are about a hundred thousand
    PhDs and egghead physicists and scientists from the Naval Weapons base
    hereabouts, all live with cutting edge computing out here in the Mojave.
    Most of these people use old Macs too, but they use them on their jobs.

    WiFi is big out here, and most everyone connects to the Internet via
    cheap cable modem, rather than DSL or dialup. Satellite modems are
    coming out soon, as well as cutting edge television and on-demand movies
    and entertainment over optical cable. This place is wired!

    As I said, this great contingent of people, those retired people, the
    poorer ones, and the egghead/scientist, use older Macs. I’m talking
    about the Mac SE and LC II kind of older Macs.

    But there are also all the other kinds of Macintosh Computers out here.
    You could start a museum, if you wanted to, but a lot of these are still
    up and running, and doing daily work on base.

    There is the original Mac 128K, the Mac 512K, the Mac XL, the Mac II,
    the Mac Plus, the Mac LC series, the Mac SE, the Mac SE/30, the Mac IIx,
    the Mac IIcx, the Mac IIci, the Mac IIsi, the Mac IIfx, the Mac
    Performa, the Mac TV, the Mac Quadra, the Mac Centris, the Mac Classic,
    the Mac Color Classic, the first Mac Portable, the original PowerBook,
    PowerBook Duos, G3 and G4 PowerBooks, the original Power Mac (in Bondi
    Blue), Power Mac G3s (in rainbow colors), Power Mac G4 Cube
    , as well
    as all the newer eMacs, iBooks, iMacs, the new G5 Macs and the Apple Xserve.

    Most of these old Macs come from the Naval base, where at one time, the
    Navy was purchasing around 33,000 Macs a year from Apple, to run all its
    scientific and phase testing labs, here on the largest military base in
    the world.


    Where did all these old Macs go? Well, in spite of the new Naval
    Directive to move everything into Win-duh-ohs PCs, the scientists out
    here are a loyal and rebellious lot. They kept their old Macs, and most
    of them are still in use, doing 24/7/365 production work. The few Macs
    the Navy was able to get rid of, ended up out here on the streets of
    Ridgecrest, mostly in swap shops and thrift stores.

    You can still pick up an old Mac, with monitor, keyboard and mouse, for less than $20, which is where a lot of people who can’t afford a new computer gets theirs. Of course, their old Macs are reliable and still useful. I believe my wife ended up buying most of these nearly free Macs for her famous (infamous) Mac LC computer lab at the private high school where she teaches.

    Actually, she has less than 20 of them, but my wallet tells me she must
    have bought most of them, as well as all the spare SCSI connectors and
    AppleTalk modules and connectors that were left in Southern California.


    She also owns a nice collection of Apple inkjet and laser printers, of every description – all of which work flawlessly in her lab. These are all connected with the old reliable AppleTalk network. Her collection is quite beautiful. All these old Macs, that daily sing in time with the tentative keystrokes of the young hands that touch them, with their very own imaginations and dreams.

    The few lucky kids that are in her class are learning what their parents discovered, so long ago, about desk top publishing, and all the creative Zen that comes standard with every Macintosh. In all of this, I take issue with Jef Raskin’s recent rant about the Macintosh.

    Jef was one of the original creators of the Mac, and he invented "click-and-drag." A fine and gentle fellow, and very bright. However, he said something today that doesn’t fit at all. It was his statement that there is "only a little difference between OS X and Windows XP today." The article containing the comment, found in the link (above) is from the Guardian, reported by Jason Walsh, on Thursday October 21, 2004.

    In it, Jef says that “The principles of putting people first, and
    designing from the interface to the software and hardware, are as vital
    today as they were then.” But then he says, “My original vision is
    outdated and irrelevant.”

    Jef continues by saying, The Mac is now a mess. A third party manual
    (Pogue’s The Missing Manual) is nearly 1,000 pages, and far from
    complete. Apple now does development by accretion, and there is only
    a little difference between using a Mac and a Windows machine
    .”

    Jef elaborates on this last statement. “There has been immense progress
    (over the last 20 years in computing), primarily in the richness of
    applications. But all this power is lost on many people, and impedes the
    utility of it for the rest, because of the unnecessary complexity of
    using computers.”

    Jef concludes by saying, “The quest for CPU power has been largely
    defeated by bloated software in applications and operating systems. Some
    programs I wrote in Basic on an Apple II ran faster than when written in
    a modern language on a G4 Dual-processor Mac with hardware 1,000 times
    faster.”

    First of all, Jef is wrong about OS X and Windows XP being nearly alike. Believe me, I know people who use Windows, and there is a world of difference and pain between XP and the Macintosh experience with OS X! Don’t even go there, Jef! But I’m completely with Jef about the fact that you don’t need a G4 or better to do simple word processing or desktop publishing. Hardly anyone can type faster than an old Mac can display the type on its screen. And that was back when Macs only ran 25Hz CPUs!

    However, I do love the power of the new Macs. Yeah, you can take my new
    Mac, (running live video and animations, music, and real time photo
    manipulation) from me, when you pry it from my cold, dead hands.


    But Jef is right about one thing.

    There is a lot to be said for a simpler Mac, and the old user interface that it once had. After all, people dreamed their dreams and felt empowered to pursue them, even on the original old Mac Plus, right? In fact, I have a wonderful old Mac Color Classic, with its tiny 9-inch built in monitor, and it serves as my web server, and sometimes game player (Shanghai and Klondike). Its screen saver is Satori, and it has a complete set of fonts for desktop publishing. I could run a business off this little thing, and its like every other Mac because its built like a tank, and will probably last a hundred years.

    If you have an old Mac. Don’t get rid of it. It’s too nice a machine for the landfill. If you don’t wish to use it anymore, donate it to a kid, or to a school. Or give it to one of the organizations that send computers to kids in backwater countries.

    Chances are, that old Mac of yours will outlive us all.


    The Day the G5 Died – Keys Out Of Order

    On October 15, 2004, in Uncategorized, by Tim Robertson

    The Day the G5 Died – Keys Out Of Order

    There are some mornings when just the simple act of getting out of bed foretells a bad day. It was Thursday morning, and surprisingly, my fifteen-month old daughter actually slept the entire night, so I actually got something close to eight hours of sleep. When I was younger, say in my teens or twenties, I could go days without sleep. Not anymore, I need as much as I can get. My youngest daughter, however, feels differently.

    Waking up that morning, I cracked my knee on a drawer I had left open the night before on the dresser. It didn’t hurt too badly, but it is a hell of a thing to do in the first five seconds of wakefulness. Wake up, turn off annoying alarm, swing legs off nice, warm, comfy bed, stand up, and CRACK. Sigh. It’s going to be one of those days.

    Actually, it only got worse.

    As I am wont to do, I put my G5 to sleep every night rather than leaving it on or turning it completely off. I don’t leave it on because the thermostat for the furnace is actually right next to my G5 and monitor, and running all night, blowing warm air right at the thermostat, is a sure way to wake up to a chilly house. It’s hard enough to drag my butt out of bed, let alone trying to do so in a cold house.

    So I headed downstairs, clicked on a few lights, and fired up the G5 by giving the spacebar a swift click. I hear the Mac start to churn up, the hard drive motors on, the monitor light brightens, and then… nothing. Again.

    As Owen Rubin wrote about in a blog here, there seems to be a problem with Mac OS X 10.3 in which a Mac, regardless of its type, refuses to wake from sleep. It seems to get about halfway there, and then nothing. The result is a hard reset. A hard reset on the G5 means holding down the power button and wait for the machine to turn itself off. Then restart.

    So I did that on that Thursday morning. Only this time, there was no start up. The Mac got as far as the grey screen with the Apple logo on it, and there it sat. Doing nothing. Oh-oh!

    So I restart, hold down Command-S to boot into Unix, and run FSCK. With 10.3 and a journaled drive, you have to use the FSCK –F to force the disk repair utility to run. And I did. The result?

    FSCK Cannot Fix This Problem:
    Keys Out Of Order


    Gaaahhh! My hard drive is toast! And NOT the cool Roxio Toast kinda way, either! Toast as in “Hope ya got a backup, this hard drive is dead. D-E-A-D!”

    Well, I know that the drive is physically fine. There is nothing wrong with the disk itself. The problem is the software ON the drive has gone bad. Still, I figured, I can rescue it.

    Step one: Boot from the CD.
    I have a number of CD’s I can boot the G5 from, including the Restore disk that came with the G5, 10.1 Install CD, 10.2, or 10.3. I grab the Mac OS X 10.3 Disc 1 from its case, pop it into my Super-Drive, and reboot.

    I get to, surprise, the gray screen again, and no further. What the hey?? Yes, I held down the C key when I rebooted, telling the G5 to boot from the CD-ROM. It started to, but as soon as the OS X on the CD-ROM tried to read the internal hard drive, blam! No go.

    Next up, make sure that the Mac not starting is actually related to the bad drive. So I shut down, unplug the drive, and reboot from the CD-ROM. No problem, the Mac starts right up. In fact, I have two internal ATA drives in the G5, and the 10.3 Install CD-ROM saw the other drive. This other drive does nothing more than hold video files and other large format graphic files I am in the process of working on. It’s a 250 GB Serial ATA drive, nice and fast. Thankfully, it also has around 200GB of free space. So I go ahead and install 10.3 on that drive.

    Step two: Reboot from second drive into 10.3
    This time, the Mac starts right up. Opps! I forgot to plug the original drive back in! Since I had already restarted, I let the new drive update everything before shutting down.

    Once the new OS is up to date on the secondary drive, I shut the machine down, plug in the original drive, and reboot… Nothing.

    Okay, maybe the G5 is trying to boot from the older, bad drive. This time I reboot and hold down the Option key, which brings up a handy feature of OS X in which you can select which OS you want to boot to. This was especially helpful during the early days of OS X when users needed to restart their machines into OS 9 without first having to go to the Start Up Disk control panel. It still works, and will let you designate which OS X on which drive you want to boot from. So I tell the Mac to boot from the newer drive, restart, and… Nothing.

    Seems that if the bad drive is plugged in at all, the machine will not start. Nada. Nothing. It simply WILL NOT BOOT.

    Okay

    Step Three: Firewire Target Disk Mode!
    Next, connect the G5 to my G4 via the handy-dandy Firewire Target Disk Mode. This is pretty simply. Shut down the G5, connect a Firewire cable between the two machines, and restart the G5 by holding down the “t” on my keyboard.

    The result? The G4 froze as soon as the bad hard drive tried to mount.

    To make sure that this should work, I unplug the bad drive, but leave the good drive plugged in, and try again. Viola! The good G5 drive mounts on the G4’s desktop (Which is also running 10.3.5) as it should. So I know that the G5 wants to do it, just not with the bad HD plugged in.

    At this point, I am a little frustrated. I make some stupid decisions, such as hot-plugging the bad hard drive in once the G5 is already up and running. This does nothing, the G5 does not see the drive. I try the latest copy of Norton Disk Doctor, it does not see the drive. I try Disk Warrior, it does not see it, either. I even tried Data Rescue from Prosoft, which really does not fix a drive, but helps you copy data off bad drives. In this case, it was useless. I am sure all three products do their job well, but with this problem, none could touch it.

    Step Four: Try OS 9!
    So I have yet another G4, not actually my machine but it has been here over a year now, that is running Mac OS 9.1. I decided that perhaps it may be something with OS X and the way it reads a hard drive software drivers that sit at the beginning of the hard drive spin-up cycle. So perhaps OS 9 would do a better job?

    Connecting via Firewire Target Mode again, I booted up the G5, and the G4 with OS 9… crashed. Yup, not even mighty OS 9 could mount this puppy.

    This was worrisome. The drive is FINE, just the software drivers are bad, or whatever “keys out of order” are. At this point, all I really want to do is copy my music files off the drive, or failing that, simply erasing the entire thing, reformat, and use it as a secondary drive. But no, you cannot even erase a drive if you cannot mount it, or start from a CD if the problem prevents ANY OS from starting up.

    I had emailed the MyMac.com staff, explaining the problem and seeking help. Most suggested things I had tried on Thursday night or Friday, but it was still helpful to get a bunch of suggestions. Bruce, Chris, Adam, Roger, Russ, Jim Nemo, and Jeffery McPheeters all had good advice.

    The thing is, I have been repairing Mac’s for ten years. I was an IT Manager in an all-Mac studio for almost five years. This is what I do. But I was stuck…

    Owen Rubin emailed me a helpful idea:

    Was your disk “protected” or encrypted?

    Sounds like the driver in the boot blocks of that drive is dead, which is a bad thing. Sometimes you can reload the driver without hurting the disk to at least get it to load. USE to be able to do this with HARD DISK TOOL KIT because they ignored the driver on the disk. I do not know of a similar tool for OS-X.

    Have you tried using the disk tools to update the driver on the drive and see if that works?

    While most people will tell you NOT to connect a drive hot, I have done this before. Connect the cable but NOT the power. After the machine is up, CAREFULLY connect the drive power. I am not sure if OS-X will immediately try and load the drive or not, because if it does, and the driver is corrupted, then when it loads it will crash!

    Do you have a machine that can boot OS-9? If so, boot that machine, connect the drive and run Hard Disk Tool Kit to mount the drive. At least you will be able to get your files off it.

    These ideas might work unless the drive is physically damaged, in which case, you may be out of luck. Of course, drive savers can recover the data, but they are SO DAMN EXPENSIVE. Maybe you can offer to do a review of them saving your drive and post an ad in exchange? Just another thought.

    -Owen-

    Well, I had actually done all that. I was still not convinced that the drive was physically damaged, though I am sure my hot-plugging was not helping matters. And OS 9 would crash just as quickly as OS X would as soon as that drive tried to mount.

    Owen emailed this follow-up as well:

    To explain my last message a bit more, we use to see this problem when I first write bootable CD for the Mac. When a drive spins up, the system loads the devices driver from the device, and then executes it. Unfortunately, if the driver blocks contain crap, guess what, you die.

    When I did bootable CD originally, I treated a CD in the drive like a floppy and tried to boot it if it had boot blocks. That means any bootable CD (which at that time only I had created) was not a problem. It turned out if you crashed with a music CD in your CD drive and restarted, some music CDs LOOK like they have boot blocks, the Mac would load the CD drivers, and crash immediately. This is why we added the “C” key to boot a CD now.

    OK, this means during boot time that any and ALL devices that have boot blocks and want to mount will load their drivers early on and the system will execute them to mount the device. Not good if the device has a corrupted driver. This can be bad data in the boot blocks, a bad driver, a damaged drive, or any of a number of problems that causes the driver to get loaded. This is TYPICALLY why a machine crashes early on in the boot sequence and runs fine if you remove that device.

    The goal is to mount the drive without using its drivers. See my last message for ways to do that.

    -Owen-

    This got me thinking. If the machine is already on, and the OS tries to mount the disk, but the disk driver is damaged, well, bad things happen. Also when he writes, “When the drive spins up, the system loads the drivers from the device, and then executes it.” Really got me thinking. So obviously I cannot have the OS load the driver. But how do you make the Mac NOT load the driver? And more, even if you could, would the Mac even “see” the drive and mount it?

    In OS 7, 8, and 9, a common work around to get your Mac to boot when it was having problems was to hold down the Shift key to turn off extensions. Most problems in OS 9 and earlier were caused by extensions, so it was a very handy tool to use when troubleshooting problems on your Mac. But there is no equivalent in OS X that I am aware of. So what to do?

    Step Five: OS 9 with no extensions.
    I remembered from my IT days that if I booted Mac OS 9 without extensions on, any attached FireWire drive would also appear on the desktop. So I shut down the G4 running OS 9.1, fired up the G5 in Target mode, waited for it to get up and running, and restarted the G4 9.1 machine with extensions off.

    Victory! There was the bad drive, as well as the good one, in the G5 mounted on the G4’s desktop!

    Step Six: Copy! Copy! Copy!
    Before I did anything else, I quickly copied all the files I was missing since my last backup. Unfortunately, that also meant copying around 40GB of music files. So late Saturday night, I started the copying, and by Sunday morning, all my files were now safely on the good G5 250GB hard drive.

    Step Seven: Repair Time!
    The first thing I did was run the OS 9 version of Disk Tools on the bad drive. As expected, it could not fix the problem. But I had, prior to connecting the G5 the first time around, installed the OS 9 version of Alsoft’s Disk Warrior on the G4.

    I ran Disk Warrior on the bad drive. It took a LONG time. What Disk Warrior does is builds a new directory on a drive, which I was hoping would cure my problems. After three hours, Disk Warrior was done. It found a BUNCH of problems. To be on the safe side, I ran it again. This time it took only a little more than an hour, and did not find any more trouble.

    Shutting everything down, I rebooted the G5. I held down the Option key so that I could tell the G5 which drive to start from. It only saw the new drive as a viable boot disk. Oh-oh…

    I held down Command-S to bring up UNIX after the next boot, and ran FSCK-F on the bad drive. It worked, fixing a few thousand items. Yikes! What did Disk Warrior do? I ran it again, and it repaired some more. Three times, and it was done.

    Restart.
    Welcome to Macintosh!

    And all was well in the world.

    A few things to take away from this:

    Not all problems are as bad as they seem. There are usually always solutions to your computer problem. Some involved thinking way outside the box. How many people would have figured that Mac OS 9.1 with extensions off would be the solution to this Keys out of Order problem? Certainly not I.

    In most cases, Disk Warrior would have fixed this problem without all the run around I had to do. If you don’t already own it, you may want to go pick up a copy. It’s well worth the small investment.

    FSCK is not always going to repair or fix your problems. So be sure to back-up your data often.

    Having two hard drives is WAY better than having only one. If you have an iMac or Portable in which you cannot cram in another drive, look at external Firewire hard drives.

    It is also helpful to have another Mac laying around for the Target Mode trick. Can’t afford one? I see them on eBay all the time, REALLY cheap!

    Hope this article helps someone else out there if you ever run into a similar problem.


    NetBarrier X3 v.10.3.4
    Company: Intego
    Price: $59.95 US
    http://www.intego.com/home.asp

    In June of this year, cable access finally reached my area. Not that it hadn’t been available before, just that all the constant problems, outages and the upgrade to fiber had finally been taken care of. With the process completed, and after checking around with others in the area, the determination was finally made to switch from a 56k modem to cable broadband.

    But during the time period leading up to the switch, I’d been doing my homework. I really wasn’t worried about someone hacking into my system with the 56k modem, I didn’t think that anyone would want to spend an inordinate amount of time trying to hack through on such a slow system of access. Switching to broadband, now that’s another story. I’d read up on system security, firewalls and routers and wanted to be prepared, plus I talked with some IT people I knew about the perils/pitfalls of cable access.

    The first thing off the bat was that I needed a firewall to place between my computer and anyone who was trying to gain access to it. Yes, I know OS X comes with one, but honestly you need a better user interface to work with it. (Yes, you can get BrickHouse , SunShield or FireWalk to provide you a more thorough interface with OS X’s firewall) I decided to see what was available commercially. Intego offers NetBarrier X3 so I decided to check it out for myself.

    First off, installation was easy, no problems encountered. The Setup Assistant walks you through the process. I would highly recommend that any user read the manual beforehand so you know what the particular items are that you are setting up. (and of course, always repair permissions after installing any software) X3 provides the user with Personal Firewall that scans all incoming and outgoing traffic, permitting or stopping data from exiting or entering your system through access ports. If you are a home user, you can set it up for client only, or network or server usage. You can even totally deny any access to the Internet or to a local network if you so wish, or set your own custom rules. You can also set it to protect against Trojans although I’ve not seen much mention of Mac users suffering through Trojan problems lately.

    X3 also provides a log that maintains a record of all activity where NetBarrier X3 has acted. It lists each time that there has been an incident, the address of the intruder, and the kind of incident recorded. I was amazed at the amount of activity when I set everything up and connected directly to the cable modem. Time after time, there were attempts to access the computer even while I sat there and did nothing to invite this activity. I’m not talking every now and then, but minute after minute after minute of attempts to enter.

    The second line of defense from X3 is Antivandal which monitors for any signs of intrusion. Only when it detects such activity will you know that it’s even there as it will display an alert. It can be set up to prevent 9 attempts to access your computer, even denying Apple Remote Desktop control. The Stop List capability of X3 can be set that once an intrusion or attack has been attempted, the originating computer cannot send any data to your computer and your computer can’t connect to it.

    The third line of defense is the Privacy Filter capability of X3. The Data Filter checks to make sure that any sensitive information you want to protect can’t leave your computer and go onto a network. Passwords, credit card numbers, or key words that appear in your documents can be prevented from leaving your computer. You can also filter out ad banner graphics; view, edit and delete each cookie on your computer or delete all the cookie files; even clean out browser cache and history files.

    The fourth line is the Monitoring capability of X3 providing the user with an overview of activity on your network, with up to 12 gauges providing info on input/output of the web, news, mail, ftp, IP and other activity. In the All tab as shown below, a simple click on the down arrow permits the user to select the particular data type that he/she wishes to monitor.

    Overall, NetBarrier X3 was easy to set up and easy to use once you get familiar with the interface and what you’re looking to avoid happening to your computer.

    For those of you wondering, yes, I added a router to the mix. Speaking with some folks who are deep into security on the web, having the hardware plus software firewall capability gives you a far better chance of surviving an assault on your computer then just having one in place.

    Good Points- Ease of set up and use, manual covers the gamut of items that NetBarrier X3 protects you from and gives you the information you need to make choices. Capability to monitor everything that is going on with NetBarrier and your computer. X3 does exactly what it is supposed to do, prevent unauthorized penetration of your computer system.

    Cons- Bit on the pricey side for those use to shareware or free products. Upgrade from version 2.x is $49, upgrade from version X3 10.x to v10.3.4 is $39. Do Mac users need Trojan protection or cookie management?

    System Requirements:
    Mac OS X- 10.1.1 or later, Jaguar, Panther; 25 MB free disk space, Screen resolution 800 x 600 or higher.
    For Mac OS 8.1 to 9.x- use NetBarrier 2.2 that requires PowerPC, Open Transport, 16 MB memory, 5 MB free disk space, Internet Config and Screen resolution 800 x 600 or higher

    Recommendation: Download the 30-day demo of NetBarrier X3 and give it a try.

    My Mac Rating: 4 out of 5

    Tagged with:  

    Tunemedia’s Tuneup Loops for GarageBand Pack One
    Company: TuneMedia
    Price: $34.99
    www.tuneuploops.com

    I love GarageBand. It’s is one of the best and most fun products to spring from the minds at Apple in a long time. Just one little problem with it: (Well, actually there are more than one but this isn’t a review of GB) not enough loops. Apple gives us over 1000 loops to play with! Yes that is true. Those loops are spread across many different instruments and keys. Also, once you have made a few songs, it becomes harder and harder to come up with something original and fresh without reusing many of the same loops.

    Fortunately, many different companies have begun selling music loops in Apple’s format. The nice thing about these packages is that they work with all of Apple’s audio editing software like GB, SoundTrack, and Logic.

    The one I’m reviewing today is Tunemedia’s Tuneup Loops for GarageBand Pack Volume One. This is a collection of around 500 loops and there are some real doozys in here.

    Installation couldn’t be easier. Startup GarageBand and wait for it to finish loading, insert the disk, double-click it from the desktop, and drag the icon labeled “loops” to GarageBand’s edit section and GarageBand does the rest. The loops will be indexed and ready to use after a short wait.

    Want to find your new loops quickly? Tunemedia made it easy as a Jimmy Page solo (Well, it’s easy if you’re Jimmy Page). Every loop begins with “TU1”. Select a category, slide down to the “T’s” and there they are. I appreciate this since it makes my new eager to be used loops so effortless to get to.

    Starting off with 120 Bass loops from Dark Bass to Sub Bass. Mostly geared toward rhythm and dance, but they are well put together and can be used in just about any kind of project.

    Want drum loops? Tuneup Loops Volume 1 includes 127 of them. From mood changing Ambient and Electro Beats to the pumping R & B and Rock Beats, there is one to fill your mood. My only complaint about the drumbeats would be that too many of them sound artificial, which is fine for most dance tracks, but they don’t fit Rock or somber mood projects. I like a lot of natural sounding drums and percussions and if you do too, you might be disappointed by the drums and percussion loops in this package.

    Next up, there are 5 effects loops. Not many really, but they sound good and make for good breaks. If you’re a Rap maker / lover, you’ll need to get your samples elsewhere. For the few times I use loops like these, these are well done and different enough from Apple’s selections.

    My favorite part of this collection is next. Guitars! GUITARS! Well, before I get too excited, there are only 32 of them, BUT THEY KICK! Tunemedia, in your next collection like this, GIVE US MORE GUITARS! Just a suggestion. These loops will scale nicely into any rock or rhythm composition you make. If you need more acoustic or electric guitars than these, consider using some of the Bass or Piano loops from this collection. Many of them convert them quite nicely.

    Melodies. There are 9 of them and they’re kind of difficult to describe. Some sound like Asian bells and others put me in mind of the Exorcist theme, they sound cool and I would use these as a background sound to break up repeated rhythms.

    Only 5 organ loops in this package and two of those are from Clavinets. Not enough to really do much with unless you’re REALLY into making 70’s era police show theme songs.

    There are 19 of what Tunemedia calls Pads sound loops. These are really neat. What these would be great for would be video projects for setting moods. Really good stuff.

    20 Piano loops. All good and all different. The Chords and Melodies sets are particularly nice.

    Do you use Rhodes organs? I don’t, but if you do there are 12 loops to choose from. Enjoy.

    I DO however use Strings in my compositions. There are 30 Strings loops and they are not too bad. A little artificial sounding for my tastes, but can be used in tunes with no problem. I wouldn’t use them in the foreground, but for background they’ll work.

    Last up, the Synth loops. There are 127 of them in this collection. Enough variety for most tastes. Synth loops are typically used to set rhythm and moods and there are plenty here to do both.

    My opinion of this collection? I wish there had been more Guitar and Piano loops, and the Strings and Drums sounded a little artificial to me. The collection taken as a whole however is a tremendous value at $35. If you enjoy using GarageBand, don’t pass this collection up.

    MyMac.com Rating 4.5 out of 5. High on value! I’m looking forward to the next set in Tunemedia’s collection.


    Morton Subotnick’s Hearing Music — Tutorial CD
    Company: Viva Media
    Price: $30
    http://www.viva-media.com

    Software works with OS X, OS 9, OS 8, and all flavors of Windows.

    If music makes you smarter, this clever music education CD will make you brilliant. Four sets of tutorials each have four levels of ascending difficulty and fifteen exercises per level. Installation is a breeze, and within a few clicks you and/or your student musicians will be exploring your first Hearing Music category. This program is suitable for individuals or groups of all ages and varying musical abilities.

    Graphical and audio production values range respectively from good to splendid. Musical examples are high-quality, and the overall package offers fine instruction at an affordable price. Slot-loading CD drives may not release the disc without a little grab-and-tug, so be aware of this possibility, slot-loaders.

    Bold primary color cartoon images are consistent from CD packaging through animated screen images. Screenshot examples for every lesson are provided in the eight-page CD sleeve insert. Toll-free phone and email tech support are offered by Viva Media. Author Morton Subotnick gives parents and teachers a written explanation of how the musical games operate, plus a brief illustrated audio lecture on how and why we should pay attention to music in our lives.

    Begin Hearing Music by COMPARING two musical passages when clicking on adjacent balloons. A pleasant female voice quickly says “You did it!” or “Oops — not quite.” Levels one and two are not difficult, but by level three and four you may encounter a musical excerpt that is backwards or upside down from its mate. Think it’s tricky to identify? “That’s correct,” as our guide would say.

    Next comes MATCHING, in which you “find two musical phrases that sound the same.” Some examples are melodic and some are percussion. Here the first three levels are straightforward, and level four is hard. You or your student musician really need to concentrate as the levels progress upward.

    The READING module has users viewing printed treble and bass staff examples to decide if the music being played is one or the other. My music students will be introduced to this component as a game, and they will be challenged to succeed at it, especially when being put on the spot during their private lessons.

    ORDERING a sequence of chunks of a song is not easy to describe, but participants will quickly figure out what is required, even if they have trouble placing each section in its correct order. This unit and the Reading lessons are for music students with more than a few lessons’ experience, but Comparing and Matching can be given to newbies. Ordering is the most difficult and sophisticated, in spite of appearing to be simple upon first glance.

    My notes scribbled during my several days evaluating Hearing Music mention “cute” and “smart” and “enjoyable.” The overall impression is of a well-designed and prepared training program using high-quality classical music snippets. Levels one and two within each tutorial are easy and fun, before the more demanding lessons of levels three and four. Users can keep score, which the software does in the background.

    On a personal note:

    I nearly fell off my piano stool when I noticed Morton Subotnick’s name on this educational CD. He was famous in the late 1960’s for “Silver Apples of the Moon,” an early eclectic electronic music LP. It was influential in my decision to study electronic and synthesizer composition at that time, which I abandoned due to inadequacy of available instruments and computers.

    How times have changed, 35 years later! Given the opportunity now, I would vigorously pursue electronic music creation. You have to work with what’s available, but I credit Morton Subotnick for opening my ears to a world of silver apples and more. You can read all about his exploits at http://www.mortonsubotnick.com.

    MyMac.com applauds Subotnick and Viva Media, rating Hearing Music at 4 out of 5. We’ll be back soon with additional reviews of music and early education CDs in the series.


    Disc Shredder DS360 – Review

    On October 5, 2004, in Uncategorized, by John Nemerovski

    Disc Shredder DS360
    Company: Primera Technology
    Price: $129.95
    http://www.primera.com

    Need a little crunchy roughage to enhance your breakfast cereal? Or some sparkling tinsel for holiday decorations?

    Could you use a nifty office accessory that guarantees a “Whazzat?” from each visitor? Or something for your kids and grandkids to play with that teaches them about product safety, media security, and environmentalism?

    Primera Technology solves all these dilemmas, plus one more, with its practical, affordable new DS360 Disc Shredder. Now you finally know how to dispose of your incomplete CD/DVD burns and your outdated data/music/video archives. Just remember to observe the icons on the shredder, warning you to keep fingers, hair, and neckties (who still wears one?) out of the input slot.

    Unpacking and setup take a couple of minutes. More time will be needed to decide where to locate this attractive, strange-looking little machine. I’m temporarily keeping it on top of my scanner/copier/printer (see photo below) which is not a practical long-term installation.

    Oops! I just read safety note #3: “Keep this device out of the reach of children.” Bad news, kiddies. But I also learned that credit cards and folded paper can be shredded, which is better news for all of us.

    DS360 comes with a one year warranty. The unit is compact, but substantial, weighing nearly 14 lbs., or over 6 kg. Design is sleek and attractive. Shredded material accumulates in the output basket, which can hold a lot of shreddings (is that a word?).

    Here’s a photo of six CDs after DS360 has digested them (each disc is consumed in ten seconds). The process is fairly loud, so you can really annoy your colleagues or family members — otherwise position DS360 in a somewhat out of the way spot.

    Primera Technology is the manufacturer of the Bravo family of CD/DVD duplicators/printers, reviewed favorably in MyMac.com and elsewhere. David Weeks and I had suggestions for improving the Bravos covered to date, and we look forward to evaluating additional products from this innovative company.

    There’s nothing to criticize on their Disc Shredder DS360, so MyMac.com is pleased to give it our highest rating, 5 out of 5, when used as directed!

    Time to invite the neighbors over for a shredding party. Let’s hope nobody mistakes some shreddings for munchies.


    Looking for something?

    Use the form below to search the site:

    Still not finding what you're looking for? Drop a comment on a post or contact us so we can take care of it!